




















JCSP42SK1SS General Electric Range - Instructions
Keep searches simple. Use keywords, e.g. "leaking", "pump", "broken" or "fit".
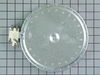
Bad Burner
I simply removed the 2 anchor screws in front of the stove and wrote down the wiring order on the instillation diagram, removed the old burner, removed the two studs, made sure they were installed on the right numbers place them in the new burner, wired the new burner, placed the springs respectively. Placed them in the correct holes in the frame to be sure that the burner was aligned properly. Put the washers on the studs and replaced the frame screws, lowered the cook top and returned the screws to lock the cook top in place.
Parts Used:
-
Roosevelt from Waggaman, LA
-
Difficulty Level:Really Easy
-
Total Repair Time:15 - 30 mins
Was this instruction helpful to you?
Thank you for voting!
rear drawer supports broke
Directtions were by diagram only, no written instructions. Drawing was small and difficult to follow but the repair itself was easy.
Parts Used:

-
TERRY from RICHMOND, VA
-
Difficulty Level:Really Easy
-
Total Repair Time:15 - 30 mins
-
Tools:Socket set
Was this instruction helpful to you?
Thank you for voting!
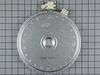
large burner on the dual element not working
The part arrived much sooner than I anticipated. The job was a little harder and took a little longer for me because I'm not good at repairing things. I usually have to call someone. However, I followed the step by step instructions that were provided both on the website and with the mailed item and had no problems. The instructions were clear and easy to follow. The tools needed were very basic - all of which I had on hand. If I could do it - anyone can.
Parts Used:
-
Alan from Medina, OH
-
Difficulty Level:A Bit Difficult
-
Total Repair Time:30 - 60 mins
-
Tools:Pliers, Screw drivers
Was this instruction helpful to you?
Thank you for voting!
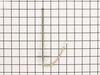
oven temp. was not what setting called for
turned oven off, pulled oven out from wall, removed back of oven, unscrewed sensor from oven replaced with new sensor, put back on, turned power to oven on, tried oven at 425, my temp. gage and the oven temp matched. a very easy fix.
Parts Used:
-
John from Acme, WA
-
Difficulty Level:Easy
-
Total Repair Time:1- 2 hours
-
Tools:Nutdriver
Was this instruction helpful to you?
Thank you for voting!
Twisting of stuck cook-top killed the event
The age of the system resulted in the cook top being heavily stuck by food-stuff to the range surface. The result was a twisting of the top when breaking it free. It caused the cooktop (a $500+ part) to crack diagonally across the whole surface. Thus ended the quick do-it-yourself process, and out to buy a new range. Parts-select was very good about the return process of the un-used and un-opened burner element.
Parts Used:
-
James from Kingsville, MD
-
Difficulty Level:Difficult
-
Total Repair Time:30 - 60 mins
-
Tools:Screw drivers
Was this instruction helpful to you?
Thank you for voting!
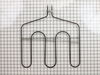
Broil element on top oven was not working
Shut the power off at the electric box.Disconnected coil from roof clips.Pulled wire connection from back wall. Disconnected wire clips, connected new unit.Clipped to roof and turned on" Working fine".
Parts Used:
-
andrew from pittstown, NJ
-
Difficulty Level:Easy
-
Total Repair Time:30 - 60 mins
-
Tools:Socket set
Was this instruction helpful to you?
Thank you for voting!
Broiler Element burnt out
The actual repair was relatively easy but access to the area in the oven made it a little difficult. Just unscrew 5 screws with a nut driver, unplug the old element, plug in the new element and reinstall the 5 screws. The only thing that made this repair difficult was being able to reach the connectors where you plug in the new element. They are loose wire connectors that don't reach very far out of the element receptacle. It was difficult to hold the end of the connector and plug in the new element because the oven door is in your way. Maybe it is easier if you take the oven door off first?
Parts Used:
-
Cherri from Katy, TX
-
Difficulty Level:A Bit Difficult
-
Total Repair Time:30 - 60 mins
-
Tools:Nutdriver
Was this instruction helpful to you?
Thank you for voting!
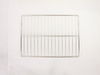
Old dishwasher rack and silverware rack
The whole process was very easy! I just got the model number and bought a new rack and silverware holder on,one. There was no assembly needed so I just popped them in and replaced the old ones! Very easy to do!
Parts Used:
-
Anne Marie from Andover, MA
-
Difficulty Level:Really Easy
-
Total Repair Time:Less than 15 mins
Was this instruction helpful to you?
Thank you for voting!
Range lower drawer would not stay on track.
-
Richard from Newark, DE
-
Difficulty Level:Really Easy
-
Total Repair Time:Less than 15 mins
-
Tools:Nutdriver
Was this instruction helpful to you?
Thank you for voting!
Broken drawer support
Followed the example picture on the part bag. Anyone could do this, incredibly easy. Took about 4 minutes to install both sides.
Parts Used:
-
Mario from Deer Park, WA
-
Difficulty Level:Really Easy
-
Total Repair Time:Less than 15 mins
-
Tools:Nutdriver
Was this instruction helpful to you?
Thank you for voting!
Oven temperature was low when reading was correct
First of all, the sensor had the proper ohm reading...at ambient temperatures. I suspected the sensor because it would jump in large degree increments over 200°F. From what I read online, the only other part that would cause this was a faulty circuit board. I opted to try the $20 part first vs. the $200 part. It worked. One screw on the back top of the inside is all that holds the sensor in. Pull the wires out and you will find a quick-disconnect. New part had the same connector (thank you). Thread the wires back through the hole and replace the screw. Works like a champion (verified with an independent thermometer. That is all she wrote. I only wish I purchased two, since they don't last that long... 4 years...or so. I just bought the house built in 2007 and empty for a year... and it took 45 minutes to cook a pizza, and even then the bottom dough was light. A house without an oven is like a hot dog without mustard!
Parts Used:
-
Orion from Vancouver, WA
-
Difficulty Level:Really Easy
-
Total Repair Time:Less than 15 mins
-
Tools:Nutdriver
Was this instruction helpful to you?
Thank you for voting!
8 inch burner was burnt out
replacement was easy. pulled away the stove from wall. unplug the stove. open oven door. remove the two hex head screws holdings stove top. raise the stove top in the front. supported stove top with a 16 inch piece of wood. place New Burner under old burner. remove old burner remove wires remove old burner and place it on top of new burner connected the wires from burner to new burner. install new burner. remove support lowered top down. plugged in stove tested. .burner. burner w.ork fine. reinstall hex head screws back top. pushback stove back into the wall. testes over again. all the stove work done.
Parts Used:
-
Luis from Kissimmee, FL
-
Difficulty Level:Really Easy
-
Total Repair Time:Less than 15 mins
-
Tools:Nutdriver, Screw drivers
Was this instruction helpful to you?
Thank you for voting!
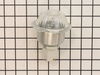
Oven lights were burning out regularly
Replaced the Oven light housing. Unscrewed the two screws that hold the housing in place. Pulled out the housing and disconnected the wire tabs from the light housing tabs. Slid the wire tabs onto the tabs of the new light housing fixture. (Each tab is fitted to the tab in goes on so they can not be mixed up) Pushed the housing fixture back into place and screwed the housing into place.
Parts Used:
-
Douglas from Thornton, CO
-
Difficulty Level:Really Easy
-
Total Repair Time:15 - 30 mins
-
Tools:Socket set
Was this instruction helpful to you?
Thank you for voting!
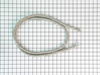
gasket replacement
Took about 15 minutes to take the old one off and put the new one on. Not difficult at all.
Parts Used:
-
Marilyn from Auburn, WA
-
Difficulty Level:Easy
-
Total Repair Time:15 - 30 mins
-
Tools:Screw drivers
Was this instruction helpful to you?
Thank you for voting!
Broiler Element Repair
I was attempting to replace the broiler element on the oven, but I discovered that the wiring may be the actual problem. I suggest before you order parts for a broiler repair, that you test the wires to ensure that you have continuity. I will have to trace the wires back to the source (the other element works fine) and see if I can find the problem with the current. I will keep the broiler element I ordered until I can confirm that the old element works.
Parts Used:
-
Robert from SANTA MARIA, CA
-
Difficulty Level:Easy
-
Total Repair Time:15 - 30 mins
-
Tools:Nutdriver
Was this instruction helpful to you?
Thank you for voting!