




















JCSP42SK1SS General Electric Range - Instructions
Keep searches simple. Use keywords, e.g. "leaking", "pump", "broken" or "fit".
Burner no longer heats
Remove two screws with nut driver that holds range top down. Turn off breaker or unplug before lifting top. Brace top with 2x4. Take picture with cell phone just in case. Orient replacement part with old burner. Remove one wire at a time and install on new burner in corresponding correcting terminal. be sure they are snug. Drop top install nuts . Test! Done! I am not an electrician!!!!!!!! Please do not publish !!!!
Parts Used:

-
Anthony from Apopka, FL
-
Difficulty Level:Very Easy
-
Total Repair Time:Less than 15 mins
-
Tools:Nutdriver, Screw drivers
1 person
found this instruction helpful.
Was this instruction helpful to you?
Thank you for voting!
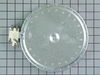
Burner didn't go on
Turned off juice
Pulled stove from wall
Unscrewed 2 screws to loosen range top
Lifted n propped top
Unplugged 4 wires
Unscrewed burner assembly
Installed burner-reversed steps to reassemble
Pulled stove from wall
Unscrewed 2 screws to loosen range top
Lifted n propped top
Unplugged 4 wires
Unscrewed burner assembly
Installed burner-reversed steps to reassemble
Parts Used:
-
Mike from Hatfield, PA
-
Difficulty Level:Really Easy
-
Total Repair Time:Less than 15 mins
-
Tools:Nutdriver, Screw drivers
1 person
found this instruction helpful.
Was this instruction helpful to you?
Thank you for voting!
oven would not turn on
Just remove the front control panel, remove old part, plug in new part.
I must say, I had a choice of two parts. One part cost 120.00 the other 56.00. I figured I would cut to the chase and order the expensive part cuz Murphy's law would say it was the part needed. I was wrong. I ordered the cheep part and BINGO!
We have our stove back. PS in Canada this fix would had cost me 750.00. At any rate we saved big!! Thanks PartSelect! Bev and Bob
I must say, I had a choice of two parts. One part cost 120.00 the other 56.00. I figured I would cut to the chase and order the expensive part cuz Murphy's law would say it was the part needed. I was wrong. I ordered the cheep part and BINGO!
We have our stove back. PS in Canada this fix would had cost me 750.00. At any rate we saved big!! Thanks PartSelect! Bev and Bob
Parts Used:

-
Crissy from Sumas, WA
-
Difficulty Level:A Bit Difficult
-
Total Repair Time:Less than 15 mins
-
Tools:Nutdriver
1 person
found this instruction helpful.
Was this instruction helpful to you?
Thank you for voting!
The storage drawer came without supports.
I just removed the drawer and installed the rear supports as instructed on paper included with the part.
Parts Used:

-
Dock from Aurora, CO
-
Difficulty Level:Really Easy
-
Total Repair Time:Less than 15 mins
-
Tools:Nutdriver
2 of 4 people
found this instruction helpful.
Was this instruction helpful to you?
Thank you for voting!
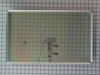
Replaced cracked inner oven door glass
This went pretty smoothly. Watch the video and just follow along step-by-step and it goes well. It would have only taken about 30-45 minutes (even being careful and slow) but I ended up placing the glass twice (be very careful and triple check that all the insulation gets poked under the housing and none is sticking out). The first time I had a small piece sticking out. (Use gloves for this part so your hands don't itch). The second time I needed to redo part of it is I forgot one of the spacers on the door handle and had to get that in there so the handle worked properly. I also took the time to clean the oven while the door was off so that took some time. Total I probably had 1.5-2 hours into this project but at least half of that was me cleaning and being fussy. This is an easy repair. I'm not a confident repair person and this wasn't difficult. It was a little time consuming but well worth the cost vs calling a repair person or buying a new appliance. You do need to have a specialty star head on a screwdriver but my simple tool kit had all the tools I needed. The oven has been working great since the repair.
Parts Used:
-
Sherry from SAINT PAUL, MN
-
Difficulty Level:Easy
-
Total Repair Time:1- 2 hours
-
Tools:Screw drivers
1 person
found this instruction helpful.
Was this instruction helpful to you?
Thank you for voting!
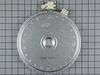
only the inner/smaller part of the dual burner is working
I ordered a new burner assuming As is turns out: nothing wrong with the burner.
Parts Used:
-
Albert from South Boston, VA
-
Difficulty Level:Really Easy
-
Total Repair Time:Less than 15 mins
2 of 5 people
found this instruction helpful.
Was this instruction helpful to you?
Thank you for voting!
small (inner) burner was not 'burning'
turn off the power at the breaker first
remove the 2 screws under the 'lip' of the stove top (open the oven door to get to them)
prop up the stove top on the cardboard box the part came in
pull off the wires one by one and attach to the new burner OR record where each wire goes first
remove the old burner (2 screws) and attach the new burner
screw down the stove top
try the burner - when it does not work flip the power breaker back on and then try again
bask in the joy, admiration and wonder directed your way by various family members
remove the 2 screws under the 'lip' of the stove top (open the oven door to get to them)
prop up the stove top on the cardboard box the part came in
pull off the wires one by one and attach to the new burner OR record where each wire goes first
remove the old burner (2 screws) and attach the new burner
screw down the stove top
try the burner - when it does not work flip the power breaker back on and then try again
bask in the joy, admiration and wonder directed your way by various family members
Parts Used:
-
Jerry from Tierra Verde, FL
-
Difficulty Level:Easy
-
Total Repair Time:Less than 15 mins
-
Tools:Pliers, Screw drivers
1 of 2 people
found this instruction helpful.
Was this instruction helpful to you?
Thank you for voting!
Change bulb
-
Louis from LEAGUE CITY, TX
-
Difficulty Level:Really Easy
-
Total Repair Time:30 - 60 mins
-
Tools:Nutdriver
3 of 8 people
found this instruction helpful.
Was this instruction helpful to you?
Thank you for voting!
Oven will not heat
As many people have encountered, my oven would not heat but the igniter would be bright orange and glow! Over time, the igniter wears and degrades causing oxidation to the surface. This cause the igniter to fail and operate at a lower current level, below 2.8 amps! Normal igniters operator over 3.0 to 3.1 amps. When is happens, a low current igniter does not have enough input to the control valve to tell the valve to open to allow gas to flow over the igniter to light the oven, thus heat the oven! This has got to be the NUMBER one reason for an oven not heating!
Parts Used:
-
Joseph from Homosassa, FL
-
Difficulty Level:Easy
-
Total Repair Time:15 - 30 mins
-
Tools:Pliers, Screw drivers
1 of 3 people
found this instruction helpful.
Was this instruction helpful to you?
Thank you for voting!
cooktop inner ring did not work
Dear PartSelect:
I am very impressed by your service and company. My order arrived in less than 24 hours. It was a perfect match and is currently in service. I am very satisfied with the entire experience and will use your company again.
I simply opened up the cooktop with a screwdriver and disconnected the wires to the affected burner. After the part arrived, I reconnected them. I had to swap over two brackets from the old burner, so don't throw it away until the new one arrives. It went back together very easily and worked immediately.
Matt Brennan
I am very impressed by your service and company. My order arrived in less than 24 hours. It was a perfect match and is currently in service. I am very satisfied with the entire experience and will use your company again.
I simply opened up the cooktop with a screwdriver and disconnected the wires to the affected burner. After the part arrived, I reconnected them. I had to swap over two brackets from the old burner, so don't throw it away until the new one arrives. It went back together very easily and worked immediately.
Matt Brennan
Parts Used:
-
Matthew from Lexington Park, MD
-
Difficulty Level:Really Easy
-
Total Repair Time:15 - 30 mins
-
Tools:Screw drivers
1 of 3 people
found this instruction helpful.
Was this instruction helpful to you?
Thank you for voting!
Light burnt out.
Turned the wire protector to the side. Turned out the old bulb and replaced it with the new. Turned the wire protector back in place and I'm like new.
Parts Used:
-
Roscoe G from ROCHESTER, NY
-
Difficulty Level:Very Easy
-
Total Repair Time:Less than 15 mins
2 of 6 people
found this instruction helpful.
Was this instruction helpful to you?
Thank you for voting!
Two stage burner was not working on the outer part of burner.
Locate breaker box and turn off breaker to stove. Removed the two screw in front that hold the top in place. Raised the top and supported it with the box the new burner came in. Removed two screws that held the burner in place and the 5 wires one at a time an installed them on the new burner. Put new burner in place and installed two mounting screws. Reinstalled the two screws in the front to hold the top in place then turned the breaker back on and tested burner. Worked great. Received part in 2 days.
Parts Used:
-
Gregory from Pleasant Valley, MO
-
Difficulty Level:Really Easy
-
Total Repair Time:15 - 30 mins
-
Tools:Nutdriver, Pliers, Screw drivers
0 of 1 people
found this instruction helpful.
Was this instruction helpful to you?
Thank you for voting!
A large burner (haliant Burner 8" ) went out on my Hotpoint Electric Range
I ordered the part on a Monday and Tuesday afternoon I received it! I went a route I often take first. I read the instructions of others before starting my job and opened the top of the range. There are two screws under the range top in front near the oven door, one on either side, that must be removed. After this I opened the top of the range and positioned a piece of 2X2 about 20 inches long at an angle to hold the top up while I worked on the burner. I then used my phone to take a close up picture of the old burner while in place in my range so I could refer to it when putting the new one in place. I then took a pair of needle nose pliers and pulled off the wiring, then removed lock washers under the burner and removed the old burner, being careful not to lose the washers and springs. I took the new burner and layed it along side the old one to see exactly how it would be placed under the glass cover. I replace the springs and lock washers then referred to my photo and replace all the wires to the burner as they had been. Then lowered the top in place and put the screws back in place. That was it. I'm a 67 year old female, if I can do this, anyone can!
Parts Used:
-
Ruth from Potosi, MO
-
Difficulty Level:Easy
-
Total Repair Time:15 - 30 mins
-
Tools:Screw drivers, Wrench set
Was this instruction helpful to you?
Thank you for voting!
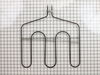
Broiler heating element was not working
Turned off the circuit breaker. Removed 5 screws. Unplugged the heating element and then plugged in the new one and replaced the 5 screws. Very simple.
Parts Used:
-
Jim from Hyrum, UT
-
Difficulty Level:Really Easy
-
Total Repair Time:15 - 30 mins
-
Tools:Socket set
Was this instruction helpful to you?
Thank you for voting!
Small burner not working, outside was fine
Followed directions that I found on the internet and it was easy to remove the old burner and replace it with the one I ordered from you. There was no problems at all.
Parts Used:
-
Lynda from Burdock, SD
-
Difficulty Level:Really Easy
-
Total Repair Time:15 - 30 mins
-
Tools:Screw drivers
Was this instruction helpful to you?
Thank you for voting!