




















JCBP24WK3WW General Electric Range - Instructions
Keep searches simple. Use keywords, e.g. "leaking", "pump", "broken" or "fit".
Incorrect oven temperature due to defective temperature sensor.

-
Anthony from FARMINGVILLE, NY
-
Difficulty Level:Really Easy
-
Total Repair Time:Less than 15 mins
-
Tools:Nutdriver
3 of 3 people
found this instruction helpful.
Was this instruction helpful to you?
Thank you for voting!
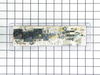
When you touched any button on the controls LOC on appeared.
Talked to parts select tech after ordering the control board. Tech advised me that he felt the range could be repaired without installing any parts. Advised me to contact manufacture tech support and explain the problem. I did to find that the child safety lock was on, probably from cleaning and touching too many buttons at once while whipping surface. Told me to hold down + and - at the same time for three seconds and it was fixed.
Parts select tech had told me don’t worry the parts are guaranteed so I called for a RMA and returned the parts for a refund. Thanks Parts Select, y’all are real professionals and that is greatly appreciated.
Thank you all.
Parts select tech had told me don’t worry the parts are guaranteed so I called for a RMA and returned the parts for a refund. Thanks Parts Select, y’all are real professionals and that is greatly appreciated.
Thank you all.
Parts Used:
-
Roger from HUNTSVILLE, AL
-
Difficulty Level:Very Easy
-
Total Repair Time:Less than 15 mins
3 of 3 people
found this instruction helpful.
Was this instruction helpful to you?
Thank you for voting!
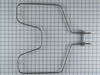
The bottom element would not come on
Took out the 2 screws,Pulled out the stove
Took the back off ,took the wires out of the little place where they fit in,Removed the old element.
Put the new one in Fitted the little thing which looked like a alumium flat piece back where we took the old one out.Put the back back on cut it on wheepe In business.Also the new element came here faster than I thought it would .I,m a 71 yearold grandmother.Pretty simple.
Took the back off ,took the wires out of the little place where they fit in,Removed the old element.
Put the new one in Fitted the little thing which looked like a alumium flat piece back where we took the old one out.Put the back back on cut it on wheepe In business.Also the new element came here faster than I thought it would .I,m a 71 yearold grandmother.Pretty simple.
Parts Used:
-
Mayree from Rocky Mount, VA
-
Difficulty Level:Really Easy
-
Total Repair Time:Less than 15 mins
-
Tools:Socket set
3 of 3 people
found this instruction helpful.
Was this instruction helpful to you?
Thank you for voting!
Noticed that the lower heating element was flashing and popping. What looked like a welders arc went completely around the whole element and turned it to dust.
First I removed the two screws that hold the element in place. I then went to pull the element out and one of the wires touched the side of the access hole. There was a spark and the electrical breaker tripped. (Remember to always shut the electricity off first). Before I put the new element in I took off the access panel on the back of the range, slid in the new element, attached the two screwd that hold the element in place. Then I went around to the back of the range and re-connected the wires from that location to make sure there was nothing around the wires that would spark. Put the access plate back on and I was done.
Parts Used:
-
STEVEN from FORT WAYNE, IN
-
Difficulty Level:Easy
-
Total Repair Time:Less than 15 mins
-
Tools:Nutdriver
3 of 3 people
found this instruction helpful.
Was this instruction helpful to you?
Thank you for voting!
Oven would not heat.
My stove would not heat. I could see that the bake element had a hole burned through it. Found this website. I was confused about what part I needed so I called the phone number and the girl was very good at locating exactly which element my stove needed after I gave her the stove make and model #. I ordered the part on Thursday afternoon. The part arrived on Saturday afternoon.
The hardest part of fixing it was finding the correct screw driver socket thingy (I'm not a technical person) to get the screws off with. Thankfully my neighbor had what I needed. I pulled my stove out from the wall (primarily because I needed to clean under there) and unplugged it. Unscrewed the screws, pulled the old element out until I could see the wire connections. I used clothes pins to hold the wires from going back into the stove once I unhooked them from the element (another tip I learned on this website) and simple slipped the wire connectors onto the new element, pushed it back into place, put the screws back on, plugged it in and TA DA... was baking a pizza in no time.
Very very VERY easy repair!!!
The hardest part of fixing it was finding the correct screw driver socket thingy (I'm not a technical person) to get the screws off with. Thankfully my neighbor had what I needed. I pulled my stove out from the wall (primarily because I needed to clean under there) and unplugged it. Unscrewed the screws, pulled the old element out until I could see the wire connections. I used clothes pins to hold the wires from going back into the stove once I unhooked them from the element (another tip I learned on this website) and simple slipped the wire connectors onto the new element, pushed it back into place, put the screws back on, plugged it in and TA DA... was baking a pizza in no time.
Very very VERY easy repair!!!
Parts Used:
-
Linda from Ravenel, SC
-
Difficulty Level:Really Easy
-
Total Repair Time:Less than 15 mins
-
Tools:Screw drivers
3 of 3 people
found this instruction helpful.
Was this instruction helpful to you?
Thank you for voting!
Grease spilled on old gasket----gasket hardened
Simply pulled old gasket from door and pushed new gasket clips into existing holes and tucked in ends at bottom of door.
Parts Used:
-
Delores from Rocksprings, TX
-
Difficulty Level:Really Easy
-
Total Repair Time:Less than 15 mins
5 of 9 people
found this instruction helpful.
Was this instruction helpful to you?
Thank you for voting!
the bake element was burned, it had a hole in it.
First , I have been working on electrical equipment for many years....and I forgot to un plug the unit from the wall. I assumed that if the oven was turned off I could remove the element, WRONG. One of the leads from the cord is wired directly to one lead of the element. When I tried to remove the element it shorted out against the wall of the oven. Then I turned the breaker off, unplugged the stove and finished the repair in about 10 minutes. Always unplug it first!.
Parts Used:
-
Everett from Peachtree City, GA
-
Difficulty Level:Easy
-
Total Repair Time:Less than 15 mins
-
Tools:Nutdriver
3 of 4 people
found this instruction helpful.
Was this instruction helpful to you?
Thank you for voting!
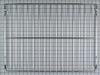
Burner food on racks
Nothing really rocket science here. The oven racks had burned on food, and I just replaced the racks..... slide out the old and slide in the new. Done !
Parts Used:
-
John from Metairie, LA
-
Difficulty Level:Really Easy
-
Total Repair Time:Less than 15 mins
3 of 4 people
found this instruction helpful.
Was this instruction helpful to you?
Thank you for voting!
Bootom heat element burned out
First I pull the stove out and unplug it. Than I removed the back cover by using an adjustable wrench. I unplug the element two wires. Then I opened up the oven on the stove and removed the racks and using the adjustable wrench remove the two bolts that mounted the heating elements. Replace with new element secured with bolts and connect the two wires to the heating element and put back on the back plate and plug the unit back into the wall.
Parts Used:
-
Lloyd from Fishers, IN
-
Difficulty Level:Really Easy
-
Total Repair Time:Less than 15 mins
-
Tools:Wrench (Adjustable)
3 of 4 people
found this instruction helpful.
Was this instruction helpful to you?
Thank you for voting!
Element burnt into pieces
Received part very quickly, easy to install, just give yourself enough wire on terminals when you pull them out, I let mine slip into holes they come out of and had to fish it out. EASY job.
Parts Used:
-
Keith from glasgow, KY
-
Difficulty Level:Really Easy
-
Total Repair Time:Less than 15 mins
-
Tools:Screw drivers
3 of 4 people
found this instruction helpful.
Was this instruction helpful to you?
Thank you for voting!
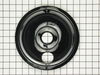
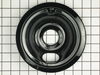
old drip pans rusted
I unplugged the burner, lifted the old drip pan out, put new drip pan in, plugged burner in. The stove looks brand new and it took less than 2 minutes.
Parts Used:
-
noreen from torrington, CT
-
Difficulty Level:Really Easy
-
Total Repair Time:Less than 15 mins
3 of 4 people
found this instruction helpful.
Was this instruction helpful to you?
Thank you for voting!
Did not have a problem, just need an extra oven rack.
Placing the order was very easy. Shipping was fast and excellent packaging. Thank you very much!
Parts Used:
-
Catherine from Bethel, CT
-
Difficulty Level:Really Easy
-
Total Repair Time:Less than 15 mins
3 of 4 people
found this instruction helpful.
Was this instruction helpful to you?
Thank you for voting!
aged burner bowls
I just removed the range elements and old bowls, placed the new bowls into the range top, and inserted the heating elements. What surprised me was the quickness in filling the order. I had the new parts the next day! Great!
Parts Used:
-
Louis from Sandwich, MA
-
Difficulty Level:Really Easy
-
Total Repair Time:Less than 15 mins
3 of 4 people
found this instruction helpful.
Was this instruction helpful to you?
Thank you for voting!
drwer slide under stove broke off.
recieved part the next day. looked different but I followed instructions and the part worked perfect.
Parts Used:

-
paul from sewell, NJ
-
Difficulty Level:Really Easy
-
Total Repair Time:Less than 15 mins
-
Tools:Screw drivers
3 of 4 people
found this instruction helpful.
Was this instruction helpful to you?
Thank you for voting!
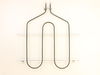
Broiler element was bad
1st and formost, unplug the range from the outlet or shut th breaker off (Ranges are on a seperate breaker). Detach 2 wires on the back of the range connected to the element. Remove three nut screws inside the oven holding the old element in place . 1 on the top and 2 at the back of the oven. Now just reverse this procedure to install the new element and your all done.
Parts Used:
-
David from LENOIR CITY, TN
-
Difficulty Level:Easy
-
Total Repair Time:15 - 30 mins
-
Tools:Nutdriver
3 of 4 people
found this instruction helpful.
Was this instruction helpful to you?
Thank you for voting!