




















HTDP120ED2WW General Electric Dryer - Instructions
Keep searches simple. Use keywords, e.g. "leaking", "pump", "broken" or "fit".
Loud noise
-
Mary from Enterprise, AL
-
Difficulty Level:Easy
-
Total Repair Time:15 - 30 mins
-
Tools:Screw drivers
3 of 5 people
found this instruction helpful.
Was this instruction helpful to you?
Thank you for voting!
Broken door handle
-
Bud from RCH CUCAMONGA, CA
-
Difficulty Level:Very Easy
-
Total Repair Time:Less than 15 mins
2 of 2 people
found this instruction helpful.
Was this instruction helpful to you?
Thank you for voting!
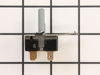
DRYER WOULD STAY ON UNLESS THE TIMER SWITCH WAS IN THE OFF POSITION
UNPLUGGED THE DRYER AND PULLED THE DIAL FROM THE START SWITCH. REMOVED THE FOUR SCREWS FROM THE TOP OF THE CONTROL PANEL WITH A T20 STAR SCREWDRIVER. PULLED THE CONTROL PANEL COVER FORWARD. LABELED THE THREE WIRES GOING TO THE START SWITCH WITH THE NUMBERS ON THE OLD SWITCH. PULLED THE WIRES OFF THE OLD SWITCH. LIFTED THE RETAINING CLIP ON THE OLD SWITCH AND ROTATED THE SWITCH ABOUT 90 DEGREES. PULLED THE OLD SWITCH OUT AND INSTALLED THE NEW SWITCH, ROTATING IT UNTIL THE RETAINING CLIP SNAPPED INTO PLACE. CONNECTED THE WIRES TO THE CORRECT NUMBERED TERMINALS ON THE NEW SWITCH. PUT THE CONTROL PANEL COVER BACK IN PLACE AND REATTACHED IT WITH THE SCREWS, REPLACED THE DIAL AND PLUGGED IN THE DRYER.
Parts Used:
-
JACK A from HIALEAH, FL
-
Difficulty Level:Very Easy
-
Total Repair Time:Less than 15 mins
2 of 2 people
found this instruction helpful.
Was this instruction helpful to you?
Thank you for voting!
Dryer wouldn't start
Unplugged the dryer. Removed the 4 star headed screws with a screwdriver. Tilted the console forward and lifted. I didn't have to slide mine to the right. Pulled the knob straight off the front of the console. Lifted the lock tab with the needle nose pliers and twisted the switch to the right. It popped right out. Pulled the wires off with the pliers. Be aware, there are three wires, two red and one black. The both red wires only connect to one terminal on the switch. It looked at first glance as if I had the wrong part. But those two wires are connected to each other so it was correct. Plugged those wires back on. Put the switch into the hole and twisted it back into place, the lock clicked in to place. Replaced the console and plugged it back in and it worked perfectly. Turned right on. This took me under 15 minutes to do. Steve is the man! This girl has been able to use his videos to repair the dryer 3 times, the washer once, and my dishwasher 3 times over the years!!
Parts Used:
-
CHERI from CREEKSIDE, PA
-
Difficulty Level:Really Easy
-
Total Repair Time:Less than 15 mins
-
Tools:Pliers, Screw drivers
2 of 2 people
found this instruction helpful.
Was this instruction helpful to you?
Thank you for voting!
Old dryer filter was cracked and bulb burnt out
Easy peasey! Just Removed/Replace screw-in type bulb.
Parts Used:
-
Michael from MEMPHIS, TN
-
Difficulty Level:Very Easy
-
Total Repair Time:Less than 15 mins
2 of 2 people
found this instruction helpful.
Was this instruction helpful to you?
Thank you for voting!
Plastic Door Handle Cracked
Old handle popped out by pulling back and out. Inserted new handle by pushing in and forward. Easy!
Parts Used:
-
richard from pleasant grove, AL
-
Difficulty Level:Really Easy
-
Total Repair Time:Less than 15 mins
-
Tools:Screw drivers
2 of 2 people
found this instruction helpful.
Was this instruction helpful to you?
Thank you for voting!
Dryer timer had gone out, and would not start.
I remove the know, slid the old timer out, leaving the wires connected. Placed the new timer into position and secured it, then unplugged wiring one at a time, placing them onto the new timer. All went great.
Parts Used:
-
JESSIE from NATCHEZ, MS
-
Difficulty Level:Very Easy
-
Total Repair Time:Less than 15 mins
-
Tools:Socket set
2 of 2 people
found this instruction helpful.
Was this instruction helpful to you?
Thank you for voting!
the dial was hard to turn and the timer quit working
YouTube showed me just what to do. I unplugged the dryer and took the back off. Then I took a picture of the timer with my phone since there were about 6 different colored wires that had to be unhooked and put back in the right place. It was not difficult. Last I turned the timer in the bracket so it was secure. I also had to order a new dial since the old one was split from years of use. A repairman would have charged for the call out plus the parts so I saved money by doing it myself. P.S. I'm a 71 year old woman.
Parts Used:
-
Kathleen from HASTINGS, NE
-
Difficulty Level:Really Easy
-
Total Repair Time:15 - 30 mins
-
Tools:Pliers, Screw drivers
2 of 2 people
found this instruction helpful.
Was this instruction helpful to you?
Thank you for voting!
start switch was defective
First thing I did was find out the model and serial #'s of the dryer. I went to a major store to see if they had the part, found out that it had to be ordered and mailed to me. I decided to do it myself, I found your website and I ordered the part. I saved $10.00 by doing this. The part was very easy to remove and install. I just had to remove a small clamp that held the part on to the machine and make sure the 3 wires were secured after I installed the new part. Thank you!
Parts Used:
-
Emerenciana from Lakeworth, FL
-
Difficulty Level:Really Easy
-
Total Repair Time:Less than 15 mins
4 of 8 people
found this instruction helpful.
Was this instruction helpful to you?
Thank you for voting!
Rythmical Squeaking
The instructions that came with the bearing were limited and the illustrations were too dark to see. However, after reading the reports of others on this website, the repair was very easy.
Prior to disassembly, remove theaccess panel on the rear of the dryer. Pull the belt drive pulley arm up and the belt will easily slide off of the motor pulley. The belt can be left on the drum.
Then, remove two screws at the inside top of the dryer door. The top of the dryer will then lift up at the front and slide forward to remove. This will allow you access to two bolt head screws on each side of the front panel. Remove these two screws and then lift the panel slightly up and forward. The front panel will then be free and the dryer drum will slide forward and out. Remove the four bolt head screws (behind the electric elements) from the heater element on the inside back of the dryer box.
You can now exchange the bearing on the drum and the bearing insert on the dryer heating element simply by removing the old and reinstalling the new just as the old was removed - four screws for each.
You will need an assistant to re-install the bearing. Someone needs to hold the three pieces behind the drum as you insert the three screws. You'll also need a star wrench set for this.
The drum is easily reinserted - just be careful to get the front of the drum placed into the front bearing surface when reinstalling the front panel. One word of caution, My wife tried to remove the felt bearing on the bottom of the front panel thinking that it was lint.
I found that the inside of my ten year old dryer was unbelievably full of lint. I'm sure that the efficiency improvements by cleaning the air passages will be substantial and I've just saved $400 on the price of a similar dryer ($900 if my wife and I decided to upgrade to the "new" model that we wanted but really didn't need.
Prior to disassembly, remove theaccess panel on the rear of the dryer. Pull the belt drive pulley arm up and the belt will easily slide off of the motor pulley. The belt can be left on the drum.
Then, remove two screws at the inside top of the dryer door. The top of the dryer will then lift up at the front and slide forward to remove. This will allow you access to two bolt head screws on each side of the front panel. Remove these two screws and then lift the panel slightly up and forward. The front panel will then be free and the dryer drum will slide forward and out. Remove the four bolt head screws (behind the electric elements) from the heater element on the inside back of the dryer box.
You can now exchange the bearing on the drum and the bearing insert on the dryer heating element simply by removing the old and reinstalling the new just as the old was removed - four screws for each.
You will need an assistant to re-install the bearing. Someone needs to hold the three pieces behind the drum as you insert the three screws. You'll also need a star wrench set for this.
The drum is easily reinserted - just be careful to get the front of the drum placed into the front bearing surface when reinstalling the front panel. One word of caution, My wife tried to remove the felt bearing on the bottom of the front panel thinking that it was lint.
I found that the inside of my ten year old dryer was unbelievably full of lint. I'm sure that the efficiency improvements by cleaning the air passages will be substantial and I've just saved $400 on the price of a similar dryer ($900 if my wife and I decided to upgrade to the "new" model that we wanted but really didn't need.
Parts Used:
-
Michael from Edmond, OK
-
Difficulty Level:Easy
-
Total Repair Time:1- 2 hours
-
Tools:Screw drivers, Socket set
2 of 2 people
found this instruction helpful.
Was this instruction helpful to you?
Thank you for voting!
Dryer did not turn off when the door was opened and then closed.
Followed your video instructions and it worked exactly as described. You will be my source for all appliance repair parts.
Parts Used:
-
Robert from SOMERSET, NJ
-
Difficulty Level:Very Easy
-
Total Repair Time:Less than 15 mins
-
Tools:Pliers, Screw drivers
2 of 2 people
found this instruction helpful.
Was this instruction helpful to you?
Thank you for voting!
Bottom part of handle was loose
Opened up the package and took off existing door handle. The new one snapped right into place. This took all of 10 seconds!
Parts Used:
-
Rick from Nora Springs, IA
-
Difficulty Level:Really Easy
-
Total Repair Time:Less than 15 mins
2 of 2 people
found this instruction helpful.
Was this instruction helpful to you?
Thank you for voting!
Dryer leaving stains on clothes
Shortly after a piece of felt (the duct felt seal) was visible on the drum intererior, the dryer started making metal-on-metal squeaks. A few weeks later it started leaving'machine part' type brown/black marks on clothes. With the model # it was quite easy to find and order the correct part, which arrived a few days later. The accompanying video made installation quite straightforward, even for someone who's NEVER worked on a dryer before - even though the model used wasn't the same. Over half the repair time was to clean out lint and dirt from the various exposed parts. Overall, an easy and effective repair that solved the staining issue. Follow the video and you won't go wrong.
Parts Used:
-
Tahir from ARLINGTON, MA
-
Difficulty Level:Easy
-
Total Repair Time:1- 2 hours
-
Tools:Screw drivers
3 of 5 people
found this instruction helpful.
Was this instruction helpful to you?
Thank you for voting!
WAITING ON PART
Still waiting for your parts. over two weeks to get part which was a hinge for something, I don't know what, but not my dryer seal. You said you would refund shipping and wrong part and charge me for a new order. End result was I got charged extra shipping for your mistake. The part still is MIA and it has been 5 weeks since I originally ordered. Will never do business with you again.
Parts Used:
-
MARTIN from MOUNTAIN VIEW, WY
-
Difficulty Level:Very Difficult
-
Total Repair Time:More than 2 hours
2 of 2 people
found this instruction helpful.
Was this instruction helpful to you?
Thank you for voting!
Dryer was making intermittent, loud, moaning and whistling-screeching noises (temporarily relieved by squirtin lubricant through the drum holes towards the bearing).
I used a flat head, a phillips head, and two sizes of sockets with my screwdriver to complete this project. I initially undid the control panel, but I don't think I needed to. I next took out two long screws that were holding the top of the cabinet on. These screws were just inside the doorway, directly above where the door sits when closed. I took the top off and set it aside. Being careful to mark which wire went to which lead, I undid the leads to the door open/closed switch. I next found two, black, hex-end screws, one each on the upper sides, towards the front, and undid these with a socket end on the screwdriver; being careful not to drop them as they came out. I then tilted the front panel out and up and set it aside. Note that the front opening holds the drum up so it can spin. Next, I tilted the front of the drum up, and pulled it outwards, till bearing at the back pulled out of the socket, and the drum dropped down enough that I could push the belt off the back of the drum. I then pulled the drum out through the front opening. I could see that the bearing was mostly worn away and metal was rubbing on metal. On the drum, I took off the air diffuser and the drum's half of the bearing assembly, and attached the new part of the bearing assembly, where the old one was. There was a metal disk that I was careful to reinsert in its former spot. I tried to make sure that all screws were tightened with equal force. Then I removed the entire bearing housing/blower assembly by undoing the outer screws that attached it ti the back wall of the cabinet, I rotated it outward at the top , pivoting around the compression fitting (no screws) at the base. I then removed the back half of the bearing housing, and replaced it. I needed to screw in the screws from the front while holding the spring-clip-thing in place (once installed, you can stick your finger through the hole in the bearing housing and feel the clip right behind it). I took this opportunity to clean all the excess lint out of the cabinet. I then replaced everything in reverse order until I got to the drum. I put the belt loosely arounf the drum, with the grooved/ridged side facing in. Then put the bearing (with drum), back in the socket. Feeling through the hole under the front of the drum, take the belt where it hangs off the drum TO YOUR RIGHT, run it under then up around the left side of the small pulley, then pull it to the right (above the small pulley) and around the right side of the big (tensioner) pulley, and let go. Note that there is a swithch in the tensioner that won't switch on unless there is enough tension on the belt! Put the front back on, lifting up the barrel from the inside, so that the barrel opening slides around the outside of the front's assembly. Ours seemed to fit more tightly than it had previously, into the felt padding around to bottom of the front assembly, but it seems to work fine? Screw in the two black, hex-head screws from the sides into the front, and re-attach the door-switch wires. Turn it on (carefully) to make sure it runs. Then attach the top, using the two long screws up through the door opening into the top. Ours is working much better than before - hotter, faster, quieter! Should we have lubricated the bearing with lithium grease?
Parts Used:
-
BJ from WHEAT RIDGE, CO
-
Difficulty Level:A Bit Difficult
-
Total Repair Time:More than 2 hours
-
Tools:Screw drivers, Socket set
2 of 2 people
found this instruction helpful.
Was this instruction helpful to you?
Thank you for voting!