




















HTDP120ED2WW General Electric Dryer - Instructions
Keep searches simple. Use keywords, e.g. "leaking", "pump", "broken" or "fit".
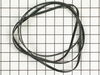
Dryer's drum doesn't run
-
ruoli from Germantown, MD
-
Difficulty Level:Really Easy
-
Total Repair Time:1- 2 hours
-
Tools:Screw drivers
3 of 3 people
found this instruction helpful.
Was this instruction helpful to you?
Thank you for voting!
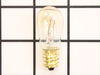
Dryer bulb burned out
Son found out where the bulb was by using YouTube. I googled lamp for model number and your website came up. I ordered the part, it arrived promptly, and my son installed it.
Parts Used:
-
Mary from NEW BRITAIN, CT
-
Difficulty Level:Very Easy
-
Total Repair Time:Less than 15 mins
3 of 3 people
found this instruction helpful.
Was this instruction helpful to you?
Thank you for voting!
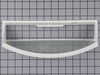
lint filter was broken
-
walter from STRATFORD, CT
-
Difficulty Level:Very Easy
-
Total Repair Time:Less than 15 mins
3 of 3 people
found this instruction helpful.
Was this instruction helpful to you?
Thank you for voting!
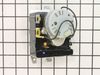
Timer internal gears had stripped and dryer would not start
-
Paul from NORTH PLATTE, NE
-
Difficulty Level:Very Easy
-
Total Repair Time:Less than 15 mins
-
Tools:Screw drivers
3 of 3 people
found this instruction helpful.
Was this instruction helpful to you?
Thank you for voting!
handle fell off
stuck it back in the holes just like the original handle. Had to do a little adjustment because I put screwdriver in them too many times to open the door after the original handle feel off, so the fit was loose. Fixed with tape.
Parts Used:
-
Lilly from CROSBY, TX
-
Difficulty Level:Very Easy
-
Total Repair Time:Less than 15 mins
3 of 3 people
found this instruction helpful.
Was this instruction helpful to you?
Thank you for voting!
The dryer drum wasn't spinning, but I could hear the motor and feel the heat from the heating element.
UNPLUG the dryer. I removed the top panel by removing the two screws at the top of the dryer door. There are some hooks toward the back of the top panel, so you'll need to slide it to the left to get it off. The front panel needs to be removed by removing two screws just inside the top left and right corners. Lift and set it aside. I didn't disconnect the door wiring, but you can if you need to do so. I just spun the front panel to the left and out of the way. With the drum exposed, I confirmed the belt was broken. I replaced the belt, then the front panel and top panel. While I was inside the dryer, I did a through cleaning with the vacuum to get all the lint.
The video on the site is easy to understand and a snap to follow.
The video on the site is easy to understand and a snap to follow.
Parts Used:
-
David from LAWRENCEVILLE, GA
-
Difficulty Level:Really Easy
-
Total Repair Time:30 - 60 mins
-
Tools:Screw drivers
3 of 3 people
found this instruction helpful.
Was this instruction helpful to you?
Thank you for voting!
remove plastic and insert
inserted the lint catcher into the opening to replace the old one
Parts Used:
-
MARY from ERIE, PA
-
Difficulty Level:Really Easy
-
Total Repair Time:Less than 15 mins
3 of 4 people
found this instruction helpful.
Was this instruction helpful to you?
Thank you for voting!
no problem
this was a part i ordered for future use. i was very happy with the ordering process and speed of delivery from PartSelect.
Parts Used:
-
john from west milford, NJ
-
Difficulty Level:Really Easy
-
Total Repair Time:Less than 15 mins
3 of 4 people
found this instruction helpful.
Was this instruction helpful to you?
Thank you for voting!
Very loud squeak with drum rotation
Key starting point is to remove top cover by removing two long screws located at the front of the cover
Remove control panel and it's bottom and side supports.
Remove short vent pipe by bending retainer tab.
Support the drum at the top using piece of rope.
Remove main rear cover (leave bottom attached).
Remove electric heating unit and install new bearing carrier from kit.
Reinstall the the heating unit
Remove three screws (inside the drum)to release the inner drum cover and release the bearing carrier.
Install new bearing carrier. Note: the three holes in the bearing carrier are not tapped, I suggest that the screws be installed (threads cut) into the bearing cover before attempting to install the bearing carrier.
Install the new bearing carrier. Note: pilot one of the holes using a small nail etc. then go on to install screws in the other two holes remove the pilot device and install the third screw.
Reassemble in reverse order.
Remove control panel and it's bottom and side supports.
Remove short vent pipe by bending retainer tab.
Support the drum at the top using piece of rope.
Remove main rear cover (leave bottom attached).
Remove electric heating unit and install new bearing carrier from kit.
Reinstall the the heating unit
Remove three screws (inside the drum)to release the inner drum cover and release the bearing carrier.
Install new bearing carrier. Note: the three holes in the bearing carrier are not tapped, I suggest that the screws be installed (threads cut) into the bearing cover before attempting to install the bearing carrier.
Install the new bearing carrier. Note: pilot one of the holes using a small nail etc. then go on to install screws in the other two holes remove the pilot device and install the third screw.
Reassemble in reverse order.
Parts Used:
-
William from San Juan, TX
-
Difficulty Level:Difficult
-
Total Repair Time:1- 2 hours
-
Tools:Nutdriver, Wrench set
2 of 2 people
found this instruction helpful.
Was this instruction helpful to you?
Thank you for voting!
Dryer belt was broken
I removed the top cover and the back cover to install new belt.
Once i put new belt i discovered that the pulley was also broken so now i have order the pulley so that i can complete the repair
Once i put new belt i discovered that the pulley was also broken so now i have order the pulley so that i can complete the repair
Parts Used:
-
Alvino from newtown, CT
-
Difficulty Level:A Bit Difficult
-
Total Repair Time:1- 2 hours
-
Tools:Screw drivers
4 of 8 people
found this instruction helpful.
Was this instruction helpful to you?
Thank you for voting!
Had to use y tube
After speaking with your representative and him explaining how to me how simple it would be to switch out this light socket myself. I went on y tube went through the instructions and had to go buy a new dryer. And before you jump to any conclusions I can and do repair and and all of things around my house. I will NEVER purchase anything from you company again ander the pretense that it is so simple. This should have been told to me that an election should have done the job!!!!!! Now not only am I out the money I paid your company but I’m out the money I shelled out for a whole new dryer. I am a very angry customer and I would never recommend you to anyone!!! EVER!!!
Parts Used:
-
MARIE from SAUGUS, MA
-
Difficulty Level:Very Difficult
-
Total Repair Time:1- 2 hours
-
Tools:Screw drivers
2 of 2 people
found this instruction helpful.
Was this instruction helpful to you?
Thank you for voting!
dryer did not latch

-
janet from martinsville, IN
-
Difficulty Level:Really Easy
-
Total Repair Time:Less than 15 mins
-
Tools:Screw drivers
3 of 5 people
found this instruction helpful.
Was this instruction helpful to you?
Thank you for voting!
Plastic handle in dryer broke off.
All I neede to do was buy the new part and snap it into place on the door. The hardest part was making the door usable while waiting for a new handle. The solution was good old duct tape. I just taped the old broken handle in place until the new one showed up.
Parts Used:
-
Steve from West Bloomfield, MI
-
Difficulty Level:Really Easy
-
Total Repair Time:Less than 15 mins
2 of 2 people
found this instruction helpful.
Was this instruction helpful to you?
Thank you for voting!
belt broke
-
joseph a from VALLEY STREAM, NY
-
Difficulty Level:Easy
-
Total Repair Time:30 - 60 mins
-
Tools:Pliers, Screw drivers
2 of 2 people
found this instruction helpful.
Was this instruction helpful to you?
Thank you for voting!
My girlfriend told me her dryer wouldn't shut off and she was concerned about a house fire.
Based on the few components in a dryer, I diagnosed the problem as a defective timer switch. Five screws remove the rear cover. The timer switch purchased was the identical part that was currently installed. In the old days, I would have drawn a picture to note the wiring connections. These days, we just take a picture on a cell phone. I removed the switch from the dryer and moved the wire connections one at a time over to the new switch. When all of the connections were in place, I installed the new switch. With cover still removed, we tested it and the dryer shut off as it should. Super easy repair. The only thing I would have done differently is I should have purchased a replacement knob and retainer - the original had cracks in the plastic that I didn't know about until re-assembly. Superglue took care of the knob, but I should have replaced it too. Disconnect the power cord first, take your time, and be careful with the sharp edges of sheet metal. I suffered an ugly cut on my finger but I'll survive. Super easy repair. She'll think you're a hero since she didn't have to call a repair man.
Parts Used:
-
Bryan from FULTONDALE, AL
-
Difficulty Level:Very Easy
-
Total Repair Time:15 - 30 mins
-
Tools:Pliers, Screw drivers
2 of 2 people
found this instruction helpful.
Was this instruction helpful to you?
Thank you for voting!