




















HTDP120ED2WW General Electric Dryer - Instructions
Keep searches simple. Use keywords, e.g. "leaking", "pump", "broken" or "fit".
The timer knob was inoperable
Very simple: I looked up the part number for my timer knob, ordered it from this site and received it one day earlier than expected. I simply attached the knob, and my problem was over. I am very, very satisfied and happy with your immediate delivery of the ordered part.
Parts Used:

-
Christel from GREENACRES, FL
-
Difficulty Level:Very Easy
-
Total Repair Time:Less than 15 mins
1 person
found this instruction helpful.
Was this instruction helpful to you?
Thank you for voting!
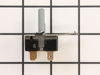
on /off switch would not work
remove 3 screws from back of top panel unplug wires from back of switch and twist out switch and replace same reassemble panel and plug it back in
Parts Used:
-
Robert from WOBURN, MA
-
Difficulty Level:Really Easy
-
Total Repair Time:Less than 15 mins
-
Tools:Screw drivers
1 person
found this instruction helpful.
Was this instruction helpful to you?
Thank you for voting!
Dryer didn't turn on
The part came today…and I installed it in 10 minutes. The only time consuming part was locating a torx screwdriver which was needed to remove the panel.
Lifted the panel, extracted the existing switch and
disconnected the wires and used a flathhead screwdriver to lift off the existing switch. Reconnected the new piece, and voila my dryer worked!
Your site is great!
Lifted the panel, extracted the existing switch and
disconnected the wires and used a flathhead screwdriver to lift off the existing switch. Reconnected the new piece, and voila my dryer worked!
Your site is great!
Parts Used:
-
Rachel from Monsey, NY
-
Difficulty Level:Really Easy
-
Total Repair Time:Less than 15 mins
-
Tools:Screw drivers
2 of 4 people
found this instruction helpful.
Was this instruction helpful to you?
Thank you for voting!
knob broke
-
Jim from CRAWFORDVILLE, FL
-
Difficulty Level:Very Easy
-
Total Repair Time:Less than 15 mins
1 person
found this instruction helpful.
Was this instruction helpful to you?
Thank you for voting!
Broken knob
-
Cheryl from LIMA, OH
-
Difficulty Level:Very Easy
-
Total Repair Time:Less than 15 mins
1 person
found this instruction helpful.
Was this instruction helpful to you?
Thank you for voting!
Timer knob fell off. Had a crack in it.
Opened the package. pushes the new knob on and voila it worked! It was very easy.
Parts Used:
-
Mary from LEONARDTOWN, MD
-
Difficulty Level:Really Easy
-
Total Repair Time:Less than 15 mins
1 person
found this instruction helpful.
Was this instruction helpful to you?
Thank you for voting!
Start Switch Replacement
It's no surprise that GE would use cheaply made parts in such a mass produced product, but it was irritating to see the start switch fail just fourteen months after purchasing the dryer. I am glad that a little thought was put into an easy snap and twist installation of the control panel switches. The original switch failed, due to arcing and pitting of the contact points no doubt, and the local parts house didn't even recognize the part, let alone have it in stock. Thanks to PartSelect.com I could have the part in just a couple of days!
The panel comes appart with just four star driver screws on top, but an allen wrench will work also. Wire jumpers with spade connectors are pulled apart and reattached with needle nose pliers.
In the mean time to keep the dryer operational, I did some creative "re-assigning" of some of the control panel jumper wires using the switch that controled the "Wrinkle Care" setting as a temporary Start Switch as it had the same current handling limits. By the way before attempting such a temporary bypass setup, consider not voiding any warrantee arrangement still applying to the product and have some basic electronics and safety knowledge, study the provided schematic well attached to the back panel and remember to write down all of the original wire connections. And when in doubt, calling a qualified GE appliance repair person is your best and safest bet.
New part went right in in about 15 minutes with original wiring restored and double-checked and the dryer is running right on que again.
Thanks PartSelect.com!
The panel comes appart with just four star driver screws on top, but an allen wrench will work also. Wire jumpers with spade connectors are pulled apart and reattached with needle nose pliers.
In the mean time to keep the dryer operational, I did some creative "re-assigning" of some of the control panel jumper wires using the switch that controled the "Wrinkle Care" setting as a temporary Start Switch as it had the same current handling limits. By the way before attempting such a temporary bypass setup, consider not voiding any warrantee arrangement still applying to the product and have some basic electronics and safety knowledge, study the provided schematic well attached to the back panel and remember to write down all of the original wire connections. And when in doubt, calling a qualified GE appliance repair person is your best and safest bet.
New part went right in in about 15 minutes with original wiring restored and double-checked and the dryer is running right on que again.
Thanks PartSelect.com!
Parts Used:
-
Michael from Tallahassee, FL
-
Difficulty Level:Easy
-
Total Repair Time:Less than 15 mins
-
Tools:Pliers
3 of 7 people
found this instruction helpful.
Was this instruction helpful to you?
Thank you for voting!
Dryer Would Start Automatic Without Using Start Switch
Remove top control panel, disconnected wire from old switch to new switch (remover 1 wire at time so it would not get mixed up)twisted old switch out inserted new switch and replaced control panel now works like it should. I thought it might would be a safety issue is why I replaced it
Parts Used:
-
MATTHEW from LIBERTY, SC
-
Difficulty Level:Really Easy
-
Total Repair Time:Less than 15 mins
-
Tools:Screw drivers
1 person
found this instruction helpful.
Was this instruction helpful to you?
Thank you for voting!
Bulb
Open dryer door, reach in at the 12 o'clock postion
on the inside is the bulb.
on the inside is the bulb.
Parts Used:

-
Mark from Monroe Township, NJ
-
Difficulty Level:Really Easy
-
Total Repair Time:Less than 15 mins
2 of 4 people
found this instruction helpful.
Was this instruction helpful to you?
Thank you for voting!
The small clip in the Timer Knob was broken and the Knob would not turn the timer.
First I took the system apart which I did not have to do. However, by doing that I was able to figure out which parts make the timer run. Anyhow, you simply place the new timer knob on the small shaft and it worked like magic. It was very easy to do.
Parts Used:
-
Michael from TAMPA, FL
-
Difficulty Level:Very Easy
-
Total Repair Time:Less than 15 mins
-
Tools:Pliers
1 person
found this instruction helpful.
Was this instruction helpful to you?
Thank you for voting!
Timer knob stop working
-
Michael from BIRMINGHAM, AL
-
Difficulty Level:Very Easy
-
Total Repair Time:Less than 15 mins
1 person
found this instruction helpful.
Was this instruction helpful to you?
Thank you for voting!
Burnt out bulb
-
Jeffry from ROCKVILLE, MD
-
Difficulty Level:Very Easy
-
Total Repair Time:Less than 15 mins
1 person
found this instruction helpful.
Was this instruction helpful to you?
Thank you for voting!
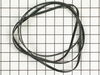
Dryer Belt Broke
After unplugging the dryer, I removed 2 metal screws up under the dryer sill rim, and removed the dryer top. Then, removed two more at the top of the front (door) section to remove it.
I wasn't careful enough when removing the door, and the wiring connectors popped loose from their connections. No harm done, though. Disconnect the wires once you remove the front panel.
I had to loosen the bottom metal screws on one side panel to have enough give to pull the dryer drum out.
The only way to replace the belt is to bend over the side of this unit and with one hand put the belt around the motor drive shaft, pull the tension pulley back, and put the belt on the wheel.
The hard part is working the drum back into place while VERY carefully slipping the belt into the drum goove. Many attempts were made only to have the belt slip off of the tension pulley or motor driveshaft. Be care full to turn the drum clock wise if the belt twists while working it into the drum groove. It was very disappointing to finally get the belt on, and work the drum back into place only to discover I had twisted the belt with the smooth side making contact on the driveshaft. Thus, I started over.
Aiming the drum into the back of the dryer is a tough task. I recommend a 1" X 4 " X 12" board to slip under the drum when beginning this process to help stablize, and guide the drum. It helped me tremendously, and was easy to remove out from under the drum once everything was back in place.
Use gloves. Yes, tough to work with in small places, and I did take them off to replace the belt around the tension pulley, however, there are too many sharp edges on the metal body of the dryer and especially the drum to do so without gloves.
Wires were easy to reattach and reassembly was smooth except for the top...check out the tabs, and spring tabs before you try and just plop the top back on. It goes a certain way...You'll know what i am talking about when you do this task.
I truly hope you have L O N G arms to do this task, and that the new belt lasts a long, long time!
I wasn't careful enough when removing the door, and the wiring connectors popped loose from their connections. No harm done, though. Disconnect the wires once you remove the front panel.
I had to loosen the bottom metal screws on one side panel to have enough give to pull the dryer drum out.
The only way to replace the belt is to bend over the side of this unit and with one hand put the belt around the motor drive shaft, pull the tension pulley back, and put the belt on the wheel.
The hard part is working the drum back into place while VERY carefully slipping the belt into the drum goove. Many attempts were made only to have the belt slip off of the tension pulley or motor driveshaft. Be care full to turn the drum clock wise if the belt twists while working it into the drum groove. It was very disappointing to finally get the belt on, and work the drum back into place only to discover I had twisted the belt with the smooth side making contact on the driveshaft. Thus, I started over.
Aiming the drum into the back of the dryer is a tough task. I recommend a 1" X 4 " X 12" board to slip under the drum when beginning this process to help stablize, and guide the drum. It helped me tremendously, and was easy to remove out from under the drum once everything was back in place.
Use gloves. Yes, tough to work with in small places, and I did take them off to replace the belt around the tension pulley, however, there are too many sharp edges on the metal body of the dryer and especially the drum to do so without gloves.
Wires were easy to reattach and reassembly was smooth except for the top...check out the tabs, and spring tabs before you try and just plop the top back on. It goes a certain way...You'll know what i am talking about when you do this task.
I truly hope you have L O N G arms to do this task, and that the new belt lasts a long, long time!
Parts Used:
-
Michael E from Victoria, TX
-
Difficulty Level:A Bit Difficult
-
Total Repair Time:More than 2 hours
-
Tools:Screw drivers
2 of 4 people
found this instruction helpful.
Was this instruction helpful to you?
Thank you for voting!
Rear drum bearing gone (only 4 years old). Decided to replace belt while I was at it.
I first watched the video on how to. Being mechecanically inclined I dismantled and removed everything needed to replace the drum bearing. Also removed belt at the same time. I replaced the bearing, then the belt. The belt could be a little tricky for some people. Getting the belt on the tension pulley could be a problem. What I did was I got a large nylon tie and put it around the armature of the motor. I then retracted the pulley just enough to be able to slip the belt over it. Of course this is all performed through the limited space on the bottom left, between the drum and the dryer shell. Once on the pulley, I cut the tie with wire cutters and it snapped into place. Rotated the drum a couple of times to line the belt with the pulley, perfect. I then put everything back together. I also cleaned any and all the lint that had gathered throughout the exhaust. Pluged the dryer in, perfect. Just like new. One more note getting the parts was so easy also. Your website and how to demo was a great help. Thank you, thank you very much. The words of the late Elvis Presley. They never get old.
Parts Used:
-
Robert from Salem, MA
-
Difficulty Level:Easy
-
Total Repair Time:More than 2 hours
-
Tools:Screw drivers, Socket set
1 person
found this instruction helpful.
Was this instruction helpful to you?
Thank you for voting!
unable to select anything on the wash cycle selector
the original knob had cracked and I ordered a new one and replaced it, all is well, thank you
Parts Used:
-
Rodney from BATESVILLE, IN
-
Difficulty Level:Very Easy
-
Total Repair Time:Less than 15 mins
1 person
found this instruction helpful.
Was this instruction helpful to you?
Thank you for voting!