




















GTUP270EM2WW General Electric Washer Dryer Combo - Instructions
Keep searches simple. Use keywords, e.g. "leaking", "pump", "broken" or "fit".
Making noise while drum was turning.
Removed 2 screws to remove top. Removed 2 other screws to remove front. Removed old parts. Installed new parts. Reassemble all afetr cleaning duct work out.
Parts Used:

-
Cheryl from Inwood, WV
-
Difficulty Level:Easy
-
Total Repair Time:30 - 60 mins
-
Tools:Screw drivers
1 of 2 people
found this instruction helpful.
Was this instruction helpful to you?
Thank you for voting!
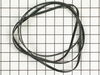
Belt was broken
Well, the intall would have been great except for the fact that I needed another part. If your belt breaks there is a reason for it. Make sure you check all the parts that work with the belt. Their was a pully the was defective and also need to be replaces. I think it would be a good idea to put a little note on the page for the Belt Drive to let people know that if you are replaceing the belt you might want to check the Idler Pully for it too might need to be replaces. I'm not an expert and if that was on the page for the Belt Drive I might have look at the pully before I ordered and I would have ordered the part along with the Belt Drive. As it was had to wait another 4 day to get my dryer fixed. I'm very happy the Parts Select has all my parts and they pretty good at getting them out to me in a good amount of time when I need them.
Parts Used:
-
William from Tupper Lake, NY
-
Difficulty Level:A Bit Difficult
-
Total Repair Time:30 - 60 mins
-
Tools:Pliers, Screw drivers
1 of 2 people
found this instruction helpful.
Was this instruction helpful to you?
Thank you for voting!
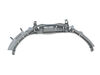
plastic & wear strips were worn out & missing
Parts were easy to take out and replace with the new ones.
Parts Used:

-
Carol from Lapeer, MI
-
Difficulty Level:Easy
-
Total Repair Time:15 - 30 mins
-
Tools:Screw drivers
1 of 2 people
found this instruction helpful.
Was this instruction helpful to you?
Thank you for voting!
had squilling noise.clothes get stuck in between top of drum and dryer
inside dryer door housing i removed two screws these hold top of dreyer on.pulled dryer top up and it unhooks from control panel.theres two more screws inside the front door asembly located at the top on booth sides.remove them and the front is free except for dryer door switch.lean it back far enough to unpug wires.lay door asembly on the floor.drum slide pops out with screw driver at the top the bottom just slides out.drum bearigs are plastic strips on the drum slide. pull the old ones out if their is any left.replace with new.you need four drum bearings.then put back together the ame as you took it apart. good luck terry
Parts Used:
-
TERRY from LIMA, OH
-
Difficulty Level:Really Easy
-
Total Repair Time:15 - 30 mins
-
Tools:Screw drivers
1 of 2 people
found this instruction helpful.
Was this instruction helpful to you?
Thank you for voting!
Dryer Made A Bad Grinding Sound Sometimes
Took off control panel,top,leftside facing door,and,door panel. Replace the 2 green and 2 white slides, the front drum bearing, the rear bearing and groundind strap behind the heating element,and new belt. Put back together,run's and sounds like new. The hardest part was putting drum bearing in inside and backside of drum by yourself. Replace belt with left side panel off. Easy to get on that way.
Parts Used:
-
JAMES from LEBANON, KY
-
Difficulty Level:Easy
-
Total Repair Time:1- 2 hours
-
Tools:Screw drivers, Socket set
1 of 3 people
found this instruction helpful.
Was this instruction helpful to you?
Thank you for voting!
turned switch to run but dryer wouldn't.
I removed the two screws inside the door and popped the top loose. I took the top off to see and have access to the interior. I leaned the front out and inserted the belt around the drum (with my wife's help), replaced the screws and laid the dryer on it's face on a rolled up blanket and proceeded to run the belt around the pulleys (two). The drive pulley was easy but the idler pulley, not so easy. I had to figure out how the pulley arm was supposed to provide tension on the belt. I figured it out by looking at the diagram. It was then I found the idler pulley was broken and fell apart in my hand. I advise that a new pulley be installed at the same time as the belt. Everything I read on your web site helped.
Parts Used:
-
BRAD from Vancouver, WA
-
Difficulty Level:Really Easy
-
Total Repair Time:30 - 60 mins
-
Tools:Screw drivers
0 of 1 people
found this instruction helpful.
Was this instruction helpful to you?
Thank you for voting!
Loud noise when running
I was teaching my associate how to do this repair so I showed him how to take off the top of the dryer. Then I showed him how to replace the drum slides. I had him clean out the dryer since we had it apart, and I also showed him how to remove the drum and then reinstall it. This was a very easy repair, and he learned a lot that he otherwise would not have known. Thanks for getting the parts to me so quickly. Rob from Clarks Summit.
Parts Used:
-
ROB from CLARKS SUMMIT, PA
-
Difficulty Level:Really Easy
-
Total Repair Time:30 - 60 mins
-
Tools:Screw drivers
0 of 1 people
found this instruction helpful.
Was this instruction helpful to you?
Thank you for voting!
Dryer made hig-pitched screech
Took off the top and front of the dryer---really easy, just two screws for each. Put new drum slides (4) on the front/sides of the drum. Then things got a little bit more difficult. Removed the drum entirely, vaccuumed everything out and had to replace the rear bearings. My husband did this part so I can't tell you exactly how he did it. Not too difficult though. The written directions from here were hard to read---need to make a new copy from the original as it's so copied that it's all smudged. Anyway, once we got the new bearings on, we put everything back together. Dryer works like a charm, at a fraction of the cost it would have been to get someone out to do it. Thanks a bunch for the fast service!
Parts Used:
-
Keli from Manassas, VA
-
Difficulty Level:A Bit Difficult
-
Total Repair Time:1- 2 hours
-
Tools:Screw drivers
0 of 1 people
found this instruction helpful.
Was this instruction helpful to you?
Thank you for voting!
Loud banging
When I first ordered the part, I did not know I needed 4 slides for the bearing. 2 of my slides had disintegrated. Make sure you have 2 good white slides, and 2 good blue slides, or order them with the bearing, or you will pay another $7.50 for shipping.
Once I got all of the parts and put it together using only common sense, I found it was binding tight. So I realigned the back of the drum that I had messed up while I was trying to diagnose the problem.
Parts Select definitely helped with diagnosis, through this comment section.
Thanks!
Once I got all of the parts and put it together using only common sense, I found it was binding tight. So I realigned the back of the drum that I had messed up while I was trying to diagnose the problem.
Parts Select definitely helped with diagnosis, through this comment section.
Thanks!
Parts Used:
-
DUANE from Kutztown, PA
-
Difficulty Level:A Bit Difficult
-
Total Repair Time:1- 2 hours
-
Tools:Screw drivers
0 of 1 people
found this instruction helpful.
Was this instruction helpful to you?
Thank you for voting!
dryer was noisy - low growling
Removed top cover by removing 2 screws in front door opening. Then removed front door removing 2 screws, one on each inner side of the front door.
Removed 2 screws on side doors located about 9 inches from bottom of dryer to permit taking off drum. Slip off belt and remove drum.
Thinking I had a bad bearing, I decided to turn the dryer on and found out I had a bad motor-still functional but noisy. I had difficulty installing the new belt since there was not access panel (which was mentioned in the service manual), so I decided to take off the left side panel-about 8 screws. With the left side panel off, it was a lot easier to install a new belt and install the new front bearings. I actually did not fix the noise, since I need to replace the motor ($$$). When it goes really bad, I can order it then, and it should not take me long to replace it.
Removed 2 screws on side doors located about 9 inches from bottom of dryer to permit taking off drum. Slip off belt and remove drum.
Thinking I had a bad bearing, I decided to turn the dryer on and found out I had a bad motor-still functional but noisy. I had difficulty installing the new belt since there was not access panel (which was mentioned in the service manual), so I decided to take off the left side panel-about 8 screws. With the left side panel off, it was a lot easier to install a new belt and install the new front bearings. I actually did not fix the noise, since I need to replace the motor ($$$). When it goes really bad, I can order it then, and it should not take me long to replace it.
Parts Used:
-
JORGE from DOWNEY, CA
-
Difficulty Level:A Bit Difficult
-
Total Repair Time:More than 2 hours
-
Tools:Pliers, Screw drivers
0 of 1 people
found this instruction helpful.
Was this instruction helpful to you?
Thank you for voting!
Drum squeaked and occassionally would not turn, even though the motor ran.
I ordered and replaced the front and rear bearings, including the slides that go on the front bearing. Most of this was un-necessary; replacing the slides would have been sufficient, and much easier to do. Two of the old slides were worn completely away.
Parts Used:
-
George from Lynchburg, VA
-
Difficulty Level:Easy
-
Total Repair Time:More than 2 hours
-
Tools:Nutdriver, Screw drivers, Socket set
0 of 1 people
found this instruction helpful.
Was this instruction helpful to you?
Thank you for voting!
Loud squeaking sound from dryer drum.
Initially purchased just the plastic slides, but when I opened the dryer I found the top drum bearing was smashed and the plastic was basically gone in a whole section, so I then ended up ordering the bearing as well. If you hear the loud squeaking, just buy the top drum bearing and the 4 slides (two white and two dark green). It is an easy repair and the squeaking sound is gone.
Parts Used:
-
Jeremy from Wexford, PA
-
Difficulty Level:Easy
-
Total Repair Time:15 - 30 mins
-
Tools:Screw drivers
0 of 1 people
found this instruction helpful.
Was this instruction helpful to you?
Thank you for voting!
Dryer was making a loud squeeking noise
The repair was very easy. Had to remove the front of dryer, parts fit great. It was worth the extra money to ship parts next day then to listen to the squeeking anymore.
Thanks to this site I was able to get the parts fast!!!
Thanks to this site I was able to get the parts fast!!!
Parts Used:
-
DOUG from BRAINERD, MN
-
Difficulty Level:Easy
-
Total Repair Time:15 - 30 mins
-
Tools:Screw drivers
0 of 1 people
found this instruction helpful.
Was this instruction helpful to you?
Thank you for voting!
Suealing noise when drum turns.
Disconnect power. Removed 2 screws from dryer door to dryer top cover. Removed dryer top cover. Remove two screws from dryer front panel to dryer side panels. Lift front /door panel up and swing to side. Remove old dryer drum bearing. Install new drum bearing and slides. Assemble dryer.
Parts Used:
-
Cheryl from Inwood, WV
-
Difficulty Level:Easy
-
Total Repair Time:15 - 30 mins
-
Tools:Screw drivers
0 of 1 people
found this instruction helpful.
Was this instruction helpful to you?
Thank you for voting!
Dryer squeaks and squeals while running
Took the top of the dryer off by removing two philips screws in front. Removed two screws holding the front of the dryer on. Pulled the front out enough to reveal the worn drum slides. Replaced them. Reassembled.
Parts Used:
-
Richard from Williston, VT
-
Difficulty Level:Easy
-
Total Repair Time:15 - 30 mins
-
Tools:Screw drivers
0 of 1 people
found this instruction helpful.
Was this instruction helpful to you?
Thank you for voting!