




















GTUP270EM2WW General Electric Washer Dryer Combo - Instructions
Keep searches simple. Use keywords, e.g. "leaking", "pump", "broken" or "fit".
Dryer was making a very loud squealing sound
I followed the step by step instructions provided by Video! Very informative, easy to understand and follow! If I can do it myself, anyone can! Thank you !
Parts Used:


-
Deborah from WINDHAM, NH
-
Difficulty Level:Really Easy
-
Total Repair Time:15 - 30 mins
-
Tools:Screw drivers
1 person
found this instruction helpful.
Was this instruction helpful to you?
Thank you for voting!
Switch not working.
Open the door and removed the part. Installed the new part and started the dryer.
Parts Used:
-
Alan from BELFORD, NJ
-
Difficulty Level:Very Easy
-
Total Repair Time:Less than 15 mins
1 person
found this instruction helpful.
Was this instruction helpful to you?
Thank you for voting!
I broke the door strike on the dryer.
Wife was out of town, visiting family. I broke the door strike by wedging the dryer door between the laundry room door, closed the laundry room door and it snapped the door strike breaking it. I ordered the part, and it shipped fast using the standard shipping, nothing fancy. Grabbed a pair of pliers and pushed the new door strike into place. It snapped right in, fits and works perfect like nothing ever happened. The wife will never know :)
Parts Used:

-
CHRISTOPHER from PHENIX CITY, AL
-
Difficulty Level:Really Easy
-
Total Repair Time:Less than 15 mins
-
Tools:Pliers
1 person
found this instruction helpful.
Was this instruction helpful to you?
Thank you for voting!
No power to dishwasher
-
Robert from OLD TOWN, FL
-
Difficulty Level:Really Easy
-
Total Repair Time:Less than 15 mins
-
Tools:Screw drivers
2 of 4 people
found this instruction helpful.
Was this instruction helpful to you?
Thank you for voting!
dryer making high pitch squeal
Remove top (2 screws) and front (2 screws), snap out old drum bearing, put new slides in new drum bearing and install in dryer. Reinstall front and top of dryer.
Parts Used:
-
Glenn from Crown Point, IN
-
Difficulty Level:Really Easy
-
Total Repair Time:Less than 15 mins
-
Tools:Screw drivers
1 person
found this instruction helpful.
Was this instruction helpful to you?
Thank you for voting!
Squeaking noise
Dryer was making a horrible noise. When I took it apart I noticed that the from side dryer bearing was ruined. Ordered the part with the slide bars and replaced...Works great...
Parts Used:
-
robert from woodstock, GA
-
Difficulty Level:Really Easy
-
Total Repair Time:15 - 30 mins
-
Tools:Screw drivers
1 person
found this instruction helpful.
Was this instruction helpful to you?
Thank you for voting!
squeeking
-
Gary from Chesnee, SC
-
Difficulty Level:Really Easy
-
Total Repair Time:15 - 30 mins
-
Tools:Screw drivers
1 person
found this instruction helpful.
Was this instruction helpful to you?
Thank you for voting!
Screeching noise and black burn marks
I read the repairs that others had posted and how they did it. It was really easy. My only complaint is that I didn't know that I needed the slides that attached to the bearing and couldn't find them on the repair list. My dryer had a spot for 4 of them and only 1 was left. Otherwise, being a female, I felt great to be able to fix it myself! Thanks!
Let me also say, I only have one good working arm/hand.
Let me also say, I only have one good working arm/hand.
Parts Used:
-
Carol from Bristolville, OH
-
Difficulty Level:Really Easy
-
Total Repair Time:15 - 30 mins
-
Tools:Screw drivers
1 person
found this instruction helpful.
Was this instruction helpful to you?
Thank you for voting!
Loud Squeal When Running
2 Screws hold top on, removed top, 2 more screws hold front panel with door on, removed front panel. Unclipped front drum bearing installed new one with new sliders put back together.
Parts Used:
-
Al from Glenshaw, PA
-
Difficulty Level:Really Easy
-
Total Repair Time:15 - 30 mins
-
Tools:Screw drivers
1 person
found this instruction helpful.
Was this instruction helpful to you?
Thank you for voting!
None stop screeching sound from the front of dryer
Unplugged power to dryer. Opened door and removed the two screws that hold the top panel on. Removed top panel and set aside. Then removed the two screws that hold the front panel secure and leaned front panel towards me. Replaced parts with absolutely no tools. Reverse steps to assemble dryer. The videos are very informative and give you the confidence you need to do it yourself.
Parts Used:
-
Eric from N MYRTLE BCH, SC
-
Difficulty Level:Really Easy
-
Total Repair Time:15 - 30 mins
-
Tools:Screw drivers
1 person
found this instruction helpful.
Was this instruction helpful to you?
Thank you for voting!
Dryer made noise upon startup which quieted after a few minuts. Sounded like loose coins in the drum.
Removed two screws inside the door at the top of the frame. This allowed the top to be lifted and slid to the left a bit which allowed the front of the dryer to be removed. The Drum Bearing was held on with plastic tabs and the Bearing slides just fitted over a small tab then into a slot. There is a "knockout" for the light which is removed. The entire process took less than 15 minutes.
Parts Used:
-
Ron from NEWTON, IA
-
Difficulty Level:Really Easy
-
Total Repair Time:15 - 30 mins
-
Tools:Screw drivers
1 person
found this instruction helpful.
Was this instruction helpful to you?
Thank you for voting!
Washer not draining
Ensure washer drum is empty of water before attempting repair. Disconnect the power to the appliance. Remove the front washer panel (a metal putty knife if needed to unlock the two upper tabs which releases the panel). Locate the existing drain pump at the bottom of the unit. Disconnect the two wires from the drain pump motor (one orange, one black/white). A pair of pliers and a gentle pull should do it. Using a small ratchet and socket, loosen and remove the two bolts that secure the drain pump to the bottom panel of the washer. Using a pair of pliers, squeeze the factory hose clamp on the large drain tube that connects the pump to the drum and remove the hose from the pump, being careful to capture any residual water from the drum. A towel is helpful to absorb the water. Repeat for the smaller discharge drain tube located on the side of the pump. Once both tubes are disconnected, remove the old pump. Install the new pump and reconnect everything in reverse order. Connect the small drain tube to the side of the pump. Connect the large drain tube from the drum. Ensure the clamps are properly secured. Insert and hand-tighten the two bolts that secure the pump to the bottom panel of the washer, making sure the bolts are snug but being careful not to overtighten. Reconnect the two wires to the motor. Restore power to the appliance. Run a quick wash cycle to ensure pump is working correctly and check for any water leaks. When satisfied, reinstall and secure the front washer panel.
Parts Used:
-
Eric from HAMPTONVILLE, NC
-
Difficulty Level:Easy
-
Total Repair Time:15 - 30 mins
-
Tools:Pliers, Socket set
1 person
found this instruction helpful.
Was this instruction helpful to you?
Thank you for voting!
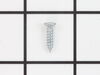
Reversing the dryer door.
-
Chris from WACO, TX
-
Difficulty Level:Easy
-
Total Repair Time:15 - 30 mins
-
Tools:Screw drivers
1 person
found this instruction helpful.
Was this instruction helpful to you?
Thank you for voting!
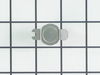
Dryer would shut off on heat dry after a couple of minutes. I could feel the heat working. It would only continue to run on fluff/no heat
Pulled the drum an found spade clip burned on wire. Hi limit Thermostat crumbled/ broke while pulling spade clip so I trimmed back the wire, cleaned the spade clip and soldered the wire back on. Isolated the other thermostats in the system and tested for resistance. Reassembled dryer.
Parts Used:
-
Dave from Wallingford, CT
-
Difficulty Level:Really Easy
-
Total Repair Time:15 - 30 mins
-
Tools:Pliers, Screw drivers
1 of 2 people
found this instruction helpful.
Was this instruction helpful to you?
Thank you for voting!
drum bearing and slides had worn through
Poped the top off took out two screws, pulled the front off removed the old parts and put in the new ones.
Parts Used:
-
ashley from crawfordville, FL
-
Difficulty Level:Really Easy
-
Total Repair Time:15 - 30 mins
-
Tools:Screw drivers
1 of 2 people
found this instruction helpful.
Was this instruction helpful to you?
Thank you for voting!