




















GSHF9NGYBCWW General Electric Refrigerator - Instructions
Keep searches simple. Use keywords, e.g. "leaking", "pump", "broken" or "fit".
Water Leak behind Refrigerator
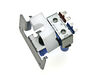
Shut water behind the refrigerator, unplugged the unit. Unscrewed the back tin panel and simply unscrewed the brace scew for the Double Outlet Water Valve. Disconnected the hoss - inspected the hosed for wear. Next detached the hoses and power source to the unit... reconnected both hoses & power source, plug the refrigator back in and inspected for any water leaks. Simple!
Parts Used:
-
Theodore from Carteret, NJ
-
Difficulty Level:Easy
-
Total Repair Time:15 - 30 mins
-
Tools:Socket set
4 of 6 people
found this instruction helpful.
Was this instruction helpful to you?
Thank you for voting!
replace solenoid on ice door
remove the front plate. use screwdriver to pry the cover off from the bottom of the cover, remove the wiring from the front cover.remove the 4 screws and pull out the shute. remove three screws from the solonide and replace . very easy fix. save yourself $100.00 labor.
Parts Used:
-
Allan from Ponce Inlet, FL
-
Difficulty Level:Easy
-
Total Repair Time:15 - 30 mins
-
Tools:Screw drivers
3 of 3 people
found this instruction helpful.
Was this instruction helpful to you?
Thank you for voting!
Dual Inlet Water Valve
-
lam from JACKSONVILLE, FL
-
Difficulty Level:Very Easy
-
Total Repair Time:15 - 30 mins
-
Tools:Screw drivers, Socket set
3 of 3 people
found this instruction helpful.
Was this instruction helpful to you?
Thank you for voting!
Busted water tank
Removed the lower 2 drawers, lower front grill, rear lower compressor cover. Removed the 2 water lines from the quick connects and screws from the water tank. Pulled lines through the hole in the right rear of the refrigerator and removed tank. Then reversed steps to install new tank. The upper plastic tank cover has 2 buttons on top that are really screws with a plastic cap, these are easily removed with pliers.
Parts Used:
-
Larry from Shepherdsville, KY
-
Difficulty Level:Really Easy
-
Total Repair Time:15 - 30 mins
-
Tools:Nutdriver, Pliers, Screw drivers
4 of 6 people
found this instruction helpful.
Was this instruction helpful to you?
Thank you for voting!
The drive cup had broken
I followed the instructions on your website. I pulled out the old drive cup and installed the new one. To my regret, I must have broken something in the main ice dispenser during the installation since it would not work. I then ordered a new bin with everything already assembled. I should have done this from the start. Now everthing works just fine.
Parts Used:
-
Herbert from Buckeye, AZ
-
Difficulty Level:Very Difficult
-
Total Repair Time:15 - 30 mins
-
Tools:Screw drivers
4 of 6 people
found this instruction helpful.
Was this instruction helpful to you?
Thank you for voting!
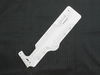
Left glide that ice bucket slides on broke in the rear where the ice motor connects on
I had previously removed the motor by unplugging 2 plugs and had the motor sitting on my kitchen counter awaiting for the part from the site. On receipt of the part, we removed the broken left glide, installed the new glide, re plugged the motor and attached it to the new glide. If it weren't for my hubby trying to find the right socket tool for the screws, installation would have been less than 15 minutes. The screw that attaches the glide to the ice motor is a different size than the ones that screw into the side of the fridge.
Parts Used:
-
Bridgette from MIAMI, FL
-
Difficulty Level:Very Easy
-
Total Repair Time:15 - 30 mins
-
Tools:Socket set
3 of 3 people
found this instruction helpful.
Was this instruction helpful to you?
Thank you for voting!
Was very helpful to have a video giving you instructions
Of course being a women to say I repair my refrigirator is very self gratifying specially when share with other womens like me divorce,having to do on their own, great site, very simple explain on the video with words I could understand, no surprices right to the penny. I save a lot of money, thank you so much, i recomend the site to anybody.
Parts Used:
-
Katherine from Converse, TX
-
Difficulty Level:Really Easy
-
Total Repair Time:15 - 30 mins
-
Tools:Nutdriver, Screw drivers, Wrench (Adjustable)
4 of 6 people
found this instruction helpful.
Was this instruction helpful to you?
Thank you for voting!
Water dispenser is not working........water not coming out!
-
George from HAYWARD, CA
-
Difficulty Level:Really Easy
-
Total Repair Time:30 - 60 mins
3 of 3 people
found this instruction helpful.
Was this instruction helpful to you?
Thank you for voting!
Water diapenser not working.
Turns out it was only the frozen water that thawed when I unplugged the fridge for 24 hours.
New part returned, not used.
Service was excellent.
New part returned, not used.
Service was excellent.
Parts Used:
-
Jim from Vista, AL
-
Difficulty Level:Really Easy
-
Total Repair Time:30 - 60 mins
-
Tools:Nutdriver, Pliers
4 of 7 people
found this instruction helpful.
Was this instruction helpful to you?
Thank you for voting!
Ice maker was over filling and freezing the cubes together.
I turned water off at valve and unplugged refrigerator. I removed screws to remove cardboard cover at bottom. I removed screw holding duel inlet water valve bracket and pulled out valve. Then it's just a matter of exchanging electrical connections and water lines. The electrical connections unplug and plug in-red to red and blue to blue. The water lines are two different sizes so they can't be mixed up. Then reattach bracket and cardboard cover. Turn water back on and plug back in.
Parts Used:
-
Gary from Pickens, MS
-
Difficulty Level:Really Easy
-
Total Repair Time:30 - 60 mins
-
Tools:Screw drivers
3 of 4 people
found this instruction helpful.
Was this instruction helpful to you?
Thank you for voting!
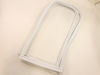
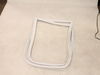
cold air leaking around gaskets on freezer and fresh food doors
Replaced freezer door gasket and fresh food door gasket. fresh food door gasket is works OK. BUT cannot stop new freezer door gasket from leaking cold air . Looked at three or four you tube videos for instructions and seemed to work well. I took off the freezer gasket and turned it over (end for end) and it still has a cold air leak. help
Parts Used:
-
Norman from ZELLWOOD, FL
-
Difficulty Level:Easy
-
Total Repair Time:30 - 60 mins
3 of 4 people
found this instruction helpful.
Was this instruction helpful to you?
Thank you for voting!
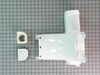
Refrigerator was getting to cold
Removed light cover, found 2 screws in front and rear of light area.Remove screws and you can unplug light to get out of way, but not necessary. Next pop off plastic cover with flat head screw driver and remove the two screws under cover. Next pull cover off water filter and remove water filter this will give you room to slide inlet cover out. Install plastic cone provided by in new kit. Next slide new cover over cone and re-install bottom screws, however leave them loose in order to adjust for the following screws to line up. After all screws and plugs are in place snug all screws. Replace light cover an install water filter and cover. You are done.
Parts Used:
-
Lawrence from Crestwood, KY
-
Difficulty Level:A Bit Difficult
-
Total Repair Time:15 - 30 mins
-
Tools:Screw drivers
4 of 7 people
found this instruction helpful.
Was this instruction helpful to you?
Thank you for voting!
Water Tank Cracked
First:
Remove all shelf’s and drawers from fridge inside that were on the way of the water tank
Second:
Pull the fridge from the wall
Turn off the water supply:
Unplugged the power supply
Third:
Remove the cardboard cover at bottom of the fridge on the back for better access to the water pipes
From the front remove the toe kick for better access at the water pipes
Disconnected the water pipe at the front left side, use a rag or paper towel to hold the water that may drip ( bigger pipe)
Remove the covers on the top of the water tank inside the fridge
Disconnected the water pipe at the back left side ( smaller pipe)
Unscrew the water tank (two screws)
Pull the water tank out with the water pipes attached
Fourth:
Install the new water tank assembly , make sure the pipes goes on the hole at the right side and reaches the from and back
Connect pipes until the line that shows on the pipes
Screw back the new water tank
Put the protections back on the top
Plug the fridge and open the water supply to make sure there is no water leaks
The water is ready to be use
Remove all shelf’s and drawers from fridge inside that were on the way of the water tank
Second:
Pull the fridge from the wall
Turn off the water supply:
Unplugged the power supply
Third:
Remove the cardboard cover at bottom of the fridge on the back for better access to the water pipes
From the front remove the toe kick for better access at the water pipes
Disconnected the water pipe at the front left side, use a rag or paper towel to hold the water that may drip ( bigger pipe)
Remove the covers on the top of the water tank inside the fridge
Disconnected the water pipe at the back left side ( smaller pipe)
Unscrew the water tank (two screws)
Pull the water tank out with the water pipes attached
Fourth:
Install the new water tank assembly , make sure the pipes goes on the hole at the right side and reaches the from and back
Connect pipes until the line that shows on the pipes
Screw back the new water tank
Put the protections back on the top
Plug the fridge and open the water supply to make sure there is no water leaks
The water is ready to be use
Parts Used:
-
Fernando from SOUTHAMPTON, NY
-
Difficulty Level:Easy
-
Total Repair Time:15 - 30 mins
-
Tools:Screw drivers
3 of 4 people
found this instruction helpful.
Was this instruction helpful to you?
Thank you for voting!
torque from ice auger broke bucket glide bracket
Removed four screws from broken glide bracket and auger bracket and remove. Replaced with new glide bracket and reinserted ice bucket to connect auger with auger motor. Two socket size job.
Parts Used:
-
Donald from Henderson, NV
-
Difficulty Level:Really Easy
-
Total Repair Time:15 - 30 mins
-
Tools:Socket set
4 of 7 people
found this instruction helpful.
Was this instruction helpful to you?
Thank you for voting!
The light would not turn on!
I pulled the bulb out to see if it was the bulb, no! I took the switch out, of course with the refer unplugged, and jummped out the wires and the light came on. Ordered my switch and put it in in 10 seconds and then there was light! Thanks again for showing me the light!
Tim in NJ
Tim in NJ
Parts Used:
-
TIMOTHY from CLIFTON, NJ
-
Difficulty Level:Really Easy
-
Total Repair Time:Less than 15 mins
-
Tools:Screw drivers
3 of 4 people
found this instruction helpful.
Was this instruction helpful to you?
Thank you for voting!