




















GSHF9NGYBCWW General Electric Refrigerator - Instructions
Keep searches simple. Use keywords, e.g. "leaking", "pump", "broken" or "fit".
grill was broken
-
John from Belvidere, NC
-
Difficulty Level:Really Easy
-
Total Repair Time:Less than 15 mins
-
Tools:Screw drivers
5 of 8 people
found this instruction helpful.
Was this instruction helpful to you?
Thank you for voting!
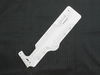
Light switch broke when I dropped a jar of jam on it.
The three bulbs would then remain on, so I loosened them to keep them off. I didn't know that the cooling system also would stop when the door was open, so for two days only the side freezer was operational. When I discovered that, I hot glued the switch button off, while I searched for a replacement part. The replacement part was an exact duplicate. A simple prying out of the old switch - using a screwdriver, and the reconnection of the two wires connectors to the new part, and clicking back in place ... done. Seriously, it took two minutes.
Parts Used:
-
Robert from Centennial, AL
-
Difficulty Level:Really Easy
-
Total Repair Time:Less than 15 mins
-
Tools:Screw drivers
5 of 8 people
found this instruction helpful.
Was this instruction helpful to you?
Thank you for voting!
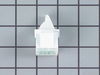
the left hand glide broke and could not support the ice bucket
I think there were 3 philip screws to remove, take off the existing glide and replace with the new part. A very simple repair and saved about 175.00 if called in a professional, Thanks Part Select
Parts Used:
-
Neal from Haverhill, MA
-
Difficulty Level:Really Easy
-
Total Repair Time:Less than 15 mins
-
Tools:Screw drivers
4 of 5 people
found this instruction helpful.
Was this instruction helpful to you?
Thank you for voting!
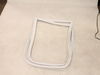
The refrigerator wouldn't stay closed because the gasket was worn
Looked it up on You Tube and basically followed the very simple instructions. Two minor differences: 1) I took the old gasket off while the door was still attached to the fridge. And 2) because it was a side-by-side freezer/ fresh food, I didn't have to take off the freezer door at all and the fresh food door was only attached at the top with 2 screws covered by a hinge cap. So I undid the screws and lifted it off the lower pin. We put the door on a table handle down and slightly off the table edge. Inserting the v-shaped rubber part of the gasket into the groove was easy- pinching it together with my fingers with a little hammer tap at the corners. Reinstalled the door and voila. 27 minutes!
Most of my DIY projects take twice as long as expected. Much time is spent taking off the old part then not as easy as expected to replace the new part. This was a breeze!
Most of my DIY projects take twice as long as expected. Much time is spent taking off the old part then not as easy as expected to replace the new part. This was a breeze!
Parts Used:
-
Carol from DAVIS, CA
-
Difficulty Level:Really Easy
-
Total Repair Time:15 - 30 mins
-
Tools:Screw drivers
4 of 5 people
found this instruction helpful.
Was this instruction helpful to you?
Thank you for voting!
Cracked the head by over tightening the water filter in2 it.
It was much easier than I had anticipated it was going 2B. All it intaled was 2 undue the 2 water lines w/a 1/2 inch wrench, take out the 2 screws on the top of the head on the inside of the refrigerator, then pull it out. I then just slipped the new head in, replaced the 2 screws, replaced the filter (definitely not overly tightening it this time) by putting some waterproof food grade grease, making it much easier 2 push up & turn. After, I went 2 the back of the refrigerator & reconnected the 1 line 2 the fridge & then the other 2 the water supply. "Walla" we were making ice again & able 2 get ice cold water again, also. The entire process took approximately 30 minutes 2 complete & that's bcuz of my limited disabilities. A younger person could probably be able 2 do it possibly faster.
Parts Used:
-
Joseph from LAKELAND, FL
-
Difficulty Level:Very Easy
-
Total Repair Time:15 - 30 mins
-
Tools:Nutdriver
3 of 3 people
found this instruction helpful.
Was this instruction helpful to you?
Thank you for voting!
Water dispenser not dispensing water
I went to the internet and found parts select web site. Saw all of the possible fixes for my problem and read all of the other repair stories. My story actually became a journey that is still continuing. I first changed the water filter, but still no water at the dispenser. I next disconnected the coupling at the bottom of the freezer door that carries water to the dispenser and when the dispenser was depressed, water flowed at the coupling, but not at the dispenser. After reconnecting the coupling, I turned the freezer setting to 1 for 4-5 days, but still no water at the dispenser (possibly the line was frozen, but we had recently been away for a week and the water dispenser still supplied water at a freezer setting of 4). Now I am at the point of the journey into replacing parts one at a time to get water. First I ordered the dual water valve for the ice maker and water dispenser. I replaced this valve with instructions from Parts Select and still no water at dispenser. Next I ordered and replaced the switch at the dispenser lever and still no water. Next was the solenoid attached to the ice door, ordered, replaced and still no water at dispenser. I am now at the final part in this repair and that is the $132 circuit board. So I will be ordering this part soon and hopefully that will fix the issue.
Parts Used:
-
David from Georgetown, TX
-
Difficulty Level:Easy
-
Total Repair Time:15 - 30 mins
-
Tools:Pliers, Screw drivers, Wrench (Adjustable)
3 of 3 people
found this instruction helpful.
Was this instruction helpful to you?
Thank you for voting!
Left side bucket guide cracked away from the auger attachment. Could not dispense ice cubes.
Amazingly simple. I followed the directions I found on your site 4 socket screws removed. They were easily accessible. Replaced the broken bucket guide with the new part. Put the screws back in in less than 15 minutes the icemaker auger feature that dispenses the ice was back in working order.
Parts Used:
-
Michael from CHATSWORTH, CA
-
Difficulty Level:Very Easy
-
Total Repair Time:Less than 15 mins
-
Tools:Socket set
3 of 3 people
found this instruction helpful.
Was this instruction helpful to you?
Thank you for voting!
Fridge shelf dropped on floor broke front shelf insert
Opened package and just snapped in front insert. Took longer to open package than it took to replace broken insert.
Parts Used:

-
Robert from BREWSTER, MA
-
Difficulty Level:Very Easy
-
Total Repair Time:Less than 15 mins
3 of 3 people
found this instruction helpful.
Was this instruction helpful to you?
Thank you for voting!
water was dripping in freezer (ice maker)
We actually followed the instructions of the video for the installation of the dual inlet valve and it was incredibly easy to perform. The fridge works perfect again!
Parts Used:
-
Gerda from RIO RANCHO, NM
-
Difficulty Level:Very Easy
-
Total Repair Time:Less than 15 mins
-
Tools:Nutdriver, Wrench (Adjustable)
3 of 3 people
found this instruction helpful.
Was this instruction helpful to you?
Thank you for voting!
Can of fruit fell from shelf and broke the switch cover.
Removed broken switch with plastic scraper (press tension latch on bottom), moved two wire terminals to the new switch and pressed the new switch into the hole.
Parts Used:
-
James from KNOXVILLE, TN
-
Difficulty Level:Really Easy
-
Total Repair Time:Less than 15 mins
3 of 3 people
found this instruction helpful.
Was this instruction helpful to you?
Thank you for voting!
The clear insert on on of the shelves on the door brike
-
Lynn from Venice, FL
-
Difficulty Level:Very Easy
-
Total Repair Time:Less than 15 mins
3 of 3 people
found this instruction helpful.
Was this instruction helpful to you?
Thank you for voting!
Ice Machine Not Dispensing Ice
As most people have stated the most difficult part of this job is disassembling the ice machine unit. I used multiple screw drivers and slowly pried the unit apart. After that was done is was as simple as placing the cup along the turning screw, and reassembling. I waited 24 hours and tested it. It worked perfectly.
Parts Used:
-
Christina from West Jordan, UT
-
Difficulty Level:Easy
-
Total Repair Time:Less than 15 mins
-
Tools:Screw drivers
4 of 6 people
found this instruction helpful.
Was this instruction helpful to you?
Thank you for voting!
Nothing to tell it was a replacement
Nothing to tell it was just a replacement part that the old part was removed and the new one inserted. Works like a dream Thanks
Parts Used:
-
Royce from Pasadena, TX
-
Difficulty Level:Really Easy
-
Total Repair Time:Less than 15 mins
3 of 3 people
found this instruction helpful.
Was this instruction helpful to you?
Thank you for voting!
replace filter
-
Marie from Philidelphia, PA
-
Difficulty Level:Really Easy
-
Total Repair Time:Less than 15 mins
5 of 9 people
found this instruction helpful.
Was this instruction helpful to you?
Thank you for voting!
drinking water cooler leaked at the seam.
ordered replacement part with the understanding that tubing to the water valve could be easily removed. The tubes were carefully removed with some difficulty, and when the new tubes were inserted one leaked. The tube seat was not snug. Therefore a new water valve was purchased. The installation was successful within about 20 minutes. If I were to do the job again, both the water resevoir and valve would be ordered together.
Parts Used:

-
Alric H from Waynesville, NC
-
Difficulty Level:A Bit Difficult
-
Total Repair Time:15 - 30 mins
-
Tools:Nutdriver, Pliers, Screw drivers
4 of 6 people
found this instruction helpful.
Was this instruction helpful to you?
Thank you for voting!