




















GFS187/MN03 Caloric Refrigerator - Instructions
Keep searches simple. Use keywords, e.g. "leaking", "pump", "broken" or "fit".
Ice on the botton of top freezer
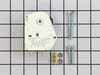
I just simply eliminated the ice buildup with hot water and a knife. But I still have the Defrost Timer Kit for future use.
Parts Used:
-
Glenn from Capitol Heights, MD
-
Difficulty Level:Easy
-
Total Repair Time:30 - 60 mins
-
Tools:Nutdriver
Was this instruction helpful to you?
Thank you for voting!
Freezer not cooling. Temperature rising.
One day the ice cream in the freezer seemed mushy, but the ice was still frozen. There was not water in the ice bin. However, the problem resolved itself. This suggested that the defrost timer had become stuck for an extended time, but then continued to run. The fact that the freezer went back to frozen, implies that all the components of the cooling loop (compressor, condenser & fan, evaporator & fan) were fine. It was possible that the problem was caused by a bad defrost (?evaporator?) thermostat but everything I saw on line suggested that the defrost timer is the culprit about 40 - 50% of the time. Anyway, I followed the instructions in the on-line video at this site for replacing the defrost timer and it was easy. It would have only taken 15 minutes, but I spent a while reading the defrost timer instructions and hunting down a schematic for my refrigerator, to determine which pin the loose wire should go on.
Parts Used:
-
Jeff from Austin, TX
-
Difficulty Level:Really Easy
-
Total Repair Time:30 - 60 mins
-
Tools:Nutdriver, Screw drivers
Was this instruction helpful to you?
Thank you for voting!
How to get timer out of defrost cycle?
Talked to local appliance repair tech, who explained how to manually turn timer with a screw driver and listen to the switch go from on to off.
Parts Used:
-
David from Virginia Beach, VA
-
Difficulty Level:A Bit Difficult
-
Total Repair Time:15 - 30 mins
-
Tools:Socket set
Was this instruction helpful to you?
Thank you for voting!
Refrigerator not cooling
Exactly how the part select video described it. Threw a little curve ball figuring out which timer setting to set it to. But the instructions provided with defrost timer walked me right through it. No problem. After installing part nothing happened for about ten minutes, which had me second guessing each and every step. Then, like magic, cold air began blowing. What a relief. Thanks so much, love this site. Refrigerator works like new!
Parts Used:
-
Bryan from Midland, NC
-
Difficulty Level:Easy
-
Total Repair Time:15 - 30 mins
-
Tools:Nutdriver, Pliers, Screw drivers
Was this instruction helpful to you?
Thank you for voting!
Dryer not staying hot
-
Lee from St. Louis, MO
-
Difficulty Level:Really Easy
-
Total Repair Time:15 - 30 mins
-
Tools:Screw drivers
Was this instruction helpful to you?
Thank you for voting!
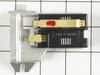
Our dryer would not ignite, so I figured it was the radiant flame sensor. Well, I out that in and still nothing. I found out that the Tube Burner was also burned off on the flame end, by the igniter. I also ordered that part. installed it, and it works beautifully.
On the Amana dryer, I had to remove the top panel. then the front panel to access the burner assembly. I also had to remove the gas pipe coming to the burner, because I replaced the tube burner assembly at the same time. There is only one screw that holds that back end of that gas pipe. The thermal flame sensor is on the left side of the burning chamber, with only one small Phillips head screw. just remove the 2 wires, keeping track of which terminal they belong. Just twist the sensor out of the small slot, and out it comes. The tube burner assembly is fastened with 2 screws. The entire burner assembly comes out in one piece, but be real careful not to bang the igniter when removing it. The coil assembly has 2 wires, which you cannot get wrong, because one has 2 prongs, the other has 3 wires.The local repair shop wanted 90 bucks per hour, plus parts, and I installed both the burner tube and radiant flame sensor for around $80.
Parts Used:
-
Rodney from Zimmerman, MN
-
Difficulty Level:Really Easy
-
Total Repair Time:15 - 30 mins
-
Tools:Screw drivers, Socket set
Was this instruction helpful to you?
Thank you for voting!
Clothes were not getting dry enought
Unplugged dryer from power source, used putty knife to release latches that hold top on, tilted the top out of the way, unplugged door lite, located the radiant switch, removed 1 screw,then undid 2 wires & lifted out switch. Reversed procedure plugged in dryer....wa la had dried a large load of clothes, took 1/3 the time to dry clothes at last. Thanks "PartSelect"
Parts Used:
-
Michael from Royal Palm Beach, FL
-
Difficulty Level:Really Easy
-
Total Repair Time:15 - 30 mins
-
Tools:Nutdriver
Was this instruction helpful to you?
Thank you for voting!
Would not heat clothes dry
unplugged dryer and removed front panel. removed the screw that holds flame sensor and unplugged electrical wires. then replaced with new. Did not solve problem so I ordered the replacement coil kit and installed them using phillips screw driver and this solved problem. Dryer is working fine now. I found this site very helpful and would recommend it to a friend.
Parts Used:
-
rick from Burton, MI
-
Difficulty Level:Really Easy
-
Total Repair Time:15 - 30 mins
-
Tools:Nutdriver, Screw drivers
Was this instruction helpful to you?
Thank you for voting!
Dryer would heat up for a short time, then shut off
First I replace the Radiant Flame Sensor, but the problem remain. Then replace the two coils and the igniter. Dryer works like it should. If I were to do it over, I would have replaced all 4 components to start with. Thanks for good advice and great service.
Parts Used:
-
David M from Watertown, WI
-
Difficulty Level:Easy
-
Total Repair Time:15 - 30 mins
-
Tools:Screw drivers, Socket set
Was this instruction helpful to you?
Thank you for voting!
Drier stopped heating up
Followed the easy to understand how to video. The drier was up and heating again in less then 30 minutes.
Parts Used:
-
Daniel from Lake Geneva, WI
-
Difficulty Level:Really Easy
-
Total Repair Time:15 - 30 mins
-
Tools:Nutdriver, Screw drivers
Was this instruction helpful to you?
Thank you for voting!
Dryer will not get hot
Replaced the flame sensor since it was believed to be the problem contributing to the lack of flame in this gas dryer. However, this part did not correct the problem.
Parts Used:
-
Robert from Ambler, PA
-
Difficulty Level:A Bit Difficult
-
Total Repair Time:15 - 30 mins
-
Tools:Nutdriver, Screw drivers
Was this instruction helpful to you?
Thank you for voting!
Dryer would not heat. No flame or gas
Remove lower bottom cover (two screws on bottom) with screw driver. Remove old radiant flame sensor from left side of tube with ignior by using socket wretch. Remove wires with needle nose pliers. Put new part in: put wires back on, insert part's lower tab into the tube ( there is a small slot) use socket wrench to tighten screw at top. Put bottom front panel back on and screw back in.
Parts Used:
-
Diane from Huntington Beach, CA
-
Difficulty Level:Easy
-
Total Repair Time:15 - 30 mins
-
Tools:Pliers, Screw drivers, Wrench set
Was this instruction helpful to you?
Thank you for voting!
Dryer would not heat!
After getting on-line to your site we looked up what the problem could be after receiving the dryer from a friend to transfer from electric to gas to save money. First we thought it to be the ignitor and after receiving it so quickly it still didn't work so went to your site again and found the Flame sensor. They were both defective and now it works wonderful!!! Your site also explains what and how to repair the appliance, which my husband appreciated! We are glad you contacted us because your site did not show that we could send you and e-mail Thanking your company for the excellant service we received. Your prices can't compare to other companies either, we were amazed on the differences. When you say the next day delivery, you mean the next day!!! Thankyou and you are now in my Favorites if ever needing parts for other appliances we own.
Parts Used:
-
Diane from Beaverton, MI
-
Difficulty Level:Really Easy
-
Total Repair Time:15 - 30 mins
-
Tools:Screw drivers
Was this instruction helpful to you?
Thank you for voting!
No heat just tumble
Opened the bottom panel w/ 1/4 nut driver to access the flame sensor and easy fix.
Parts Used:
-
Mario from SAN DIEGO, CA
-
Difficulty Level:Really Easy
-
Total Repair Time:15 - 30 mins
-
Tools:Nutdriver, Screw drivers
Was this instruction helpful to you?
Thank you for voting!
Light bulb failure
Received the part the day after ordering. Appreciated the quick service and repair took less than a minute.
Parts Used:

-
Grant from Alexandria, VA
-
Difficulty Level:Really Easy
-
Total Repair Time:Less than 15 mins
Was this instruction helpful to you?
Thank you for voting!