




















GFS187/MN03 Caloric Refrigerator - Instructions
Keep searches simple. Use keywords, e.g. "leaking", "pump", "broken" or "fit".
Bulb Replacement
I pulled down the wire around the glass cover. . . Released on end of the wire from its holder being careful to not let the glass cover drop. Unscrewed the bulb and replaced with replacement. Easy, easy.
Parts Used:

-
Judith from Phoenix, AZ
-
Difficulty Level:Really Easy
-
Total Repair Time:Less than 15 mins
0 of 2 people
found this instruction helpful.
Was this instruction helpful to you?
Thank you for voting!
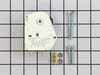
The refridgeror side was not cold enough
it was a simple repair once I located the part I had to replace . I really like your speedy delivery of the part I needed Thank you Pat Crotty
Parts Used:
-
Patrick from Sun City, AZ
-
Difficulty Level:Really Easy
-
Total Repair Time:30 - 60 mins
-
Tools:Nutdriver, Screw drivers
0 of 2 people
found this instruction helpful.
Was this instruction helpful to you?
Thank you for voting!
Refrigerator was freezing everything
First of all the part was not located in the section of the refrigerator that was shown in the video. I wasted a lot of time taking that section apart only to find that the part wasn't there. After some investigation I finally located the defective part. It was behind a piece of sheet metal that had to be bent out of the way to unscrew the part. If I hadn't bent it out of the way, it would have been a major disassembly to remove the sheet metal. Once removed, the installation of the new part was fairly simple. The only confusing thing about the installation was determinig which of the prongs on the part that the internal wire to the new part was to be attached. There were 3 options given and the instructions were not very clear as to which one I should use. Apparently I guessed correctly because the refrigerator seems to be functioning perfectly since the repair.
Parts Used:
-
Robert from Norwich, CT
-
Difficulty Level:A Bit Difficult
-
Total Repair Time:30 - 60 mins
-
Tools:Screw drivers, Socket set
Was this instruction helpful to you?
Thank you for voting!
Freezer iced over, water leaking into refridgerator
My fridge is a little different from the video model. The Controls in the fridge are located on an "arm" which swings down when the two screws are removed from the sides. It was not necessary to remove a front plate or knobs. However, I found when I got in to it that the old timer was not held by screws, but by plstic posts which had these "speed nuts" on them. This is a little metal plate which fits over the plastic post and bends to lock it in place. When you try to remove it, it acts like a barb, holding the little sucker on. I ended up bending the ends of those little suckers up tight against the post and twisting and pulling with needle-nose pliers. I broke one post like others before me commented, but one stayed intact. The only break at the top, so there ie still post left to hold the new timer. Once it was off, I was able to replace easily. The directions for choosing the right prong were a little confusing, but follow your gut and go with the wire colors. My schematic found in the bottom of the fridge did not look like any of the drawings, but I could match the wire colors. I also asked "Just Ask" for help, to make sure. My gut instinct was right. My fridge is now working again beautifully. If a housewife with no appliance repair knowledge can do it, so can you. I fixed my dryer with PartSelect too!I will never call another repair man until I have checked this site to see if I can do it myself. Bet I have saved $600 so far at least!
Parts Used:
-
Jennifer from Cincinnati, OH
-
Difficulty Level:A Bit Difficult
-
Total Repair Time:30 - 60 mins
-
Tools:Nutdriver, Pliers
Was this instruction helpful to you?
Thank you for voting!
not cooling could hear a clicking noise
With the help of the website I was able to verify that the part I removed (in the area of the clicking sound) was probably the part required for replacement. I ordered it, installed it... IT WORKS (I knew it the moment I plugged in the power cord and heard the compressor kick on). Saved me from buying a new fridge or calling a repairman. I'm a 58 year old woman with no appliance experience. I watched the videos and installed the part without any trouble. Thank you PartSelect for your easy to use website instructions and helpful hints.
Parts Used:
-
Deborah from Elkton, MD
-
Difficulty Level:Easy
-
Total Repair Time:30 - 60 mins
-
Tools:Screw drivers, Socket set
Was this instruction helpful to you?
Thank you for voting!
Refregirator would not freeze properly. It would stay in the defrost mode at times.
-
Eartis from Mckenzie, AL
-
Difficulty Level:Easy
-
Total Repair Time:30 - 60 mins
-
Tools:Nutdriver, Pliers, Screw drivers
Was this instruction helpful to you?
Thank you for voting!
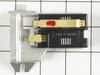
The dryer does not heat
I just knew it had to be the heat sensor unable to activate the actual ignition. I following the directions and video for the installation of the heat sensor #PS344761. It went very smoothly. Upon completion of the installation, the click, then the flame roared to life and I felt like a real do-it-selfer!! This was short lived. The wetness of the clothes had no effect. Something I did not do and I certainly know better was to check and see what was taking place before I replaced the "damaged" sensor. No, I was just so sure there was no need of that. You say, put the old back in and watch what happens....I recycled the old one immediately. Sigh! We have had two weeks of rain and I'm really tired of damp clothes everywhere. I will read other alternatives and report back. DClark, TX
Parts Used:
-
Diana from Nassau Bay, TX
-
Difficulty Level:Really Easy
-
Total Repair Time:30 - 60 mins
-
Tools:Nutdriver, Screw drivers, Wrench (Adjustable)
Was this instruction helpful to you?
Thank you for voting!
No heat
I feel like I have a new dryer now. I replace 3 of the 4 main components using parts select. Not only did they ship next day, but the tutorial videos with Steven were right on the money and self explanative.
Parts Used:
-
Steven from Oak Lawn, IL
-
Difficulty Level:Difficult
-
Total Repair Time:1- 2 hours
-
Tools:Nutdriver, Screw drivers, Socket set
Was this instruction helpful to you?
Thank you for voting!
Dryer would stat but no heat
The part came in very quickly. If you know how to remove the front panel, it is very easy to repair. The hard part is to diagnose the problem. The first thing to check is the igniter. If it comes on then you look for faulty limit switches. If you have lots of training in electronics and appliance repair this is very easy, if you do not I would not try this. I have 40 years in the repair business, It still took me 1hr. to find the problem. the switch was intermitted, one time the dryer would work the next time it would not. Good luck and happy repairs.
Parts Used:
-
Quinn from Los Alamos, NM
-
Difficulty Level:Easy
-
Total Repair Time:1- 2 hours
-
Tools:Nutdriver
Was this instruction helpful to you?
Thank you for voting!
would not heat
changed fuse,radiant flame sensor. no help. bought a new dryer. i don't think the gas valuve was opening.everything seemed to be working properly,just no gas.
Parts Used:
-
marc from bristol, WI
-
Difficulty Level:Easy
-
Total Repair Time:30 - 60 mins
-
Tools:Nutdriver, Screw drivers, Wrench (Adjustable)
Was this instruction helpful to you?
Thank you for voting!
No heat, therefore the clothes didn't dry.
I read some of the repairs of other people and this best described my situation. I ordered the Radiant Flame Sensor and followed the step by step instructions in the video for the repair, which by the way was excellent. It couldn't have been easier. My most difficult part of the repair was moving my dryer out of the laundry closet.
Parts Used:
-
Beverly from Plainfield, IL
-
Difficulty Level:Easy
-
Total Repair Time:30 - 60 mins
-
Tools:Nutdriver, Pliers, Screw drivers, Socket set, Wrench set
Was this instruction helpful to you?
Thank you for voting!
Dryer worked but did not heat
Followed troubleshooting steps. Checked thermal fuse (shorted)- OK. Checked igniter (about 70 ohms) - OK. checked flame sensor - (open) BAD (should read shorted). This part is normally shorted then opens when the igniter gets hot causing it to open and thus turns on the gas flow. An open flame sensor does not permit the igniter to turn on.
Parts Used:
-
Steven from Garden City, NY
-
Difficulty Level:Easy
-
Total Repair Time:30 - 60 mins
-
Tools:Nutdriver, Screw drivers
Was this instruction helpful to you?
Thank you for voting!
See below
The defrost timer that I ordered form you did the trick. My fridge was
running all the time and the fridge temp was 55 but the freezer was 10
below. The instructions did not say how to test the old one to compare with
the new on. However in the Readers Digest Home Repair book it did and the
test proved that it was defective. Your article said that with the system I
had, 65% on the time it was the timer. I ordered it and thank you it works
just fine. I do have another problem, maybe you can help. The fridge runs
for 6 minuets and stays off for 10 minuets. The temp in the freezer is 0
and the fridge is 35-40 on the warmest settings, but all is well.
Thank you
running all the time and the fridge temp was 55 but the freezer was 10
below. The instructions did not say how to test the old one to compare with
the new on. However in the Readers Digest Home Repair book it did and the
test proved that it was defective. Your article said that with the system I
had, 65% on the time it was the timer. I ordered it and thank you it works
just fine. I do have another problem, maybe you can help. The fridge runs
for 6 minuets and stays off for 10 minuets. The temp in the freezer is 0
and the fridge is 35-40 on the warmest settings, but all is well.
Thank you
Parts Used:
-
Patricia from Hobe Sound, FL
-
Difficulty Level:Really Easy
-
Total Repair Time:15 - 30 mins
-
Tools:Nutdriver, Screw drivers
Was this instruction helpful to you?
Thank you for voting!
Freezer was too cold and refrigerator was too warm
After receiving the part, I watched the installation video on the PartSelect website. The step by step demonstration was excellent. I felt confident I could do it myself after watching the video just once, and utilizing the written instructions that came with the part. The installation went smoothly, and my refrigerator is functioning correctly again. Best of all, I did not have to go through the hassle and expense of hiring a repair person!
Parts Used:
-
Jolinda from Eau Claire, WI
-
Difficulty Level:Really Easy
-
Total Repair Time:15 - 30 mins
-
Tools:Screw drivers, Socket set
Was this instruction helpful to you?
Thank you for voting!
Both the freezer and bottom of refrig too hot
Was very simple once I found out where the defrost timer was located. I had a friend walking me through trying to find the location on the phone. Not all models have them in the same place. Once the part was located all I had to do was remove the cover, unplug the old one and plug the new one in just the way the old one came off. The black wire was easy to locate on the old and just matched it up. Put the cover back on and plugged it in. It was no time till I started feeling it cool. Checked both top and bottom with thermomater and it was where it should be within 12 hours. I am happy and using it again. Was almost ready to throw it out. Did not know it was so cheap to fix one. Nothing anyone can't handle. If this woman can do it anyone can.
Parts Used:
-
Marcia from Kansas, OK
-
Difficulty Level:Easy
-
Total Repair Time:15 - 30 mins
-
Tools:Nutdriver, Screw drivers
Was this instruction helpful to you?
Thank you for voting!