




















GDF640HMM2ES General Electric Dishwasher - Instructions
Keep searches simple. Use keywords, e.g. "leaking", "pump", "broken" or "fit".
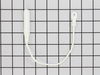
REPLACE DOOR CABLE
Removed the top two screws that hold the dishwasher to the cabinet , remove the two screws on the bottom panel and remove the panel. Screw the levelers all of the way up and pull out the dishwasher about 6 to 8 inch. Hook the new cabe on the spring and pull around pulley and attach it to the door bracket. I replaced both cables. Reverse to complete.
Parts Used:
-
Lonnie from YUKON, OK
-
Difficulty Level:Really Easy
-
Total Repair Time:30 - 60 mins
-
Tools:Screw drivers, Wrench (Adjustable)
3 of 3 people
found this instruction helpful.
Was this instruction helpful to you?
Thank you for voting!
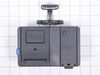
The soap dispenser was not opening during the washing cycle
Took off the door and separated the two door pieces. Unscrewed the old dispenser and replaced it with the new one.
Parts Used:
-
Stephanie from Huntsville, AL
-
Difficulty Level:A Bit Difficult
-
Total Repair Time:1- 2 hours
-
Tools:Nutdriver, Pliers, Screw drivers
4 of 7 people
found this instruction helpful.
Was this instruction helpful to you?
Thank you for voting!
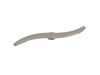
Loud banging sound when dishwasher was on.
The base of the spray arm literally just spins a little bit into place like a luer lock. Takes two seconds to replace.
Parts Used:
-
Joseph from KENNEDALE, TX
-
Difficulty Level:Very Easy
-
Total Repair Time:Less than 15 mins
3 of 4 people
found this instruction helpful.
Was this instruction helpful to you?
Thank you for voting!
Old silverware basket wore through and melamine utensils fell through and stuck to heating element which cost me $100 for repairman to remove

-
Diana from NAPLES, FL
-
Difficulty Level:Very Easy
-
Total Repair Time:Less than 15 mins
3 of 4 people
found this instruction helpful.
Was this instruction helpful to you?
Thank you for voting!
Dish rack prongs rusted and broke off
It wasnt exactly the right lower dish rack to hold silverware holder. Instead of the trouble of sending it back we will use it. Silverware holder takes up some of the space for other dishes.
Parts Used:

-
David from Hooksett, NH
-
Difficulty Level:Really Easy
-
Total Repair Time:Less than 15 mins
2 of 2 people
found this instruction helpful.
Was this instruction helpful to you?
Thank you for voting!
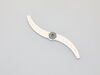
All 3 spray arms were stoped up.
Replaced all 3 spray arms in less than 10 minutes.The top one came in two pieces,the mounting bracket and the arm.Snap the bracket on the dishwasher first , then attach the arm to the bracket.
Parts Used:
-
Kenneth from SEBRING, FL
-
Difficulty Level:Very Easy
-
Total Repair Time:Less than 15 mins
-
Tools:Screw drivers
3 of 5 people
found this instruction helpful.
Was this instruction helpful to you?
Thank you for voting!
The lower dishwasher rack was rusting out. The rubber/epoxy coating was coming off causing rack to rust out.
-
Chris from LAS VEGAS, NV
-
Difficulty Level:Very Easy
-
Total Repair Time:Less than 15 mins
2 of 2 people
found this instruction helpful.
Was this instruction helpful to you?
Thank you for voting!
No water getting to the dishwasher
Researched what others have posted about on Parts select. That really helped with the diagnosis! Took a chance on a $28 part. Repairman was going to charge $150 just to show up, then diagnose, leave for 2 months while waiting for the part, charge another $150 plus the part to fix…
Just had to pull out dishwasher far enough to take the water supply line off. Then the water inlet solenoid then 2 more screws and a 2 pronged plug reattach water supply then done! 15 minutes MAX!!!
Just had to pull out dishwasher far enough to take the water supply line off. Then the water inlet solenoid then 2 more screws and a 2 pronged plug reattach water supply then done! 15 minutes MAX!!!
Parts Used:

-
William from JUNCTION CITY, OR
-
Difficulty Level:Really Easy
-
Total Repair Time:15 - 30 mins
-
Tools:Pliers, Screw drivers, Wrench set
2 of 2 people
found this instruction helpful.
Was this instruction helpful to you?
Thank you for voting!
The soap dispenser was broken os to save money I ordered one on-line
The repair instructions were great and the repair went well. The repair took less than an hour.
Thank you
Gary
Thank you
Gary
Parts Used:
-
GARY from SOAP LAKE, WA
-
Difficulty Level:Easy
-
Total Repair Time:30 - 60 mins
-
Tools:Nutdriver, Pliers, Screw drivers
2 of 2 people
found this instruction helpful.
Was this instruction helpful to you?
Thank you for voting!
washer would nt ru it beeped 3x and flash start lite
Looked upm the problem it said door wasn.t closed so cause was the door latch. put in the new one no change so I bought a new dishwasher
Parts Used:
-
Robert from ST AUGUSTINE, FL
-
Difficulty Level:Easy
-
Total Repair Time:30 - 60 mins
-
Tools:Screw drivers
2 of 2 people
found this instruction helpful.
Was this instruction helpful to you?
Thank you for voting!
Dishwasher wouldn't turn on without turning off the breaker for 30 seconds or more.
This is for a front facing control panel, not a top facing one. Likely similar process.
Remove lower splash guard, raise the feet all the way, pull out dishwasher about 6-inches. Remove the two small screws from the bottom of the door that hold the outer door liner to the inner door liner.
Disconnect the pull-cord from the spring assembly. Open the door about 1/3 and lift the door off. Be careful, there's not a ton of slack in the wire loom. Put it on towels on the floor to avoid scratching the door.
Separate the two door panels by sliding the outer liner upward and off.
Disconnect the steam vent by twisting off the cap on the inside and lifting up.
Using the pick tool, pull up on the plastic on the inside of the control panel assembly and pop it out from the little silver tabs on the outer door. Once all of them are popped (4 or 5), it will lift right off.
Disconnect the connector from the control board. Take out the two screws holding the control board in. Replace, and reverse procedure for reassembly.
Remove lower splash guard, raise the feet all the way, pull out dishwasher about 6-inches. Remove the two small screws from the bottom of the door that hold the outer door liner to the inner door liner.
Disconnect the pull-cord from the spring assembly. Open the door about 1/3 and lift the door off. Be careful, there's not a ton of slack in the wire loom. Put it on towels on the floor to avoid scratching the door.
Separate the two door panels by sliding the outer liner upward and off.
Disconnect the steam vent by twisting off the cap on the inside and lifting up.
Using the pick tool, pull up on the plastic on the inside of the control panel assembly and pop it out from the little silver tabs on the outer door. Once all of them are popped (4 or 5), it will lift right off.
Disconnect the connector from the control board. Take out the two screws holding the control board in. Replace, and reverse procedure for reassembly.
Parts Used:

-
Roman from AURORA, CO
-
Difficulty Level:A Bit Difficult
-
Total Repair Time:1- 2 hours
-
Tools:Nutdriver, Pliers, Socket set
2 of 2 people
found this instruction helpful.
Was this instruction helpful to you?
Thank you for voting!
roller wheel was melted.
I removed the old roller wheels and the new roller wheels snapped together and the simple instructions made the repair quick and simple..
Parts Used:

-
Julian T from Dalton, GA
-
Difficulty Level:Really Easy
-
Total Repair Time:30 - 60 mins
2 of 2 people
found this instruction helpful.
Was this instruction helpful to you?
Thank you for voting!
Lower try rusting out
Part was incorrect Compare that to GE site saying number on both ports to different parts try to return was half the course of what I paid ridiculous So apparently I'm stuck with it Check GE site you'll see the port is different from what your sound but the numbers are exactly the same No clips to support the utensil tray
Parts Used:
-
Ronald from cherry hill, NJ
-
Difficulty Level:Really Easy
-
Total Repair Time:30 - 60 mins
1 person
found this instruction helpful.
Was this instruction helpful to you?
Thank you for voting!
Water would not drain
The repair was just like the video that the agent sent me. And while I had the unit out of the cabinet I installed a part I have had for months which I ordered before I realized I had to take the unit out of the cabinet: the part was the seal for the bottom of the door. I recommend if you are ordering a pump order this part too an it is easy to install if you already have the dishwasher out of the cabinet.
Parts Used:
-
Ruth from TOPOCK, AZ
-
Difficulty Level:Really Easy
-
Total Repair Time:30 - 60 mins
-
Tools:Nutdriver, Pliers, Socket set
1 person
found this instruction helpful.
Was this instruction helpful to you?
Thank you for voting!
Replace the middle flatware basket
So easy, even I was able to do it. Slide tabs back on defective basket and remove both sides, then slide the tabs onto new basket and place in dishwasher. All Done!
Parts Used:
-
Marc from Brambleton, VA
-
Difficulty Level:Really Easy
-
Total Repair Time:30 - 60 mins
1 person
found this instruction helpful.
Was this instruction helpful to you?
Thank you for voting!