




















F32C747CT0 Frigidaire Dryer - Instructions
Keep searches simple. Use keywords, e.g. "leaking", "pump", "broken" or "fit".
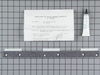
Zippers and other items on clothing getting stuck in drum.
-
Dan from Parker, TX
-
Difficulty Level:Really Easy
-
Total Repair Time:15 - 30 mins
1 of 2 people
found this instruction helpful.
Was this instruction helpful to you?
Thank you for voting!
Door catch broke and fell into dryer.

-
Genevieve from NORTH ANDOVER, MA
-
Difficulty Level:Very Easy
-
Total Repair Time:Less than 15 mins
1 of 2 people
found this instruction helpful.
Was this instruction helpful to you?
Thank you for voting!
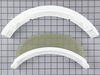
Lint screen had separated from frame letting lint into vent.
New screen and holder came in, removed screws holding the holder in place and reinstalled new one & dropped the screen in place.
Parts Used:
-
George W. from Wallkill, NY
-
Difficulty Level:Really Easy
-
Total Repair Time:Less than 15 mins
-
Tools:Screw drivers
1 of 2 people
found this instruction helpful.
Was this instruction helpful to you?
Thank you for voting!
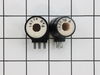
dryer would dry for the first 5 min them make noise with no heat.
my experience was just like the other responses. top comes off, 2 screws and the front comes off and the screws to the solenoids come off. Replaced the solenoids and put everything back together.
Parts Used:
-
Matthew from lake villa, IL
-
Difficulty Level:Really Easy
-
Total Repair Time:Less than 15 mins
-
Tools:Screw drivers
1 of 2 people
found this instruction helpful.
Was this instruction helpful to you?
Thank you for voting!
Heat was intermittent
Unplug dryer.
Put up the top of the dryer at the front, remove 2 screws holding the front of the dryer to the sides and remove front of dryer. Locate ignition coil on lower left. Remove 2 screws and bracket over the two ignition coils. Replace coils and reassemble in reverse.
Everybody's happy.
Put up the top of the dryer at the front, remove 2 screws holding the front of the dryer to the sides and remove front of dryer. Locate ignition coil on lower left. Remove 2 screws and bracket over the two ignition coils. Replace coils and reassemble in reverse.
Everybody's happy.
Parts Used:
-
mark from santa cruz, CA
-
Difficulty Level:Really Easy
-
Total Repair Time:Less than 15 mins
-
Tools:Screw drivers
1 of 2 people
found this instruction helpful.
Was this instruction helpful to you?
Thank you for voting!
Propane dryer would not ignite
Cover of the dryer pops off and hinges back. Use a flat screw driver to pop the clips on the front sides. Two phillips head screws hold the front panel on. Remove them then lift the panel off the clips at the bottom. Two phillips head hold the Ignition Coil bracket in place. Take note of the direction of the cable connection, it's not marked. Dryer would ignite intermittently. Clothes were not dry after 1 hour.
Parts Used:
-
chris from Hinesburg, VT
-
Difficulty Level:Really Easy
-
Total Repair Time:Less than 15 mins
-
Tools:Screw drivers
1 of 2 people
found this instruction helpful.
Was this instruction helpful to you?
Thank you for voting!
Lint screen was dilapidated and needed replacement.
I took the new screen out of the box. I removed the old lint screen from the dryer, and I put in the new screen. Real simple!
Parts Used:
-
Thomas from Norwich, CT
-
Difficulty Level:Really Easy
-
Total Repair Time:Less than 15 mins
1 of 2 people
found this instruction helpful.
Was this instruction helpful to you?
Thank you for voting!
Burner Want Stay Light
Removed burner, unpluged 2 plugs on coils. Removed 2 screws, replaced coils, pluged 2 plugs to coils replaced 2 screws. Reinstaled burner. Dryer works great.
Parts Used:
-
JOHNNY from LONG BEACH, MS
-
Difficulty Level:Really Easy
-
Total Repair Time:15 - 30 mins
-
Tools:Screw drivers, Socket set
1 of 3 people
found this instruction helpful.
Was this instruction helpful to you?
Thank you for voting!
The drum belt was making a squealing noise, and it looked frayed.
After watching the video that explained and showed how to replace the bearing assembly, installation was a breeze. Great company to do business with. Ordered the part and had it in two days, and the dryer was working again asap. Thanks PartSelect
PS this dryer is 23 years old.
PS this dryer is 23 years old.
Parts Used:

-
Margery from Hartland, ME
-
Difficulty Level:Really Easy
-
Total Repair Time:15 - 30 mins
-
Tools:Screw drivers, Socket set
1 of 3 people
found this instruction helpful.
Was this instruction helpful to you?
Thank you for voting!
drum turning out of balance, due to worn out drum glide top and bottom, and clothes being cougth beteween dryer frame and drum
I removed the top lid, then removed the front panel, to expose top and bottom drum glides attached to panel, then using a carpenter shisel, and cutting knive scraped away the old worn out glides, wiped clean with acetone the area were the new glides were being cemented. all of this thanks to couple of customers that had the same issues on their dryer, and documented step by step their own way to have this done, I just followed thru their experiences.
Parts Used:
-
guillermo from los angeles, CA
-
Difficulty Level:Easy
-
Total Repair Time:1- 2 hours
-
Tools:Screw drivers
1 of 3 people
found this instruction helpful.
Was this instruction helpful to you?
Thank you for voting!
Dryer Made High Pitch Noise, Rear Brg Worn And Drum Glides Worn
Removed top panel - disconnected harness from front panel- removed front panel- removed access door to belt tensioner on back panel - took belt off tensioner- removed drum removed upper felt with worn glide pads from front panel - removed most of old glue from panel (small file) and glued on new felt strip with glide pads - let sit to cure removed three phillips screws holding rear brg to the drum and removed brg - removed two phillips screws from rear panel holding plastic bracket, supporting bracket and back clip to the rear panel and replaced with new (use a drop of grease to hold the little ball brg in place during installation, make sure you don't loose it) install new brg to the drum (since they are self cutting screw difficult to install throught he drum, I "pre-cut" one of the threads then installed the rear brg to the drum, screw driver was of ratched type with a long extension - filled the plastic bracket with the grease - installed drum and front panel - tensioned the belt - installed top panel and access rear panel - done - I used the opprtunity to vaccum the interior of the dryer, lot of lint ----------------------------------------------------------------- there is a plastic guide on top of the heating elements which is burnt and should have been replaced but I could not find it in a catalogue. Anybody any idea? Also instructions for glide say to check the paint on the drum, what if it is damaged or gone?
Parts Used:
-
Joachim from Marlborough, CT
-
Difficulty Level:Easy
-
Total Repair Time:1- 2 hours
-
Tools:Screw drivers
0 of 1 people
found this instruction helpful.
Was this instruction helpful to you?
Thank you for voting!
The dryer was squeaking.
We followed the video exactly. The video itself was simple and straight forward. Our model was a bit different than the video's example. The video's example had their spring action for the belt configured differently. When we finally figured out the difference, we were able to finish the job within minutes. The dryer now runs like new. We aren't mechanically inclined. That's why it took us so long. I still would recommend this company to anyone because it saved us time and money. The video really helps!
Parts Used:
-
Kara from Doylestown, PA
-
Difficulty Level:A Bit Difficult
-
Total Repair Time:1- 2 hours
-
Tools:Screw drivers
0 of 1 people
found this instruction helpful.
Was this instruction helpful to you?
Thank you for voting!
The dryer squealed when operating.
I have a frigidaire dryer about 5 years old.
I first removed the top cover being careful to watch how the wires to the controls are connected. It is best to snap photos with your digital camera so you can remember how to reconnect the wires.
Pulling up on the drum, I lifted it out of the rear sleeve. Once out, you could easily see why it squealed. The metal bearing had groves on it where is made contact with the holder.
The difficult part of this was getting the 3 screws that hold the bearing to the drum off. The phillips screw head was easily marred if you don't have the proper screw driver bit. I think a better screw head would make the job easier.
After removal, the replacement was a snap. When everything was back together, the dryer sounded like new. The job took me about 2 hrs due to the hard part of removing the screws.
I first removed the top cover being careful to watch how the wires to the controls are connected. It is best to snap photos with your digital camera so you can remember how to reconnect the wires.
Pulling up on the drum, I lifted it out of the rear sleeve. Once out, you could easily see why it squealed. The metal bearing had groves on it where is made contact with the holder.
The difficult part of this was getting the 3 screws that hold the bearing to the drum off. The phillips screw head was easily marred if you don't have the proper screw driver bit. I think a better screw head would make the job easier.
After removal, the replacement was a snap. When everything was back together, the dryer sounded like new. The job took me about 2 hrs due to the hard part of removing the screws.
Parts Used:
-
Gland from Mount Pocono, PA
-
Difficulty Level:A Bit Difficult
-
Total Repair Time:1- 2 hours
-
Tools:Pliers, Screw drivers
0 of 1 people
found this instruction helpful.
Was this instruction helpful to you?
Thank you for voting!
worn bearing
Taking apart cleaning putting back together I don't have any h-t lube so ill be doing it again. Thanks for the part ill be calling again!
Parts Used:
-
Mike from Midlothian, VA
-
Difficulty Level:A Bit Difficult
-
Total Repair Time:1- 2 hours
-
Tools:Nutdriver, Pliers, Screw drivers, Socket set, Wrench (Adjustable), Wrench set
0 of 1 people
found this instruction helpful.
Was this instruction helpful to you?
Thank you for voting!
Machine was making a squeaking noise.
Followed video instructions that were emailed by you.
Parts Used:
-
scott from whitehouse station, NJ
-
Difficulty Level:Easy
-
Total Repair Time:1- 2 hours
-
Tools:Screw drivers, Socket set
0 of 1 people
found this instruction helpful.
Was this instruction helpful to you?
Thank you for voting!