




















F1399RYN LG Washer - Instructions
Keep searches simple. Use keywords, e.g. "leaking", "pump", "broken" or "fit".
Instructions on how to turn Clamp counter clockwise to get back on tube assembly
Watched videos but didn’t show the clamp had to be placed on counterclockwise
Parts Used:

-
Timothy from SCOTTSBORO, AL
-
Difficulty Level:A Bit Difficult
-
Total Repair Time:More than 2 hours
-
Tools:Pliers, Screw drivers
2 of 2 people
found this instruction helpful.
Was this instruction helpful to you?
Thank you for voting!
Door would not close because the part that was in the door that held it closed kept falling out.
Order the part through PartsSelect. It arrived in a few days and I (an 81 year old woman) replaced it within minutes with no help needed. It was super easy.
Parts Used:
-
Bobbie Joan from ASHEVILLE, NC
-
Difficulty Level:Really Easy
-
Total Repair Time:Less than 15 mins
2 of 2 people
found this instruction helpful.
Was this instruction helpful to you?
Thank you for voting!
the magnetic door plunger fell on the floor,
the magnetic door plunger fell on the floor, would not stay in place and did not hold the door closed. Received a new on, put it in place. works just like it is supposed to. took all of 2 seconds. great service from
Partselect. got the new part in less than a week.
Thank you
Partselect. got the new part in less than a week.
Thank you
Parts Used:
-
Lois from ARIZONA CITY, AZ
-
Difficulty Level:Really Easy
-
Total Repair Time:Less than 15 mins
2 of 2 people
found this instruction helpful.
Was this instruction helpful to you?
Thank you for voting!
The hot water valve was leaking
It went great. First of all, thank you Part Select for the video on how to do this myself. My home warranty company was giving me a hard time. Blah, blah, blah. A mechanic friend of mine referred me to this site. Within minutes I found the part I need and a GREAT!!!! price. Ordered it, got it super fast, fixed it my self and my second hand washer is no longer peeing all over the floor. Very very happy. I will definitely be a repeat customer, hopefully not anytime soon.
Thank you again for an amazing experience.
Thank you again for an amazing experience.
Parts Used:
-
christen from HUMBLE, TX
-
Difficulty Level:Very Easy
-
Total Repair Time:Less than 15 mins
-
Tools:Pliers, Wrench (Adjustable)
2 of 2 people
found this instruction helpful.
Was this instruction helpful to you?
Thank you for voting!
One Plunger latch broken off.
Line up the plunger with the existing slots in the door and push in.
NOTE: When testing it was evident that the magnet was not as strong as the original one. I would rate as one step up from useless.
NOTE: When testing it was evident that the magnet was not as strong as the original one. I would rate as one step up from useless.
Parts Used:
-
Frank from SMITHVILLE, TX
-
Difficulty Level:Really Easy
-
Total Repair Time:Less than 15 mins
3 of 5 people
found this instruction helpful.
Was this instruction helpful to you?
Thank you for voting!
Did not draw the water and did not finish its cycle
Remove where the water pumps are and remove the one that was damaged easily
Parts Used:
-
saul from NEW YORK, NY
-
Difficulty Level:Really Easy
-
Total Repair Time:15 - 30 mins
-
Tools:Pliers, Screw drivers
2 of 2 people
found this instruction helpful.
Was this instruction helpful to you?
Thank you for voting!
Washing machine stopped purging water from drum to hose
Do not pay a service company to come to your house to make this fix!!! If you have common sense, simple tools, a phone camera and some mini zip ties you can do this!
After watching a couple YouTube videos on installing a new motor I had the confidence to start the job. My biggest worry was I'd forget where a screw/part went so I took a lot of pictures as I disassembled. I also laid all the parts out on a table reflective of where they belonged on the machine. I learned washers aren't rocket science - YOU CAN DO THIS. The most difficult part of the fix was my washer was a different model so much of the caging was completely different than YouTube disassembly, but once I got into the machine it was fairly identical. Easily popped out the old, broken motor and inserted the new LG certified part. Reassembled in 1/2 the time of disassembly and my machine works like new:) Hoping to get another 10+ years out of this washer.
Thanks PartsSelect for the high quality certified LG part. Very nice quality and weight.
After watching a couple YouTube videos on installing a new motor I had the confidence to start the job. My biggest worry was I'd forget where a screw/part went so I took a lot of pictures as I disassembled. I also laid all the parts out on a table reflective of where they belonged on the machine. I learned washers aren't rocket science - YOU CAN DO THIS. The most difficult part of the fix was my washer was a different model so much of the caging was completely different than YouTube disassembly, but once I got into the machine it was fairly identical. Easily popped out the old, broken motor and inserted the new LG certified part. Reassembled in 1/2 the time of disassembly and my machine works like new:) Hoping to get another 10+ years out of this washer.
Thanks PartsSelect for the high quality certified LG part. Very nice quality and weight.
Parts Used:
-
Andria from EDINA, MN
-
Difficulty Level:Easy
-
Total Repair Time:30 - 60 mins
-
Tools:Pliers, Screw drivers, Wrench set
2 of 2 people
found this instruction helpful.
Was this instruction helpful to you?
Thank you for voting!
Dishwasher would not fill
Used Youtube to look for a set of repair instructions. From start to end 35 min.
The difficult part was getting the door back on. Only 1 Youtube video I watched stated Do not remove the 2 center screws at the top. Wish I had seen that video first.
Overall very easy to do.
The difficult part was getting the door back on. Only 1 Youtube video I watched stated Do not remove the 2 center screws at the top. Wish I had seen that video first.
Overall very easy to do.
Parts Used:
-
Jesse from CARNEGIE, PA
-
Difficulty Level:Really Easy
-
Total Repair Time:30 - 60 mins
-
Tools:Nutdriver, Pliers
2 of 2 people
found this instruction helpful.
Was this instruction helpful to you?
Thank you for voting!
Drain pump inoperable
1 tilt washer back
2 remove cover plate screw from front of drain filter access panel.
3 Remove cover plate and remove 2 more mounting screws .
4 go below washer and pull down sliding clip and move pump assembly back.
5 remove wires and 3 mounting screws around pump housing
6 Swap pump and re-attch wires
2 remove cover plate screw from front of drain filter access panel.
3 Remove cover plate and remove 2 more mounting screws .
4 go below washer and pull down sliding clip and move pump assembly back.
5 remove wires and 3 mounting screws around pump housing
6 Swap pump and re-attch wires
Parts Used:
-
Gregory from PITTSBURGH, PA
-
Difficulty Level:Really Easy
-
Total Repair Time:30 - 60 mins
-
Tools:Pliers, Screw drivers
2 of 2 people
found this instruction helpful.
Was this instruction helpful to you?
Thank you for voting!
No power to dishwasher. Confirmed that outlet had power coming out.
Turn off circuit breaker. Turn off water at shutoff valve usually located under sink. Disconnect water line from dishwasher. Disconnect wires for the power feed from cord, Marked corresponding wires upon removal for re-installation. Remove 2 mounting screws that secure dishwasher to counter. Slide dishwasher out from counter and turn upside down. Use a blanket to prevent scratching of surfaces. Locate component on the back portion of the dishwasher. Unplug 2 wiring harnesses. My part was held on by 2 phillip screws. One in front, the other in the back along the leg bracket support. Once removed, reverse the order of removal. The i a You Tube video you can locate fr this removal. They said that you needed to release a clip to get the part out. Mine had a screw holding it on the back side. This difference cause about an extra 1/2 hour before I was able to figure out that there was NO clip that was being shown on the video. After that, The replacement went smoothly and we were having the dishes washed later that day.
Parts Used:
-
JOHN from FORT MYERS, FL
-
Difficulty Level:Easy
-
Total Repair Time:30 - 60 mins
-
Tools:Screw drivers, Wrench (Adjustable)
4 of 9 people
found this instruction helpful.
Was this instruction helpful to you?
Thank you for voting!
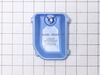
soap dispenser broke
just put new part in very simple only problem was shipping yall used fedex went to 4 states and one state twice they finally gave it to USPS so it took almost 9 days to get here
Parts Used:
-
Roger from LA CROSSE, VA
-
Difficulty Level:Really Easy
-
Total Repair Time:Less than 15 mins
2 of 3 people
found this instruction helpful.
Was this instruction helpful to you?
Thank you for voting!
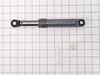
Washer was giving an error and not removing water/spinning
Followed instructions on YouTube link. Replaced the shock absorber and washer is working really well.
Parts Used:
-
Magalys from WYOMING, MI
-
Difficulty Level:Easy
-
Total Repair Time:1- 2 hours
-
Tools:Pliers, Screw drivers, Socket set, Wrench set
3 of 6 people
found this instruction helpful.
Was this instruction helpful to you?
Thank you for voting!
Washer leaks
Could not do the repair. Partselect sent me the wrong parts even though I gave them the model number and the brand they sent me the wrong parts.
Parts Used:
-
Wane from OLATHE, KS
-
Difficulty Level:Very Difficult
-
Total Repair Time:More than 2 hours
3 of 6 people
found this instruction helpful.
Was this instruction helpful to you?
Thank you for voting!
water & soap leaked into / on the tub bearings causing Bearing failure

-
Michael from SUGAR GROVE, OH
-
Difficulty Level:A Bit Difficult
-
Total Repair Time:More than 2 hours
-
Tools:Nutdriver, Pliers, Screw drivers, Socket set
1 person
found this instruction helpful.
Was this instruction helpful to you?
Thank you for voting!
My front load washer was making a loud roaring sound while spinning out the water
The repair went good but time consuming. I replaced both inner and outer tub bearings along with the tub seal. I removed top by removing two screws in back then pulling back slighty then lifting up. I removed soap tray by pressing down tab and pulling out. Loosened soap dispenser and folded back on top. I removed control panel then front door panel. Remove back panel. Remove motor and shocks and hanging springs which there are two. Disconnect the hoses attached to tub then pull the tub. Remove screws holding the tub halves together. Use punch to remove bearings. NOTE: If you put the bearings in the freezer prior to installing, they go in much easier. I used the old bearing, set it on the new bearing then I tapped the old bearing so not to damage new bearings. I replaced the seal then put everything back together. Not difficult but time consuming.
Parts Used:

-
Thomas from GREEN BAY, WI
-
Difficulty Level:A Bit Difficult
-
Total Repair Time:More than 2 hours
-
Tools:Pliers, Screw drivers, Socket set
1 person
found this instruction helpful.
Was this instruction helpful to you?
Thank you for voting!