




















F1399RYN LG Washer - Instructions
Keep searches simple. Use keywords, e.g. "leaking", "pump", "broken" or "fit".
Noisy and drum still full of water . Will not go to next cycle.
-
Marshall from ROSEVILLE, CA
-
Difficulty Level:Easy
-
Total Repair Time:30 - 60 mins
-
Tools:Pliers, Screw drivers
6 of 7 people
found this instruction helpful.
Was this instruction helpful to you?
Thank you for voting!
w/d repeatedly fills with water during warm or hot loads
E. Z. hardest part (which isn't hard) was moving the appliance to reach the back, then putting the appliance back into place. the actual repair (swapping out valve) took less time than that to do.
Parts Used:
-
kevin from WASHINGTON, DC
-
Difficulty Level:Very Easy
-
Total Repair Time:Less than 15 mins
-
Tools:Screw drivers
5 of 5 people
found this instruction helpful.
Was this instruction helpful to you?
Thank you for voting!
Magnetic Door Plunger would stay on washer and not stay in door.
-
SHIRLEY from HARTFORD CITY, IN
-
Difficulty Level:Very Easy
-
Total Repair Time:Less than 15 mins
6 of 8 people
found this instruction helpful.
Was this instruction helpful to you?
Thank you for voting!
Plunger/magnet capsule fell out of door recepticale because plastic locking tab broke off
Simply inserted new plunger/magnet back into door with thumb&finger until you hear the little locking tabs click. No tools required.
Parts Used:
-
Jo Ann from WYLIE, TX
-
Difficulty Level:Really Easy
-
Total Repair Time:Less than 15 mins
4 of 4 people
found this instruction helpful.
Was this instruction helpful to you?
Thank you for voting!
Washer shook in spin cycle
Took front of machine off to access 2 shocks, put back together then removed panel in back to access third shock, watched YouTube video first so things went smooth
Parts Used:
-
Kenneth from CONESUS, NY
-
Difficulty Level:Easy
-
Total Repair Time:30 - 60 mins
-
Tools:Pliers, Screw drivers, Socket set
4 of 4 people
found this instruction helpful.
Was this instruction helpful to you?
Thank you for voting!
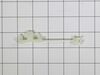
Drum spring broke
Removed top panal found broken parts and pieces, replaced spring and plastic spring holder. Straightened out and reattached drum front boot.
Parts Used:
-
Todd from LAKEWOOD, CO
-
Difficulty Level:Really Easy
-
Total Repair Time:30 - 60 mins
-
Tools:Pliers, Screw drivers
4 of 4 people
found this instruction helpful.
Was this instruction helpful to you?
Thank you for voting!
Making noise on the spin cycle
Disassembled washer, replaced bearings, seals and gasket. Watched instructional video to familiarize myself with the repair. Followed all steps as recommended, repair was straight forward without any surprises. Hardest part was removing the drum from the machine, somewhat heavy. Disassembled and replaced all bearings, seals, spider and gasket. Reinstalled in reverse order. Note: Upon tear down, I found the seal was pushed out, causing the bearing failure. I also found that the seal was installed incorrectly from LG. They have the seal lip facing the bearings, should be facing the water. This repair seems to be difficult, but was fairly self explanatory. All plug ins are color coded, all hoses are accessible with little effort. If you have basic skills you should be able to handle this repair.
Parts Used:

-
Ritchie from HOUMA, LA
-
Difficulty Level:A Bit Difficult
-
Total Repair Time:More than 2 hours
-
Tools:Pliers, Screw drivers, Socket set, Wrench set
4 of 5 people
found this instruction helpful.
Was this instruction helpful to you?
Thank you for voting!
washer dicharge water pump
-
stephen from FRANKLIN, NJ
-
Difficulty Level:Really Easy
-
Total Repair Time:30 - 60 mins
-
Tools:Pliers, Screw drivers
4 of 5 people
found this instruction helpful.
Was this instruction helpful to you?
Thank you for voting!
Error Code OE showed drain pump problem
I youtube searched this problem and found a video from partselect. I watched the video, purchased the part, and followed the video instruction step by step to repair the washer. Part with tax and shipping was $52.
Parts Used:
-
Joshua from DELTA, PA
-
Difficulty Level:Really Easy
-
Total Repair Time:30 - 60 mins
-
Tools:Nutdriver, Pliers, Screw drivers
5 of 8 people
found this instruction helpful.
Was this instruction helpful to you?
Thank you for voting!
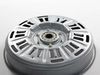
Displayed LE error even with a couple of pair of socks as a load
I ordered the Rotor Assembly and Sensor Assy..
Rotor Assy. was not the problem.
1 - 17mm bolt in the center of the rotor assy.
6 10mm bolts to take off the Stator assy.
once you have the Stator assy off, upplug the sensor assy and release the clips on the sensor assy. and remove.
Install the new sensor assy. and plug the electrical connection back in.
replace the 6 bolts and screw the bolts evenly around the Stator.
replace the Rotor Assy. and secure the 17mm bolt.
Replace the back cover (4 - philips screws.
Do a test load.
Rotor Assy. was not the problem.
1 - 17mm bolt in the center of the rotor assy.
6 10mm bolts to take off the Stator assy.
once you have the Stator assy off, upplug the sensor assy and release the clips on the sensor assy. and remove.
Install the new sensor assy. and plug the electrical connection back in.
replace the 6 bolts and screw the bolts evenly around the Stator.
replace the Rotor Assy. and secure the 17mm bolt.
Replace the back cover (4 - philips screws.
Do a test load.
Parts Used:
-
Ray from SHELTON, WA
-
Difficulty Level:Really Easy
-
Total Repair Time:30 - 60 mins
-
Tools:Screw drivers, Socket set
3 of 3 people
found this instruction helpful.
Was this instruction helpful to you?
Thank you for voting!
broken retainer
-
Gloria D. from MEMPHIS, TN
-
Difficulty Level:Very Easy
-
Total Repair Time:Less than 15 mins
3 of 3 people
found this instruction helpful.
Was this instruction helpful to you?
Thank you for voting!
Magnetic door plunger broke off, then got stuck inside the door and couldn't be removed for replacement.
I used another magnet to pull the old plunger out of the door and replaced it with the new part.
Parts Used:
-
Anne from MONROE, NY
-
Difficulty Level:Really Easy
-
Total Repair Time:Less than 15 mins
3 of 4 people
found this instruction helpful.
Was this instruction helpful to you?
Thank you for voting!
Door plunger had a broken tooth and would not stay in place.
-
Larry from IOWA PARK, TX
-
Difficulty Level:Very Easy
-
Total Repair Time:Less than 15 mins
3 of 4 people
found this instruction helpful.
Was this instruction helpful to you?
Thank you for voting!
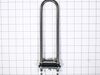
TE error. Replaced heater / thermistor assembly.
removed top and front. heater is at the base of the tub. the nut compresses the rubber seal and may take some wiggling to remove the old one.
Parts Used:
-
Andrew from BOTHELL, WA
-
Difficulty Level:Easy
-
Total Repair Time:30 - 60 mins
-
Tools:Screw drivers, Socket set
4 of 7 people
found this instruction helpful.
Was this instruction helpful to you?
Thank you for voting!
Water wouldn't drain
I followed the video. Everything worked exactly as described. i ran a quick cycle and everything seemed to be fine. Started a wash and the machine was going fine but stopped, and wouldn't drain. I thought that maybe it might be the Rotor Position Sensor assembly, which I had already purchased just in case.But first i drained the machine and checked out the pump filter. Plugged solid. I'm guessing when the pump went there must have been a lot of lint and debris in the machine. something you might want to check out, after that repair. Thanks. you guys saved me a couple of hundred dollars
Parts Used:
-
lawrence from DOBBS FERRY, NY
-
Difficulty Level:Really Easy
-
Total Repair Time:30 - 60 mins
-
Tools:Pliers, Screw drivers
2 of 2 people
found this instruction helpful.
Was this instruction helpful to you?
Thank you for voting!