




















DU8700XT0 Whirlpool Dishwasher - Instructions
Keep searches simple. Use keywords, e.g. "leaking", "pump", "broken" or "fit".
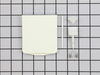
spring on dispenser broken
Removed cover and broken spring ,installed new spring and cover.Did it all in less than 10 minutes
Parts Used:
-
Delano from Durham, NC
-
Difficulty Level:Really Easy
-
Total Repair Time:Less than 15 mins
-
Tools:Screw drivers
Was this instruction helpful to you?
Thank you for voting!
the rollers were completly broken off & I had to lift the bottom tray in/out of the dishwasher
popped off the old rollers + tracks; then snapped on the new ones; as my granddaughter would say "easy peasy lemon squeezy". Took hardly any time at all. :-)
Parts Used:

-
Susan from Del Mar, CA
-
Difficulty Level:Really Easy
-
Total Repair Time:Less than 15 mins
Was this instruction helpful to you?
Thank you for voting!
detergent dispencer door spring and pin worn
I installed the opener spring in the direction it was needed to open the door then installed the pin. I placed the door in the position it goes and took a pair of pliers and squeezed the pin into the pin slot. the spring has to be forced into a tension position. I did this by sliding the spring to one side and forcing it into position, the other side is done the same way. works great
Parts Used:
-
perry from cynthiana, KY
-
Difficulty Level:Easy
-
Total Repair Time:15 - 30 mins
-
Tools:Pliers, Screw drivers
Was this instruction helpful to you?
Thank you for voting!
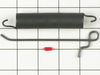
One spring on a dishwasher door was broken
I simply looked at the remaining spring to see which notch it needed to be attached to. I went in very well using a long needle nose plier. Works great.
Parts Used:
-
Jim from Alton, IL
-
Difficulty Level:Really Easy
-
Total Repair Time:15 - 30 mins
-
Tools:Nutdriver, Pliers
Was this instruction helpful to you?
Thank you for voting!
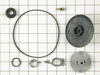
Dishwasher making a noise (lower area)
I reviewed your video and followed the steps, I appreciate the video. I used the tools described in the video; it was a simple process. Thank you Parts Select. .
Parts Used:
-
Fernando from El Paso, TX
-
Difficulty Level:Easy
-
Total Repair Time:15 - 30 mins
-
Tools:Nutdriver, Screw drivers, Wrench (Adjustable)
Was this instruction helpful to you?
Thank you for voting!
Dishes not clean and soap dispenser not completely rinsed out.
I looked in the bottom of the dishwasher after browsing the website regarding possible solutions. When I removed the bottom spray arm I noticed three screws missing from the pump housing. The loose pump outlet had allowed the seal to push out. Ordered-Normal shipping on the part.
Parts Used:

-
James from Trafalgar, IN
-
Difficulty Level:Easy
-
Total Repair Time:15 - 30 mins
-
Tools:Screw drivers
Was this instruction helpful to you?
Thank you for voting!
Rollers were broken on original parts
Unsnapped the old rollers and snapped in the new ones. Worked great and easy. I was very pleased that the parts came so soon as well. Thank You, Ms. Cason
Parts Used:
-
Claudia from Alexandria, VA
-
Difficulty Level:Really Easy
-
Total Repair Time:15 - 30 mins
-
Tools:Screw drivers
Was this instruction helpful to you?
Thank you for voting!
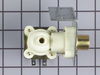
Wasn't getting any water into the washer
Turned off water and power. Used small nut diver to remove two upper screws from kick-plate, and loosen two screws in lower key slot of kick- plate. Removed kick- plate. Used plier to compress snap ring and remove hose to washer. Pulled off electrical connector. Used 5/6 wrench to remove copper water inlet. Used nut driver to remove two screws holding old valve. Once out removed the water connecting elbow from the old valve and installed it on the new valve. Reversed process to reinstall. Didn't even have to remove washer from the counter. My 25 year old washer is working like new again.
Parts Used:
-
Donald W from Austin, TX
-
Difficulty Level:Really Easy
-
Total Repair Time:15 - 30 mins
-
Tools:Nutdriver, Pliers, Screw drivers, Wrench (Adjustable)
Was this instruction helpful to you?
Thank you for voting!
Unfortunately, a mouse had made its home on top of our surround insulation. For hygienic reasons, I replaced the surround.
1. Turn off the electrical switch that powers the dishwasher. 2. Open the door of the dishwasher and find the two phillips head screws that secure the top of the dishwasher to the kitchen counter. 3. Remove the screws. 4. Gently move the machine side-by-side a bit while pulling it out onto the kitchen tile (be careful, the water-supply hose, electric cord, and dishwasher drain hose may not be long enough to allow you to pull it out very far - don't break or kink the hoses). 5. Remove (pull off) the black plastic fastener located on the bottom/rear of each side of the dishwasher. 6. Remove the old surround. 7. Lay the new wrap in place and secure with the two plastic fasteners. 8. Push back into place, secure the two screws, check your hoses.
Parts Used:
-
John from Taylor, TX
-
Difficulty Level:A Bit Difficult
-
Total Repair Time:15 - 30 mins
-
Tools:Screw drivers
Was this instruction helpful to you?
Thank you for voting!
Leaking seals
Used the diagram and disassembled and reassembled.Used most parts that were in kit as it also fit other models and did not need all the parts.
Parts Used:
-
Robert from Arlington Heights, IL
-
Difficulty Level:Easy
-
Total Repair Time:15 - 30 mins
-
Tools:Nutdriver, Pliers, Screw drivers
Was this instruction helpful to you?
Thank you for voting!
Lid Spring
Performed repair as to Video shown in receipt after purchase of spring plus we used a friend who has same dishwasher and has performed the same repair recently, video was easier to follow though. All you do is push off lid with a screwdriver and pop off as per instructions on video then unlatch spring from ledge and pull off post, then just reinsert new spring in reverse order or follow video instructions either way is easy and takes about 15-20 minutes to install
Parts Used:

-
Darrel from rosamond, CA
-
Difficulty Level:Easy
-
Total Repair Time:15 - 30 mins
-
Tools:Pliers, Screw drivers
Was this instruction helpful to you?
Thank you for voting!
clear/clean water filling bottom of dishwasher when not in use
This Whirlpool model has the water inlet valve located in the front left of the dishwasher. It was not necessary to remove the dishwasher from under the cabinet. Disconnect the power at the breaker box and turn off the water supply to the dishwasher. Place a towel under the Valve as there will be a small amount of drainage from the water lines and the Valve when disconnected. After removing the front plate on the bottom, I could easily access the 2 screws securing the Water Inlet Valve. Disconnect the water lines on the Inlet Valve and the power connection. . Mount the new Water Inlet Valve, re-connect the water lines and the power connection to the Valve. Turn on water supply and check for leaks. Turn on power.
Parts Used:
-
John from Parkville, MO
-
Difficulty Level:Easy
-
Total Repair Time:15 - 30 mins
-
Tools:Pliers, Screw drivers, Socket set
Was this instruction helpful to you?
Thank you for voting!
Dishwasher wouldn't drain
Watched "Steve" install the drain and wash impeller kit and then I did it.
Parts Used:
-
Teresa from Fallon, NV
-
Difficulty Level:Really Easy
-
Total Repair Time:15 - 30 mins
-
Tools:Nutdriver, Screw drivers, Wrench (Adjustable), Wrench set
Was this instruction helpful to you?
Thank you for voting!
missing part
-
Ruby from Saint Marys, GA
-
Difficulty Level:Really Easy
-
Total Repair Time:Less than 15 mins
-
Tools:Screw drivers
Was this instruction helpful to you?
Thank you for voting!
broken door spring
Very easy. Slide the dishwasher out a few inches, install spring per the good instructions, and slide the dishwasher back. Service was amazing. Part arrived just over 24 hours after I made the on-line order. I will use Part Select for all my future appliance parts needs.
Parts Used:
-
Jonathan from Newton, MA
-
Difficulty Level:Really Easy
-
Total Repair Time:Less than 15 mins
-
Tools:Screw drivers
Was this instruction helpful to you?
Thank you for voting!