




















CDB900NB5A Crosley Dishwasher - Instructions
Keep searches simple. Use keywords, e.g. "leaking", "pump", "broken" or "fit".
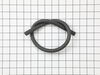
Water fill hose leaked.
It is rather easy to repair. After you remove the screws that secure the top of the dishwasher to the countertop you can slide the disherwasher out far enough to gain access to the hose. The hose pulls off after you slide the spring clips down the hose far enough so they no longer grab. Then simply reverse the order and you're done. Less than 30 minutes and you should no longer have to hand wash your dishes!
Parts Used:
-
Thomas from Wheaton, IL
-
Difficulty Level:Easy
-
Total Repair Time:15 - 30 mins
-
Tools:Pliers, Screw drivers
7 of 8 people
found this instruction helpful.
Was this instruction helpful to you?
Thank you for voting!
Dishwasher was leaking out of small gold nut
The nut was split down one side, so I first tried to sauder the nut back together. Saudering never goes well for me anyway, but I couldn't get a good enough seal around the nut to make it fit tightly. Then I had to cut off the clear plastic shield to get down in there, just before realizing you could just pull the white wire firmly and it would come loose from the nut. All I had to do then was unscrew the original nut, and screw on the new nut. Then, luckily I had mistakenly ordered an extra clear plastic shield and could replace the one I had previously cut. Dishwasher now runs like a charm!
Parts Used:

-
Emily from Kyle, TX
-
Difficulty Level:Easy
-
Total Repair Time:15 - 30 mins
-
Tools:Pliers
8 of 11 people
found this instruction helpful.
Was this instruction helpful to you?
Thank you for voting!
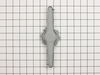
arm upper spray unit fell off
Easiest repair ever. Part came quickly & came fully assembled. Just screwed the part on by hand and it has worked like new ever since. The original part is 3 separate pieces but the new part was all in one & fit perfectly.
Parts Used:
-
Randall from Mather, CA
-
Difficulty Level:Really Easy
-
Total Repair Time:Less than 15 mins
7 of 8 people
found this instruction helpful.
Was this instruction helpful to you?
Thank you for voting!
Dishwasher was leaking
I turned the power off at the circuit breaker. I then took the access panel off the dishwasher at the bottom. I pulled the wire off the connector. I used a plied to remove the broken washer and replaced with new part. I put everything back in reverse order and ran the dishwasher. I than checked for leaks over two days while the machine was running and everything was fine. Thank you Parts Select for saving me $500!
Parts Used:
-
Tony from Lavallette, NJ
-
Difficulty Level:Really Easy
-
Total Repair Time:Less than 15 mins
-
Tools:Pliers
6 of 6 people
found this instruction helpful.
Was this instruction helpful to you?
Thank you for voting!
found spray arm on the rack
found spray arm on the rack looked at the top of rack saw a nut screw the nut looked at the clip found the ears broke off easy r&r.
Parts Used:
-
JOHN from LA QUINTA, CA
-
Difficulty Level:Really Easy
-
Total Repair Time:Less than 15 mins
7 of 9 people
found this instruction helpful.
Was this instruction helpful to you?
Thank you for voting!
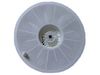
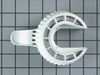
Filters and drain trap extremely clogged, causing dishwasher not to drain and leak.
-
Denise from EUGENE, OR
-
Difficulty Level:Really Easy
-
Total Repair Time:Less than 15 mins
6 of 6 people
found this instruction helpful.
Was this instruction helpful to you?
Thank you for voting!
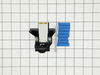
Latch assembly broken, Dw will not shut off upon door opening.
Remove Phillips head screws on inner part of door panel. Pull door cover up and remove face panel. Remove torx head screws from inner side of door and remove control panel. Remove two torx screws retaining door latch mechanism. Remove and replace two wiring harnesses from old latch to new latch noting polarity. I tall new latch using two original torx screws. Replace control panel and cover in reverse order. Test door latch function under any cycle. Washer should start with door closed and stop when opened
Parts Used:
-
Brian from NEW FAIRFIELD, CT
-
Difficulty Level:Very Easy
-
Total Repair Time:Less than 15 mins
-
Tools:Screw drivers
6 of 6 people
found this instruction helpful.
Was this instruction helpful to you?
Thank you for voting!
Wheels on lower rack melted
Very, very easy. Pop off the old wheels and snap the new ones into place on the rack.
Parts Used:

-
Jason from Lafayette, LA
-
Difficulty Level:Really Easy
-
Total Repair Time:Less than 15 mins
6 of 7 people
found this instruction helpful.
Was this instruction helpful to you?
Thank you for voting!
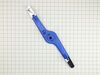
Lower arm came off and melted.
-
MICHAEL from TULSA, OK
-
Difficulty Level:Really Easy
-
Total Repair Time:Less than 15 mins
7 of 10 people
found this instruction helpful.
Was this instruction helpful to you?
Thank you for voting!
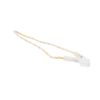
door falls open
Slid dishwater out from cabinet, replace cable, slid unit back in , secure ---done! door has tension now.
Parts Used:
-
Thomas from Huntington Station, NY
-
Difficulty Level:Really Easy
-
Total Repair Time:15 - 30 mins
-
Tools:Screw drivers
7 of 10 people
found this instruction helpful.
Was this instruction helpful to you?
Thank you for voting!
Dishwasher door switch would not engage properly
Removed 6 screws from door front panel. Removed two wiring connectors and screws fromdoor latch Replaced and all is great
Parts Used:
-
carol from CHAPEL HILL, NC
-
Difficulty Level:Really Easy
-
Total Repair Time:15 - 30 mins
-
Tools:Screw drivers
5 of 5 people
found this instruction helpful.
Was this instruction helpful to you?
Thank you for voting!
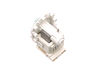
Drain pump had failed.
Disconnected power, water, and drain tube from dishwasher. Pulled dishwasher out and laid it on right side. It was not necessary to remove the pump motor. When disconnecting the water line, it is better to remove 3/8 line from the appliance adapter rather that the appliance adapter from the dishwasher as the nylon connection tends to strip.
Parts Used:
-
Michael from GLEN RIDGE, NJ
-
Difficulty Level:Easy
-
Total Repair Time:30 - 60 mins
-
Tools:Pliers, Screw drivers
5 of 5 people
found this instruction helpful.
Was this instruction helpful to you?
Thank you for voting!
Son ripped open dishwasher while running and wouldn't close
Replace the latch. Got to cut off old latch, trim wires, install latch, and put on the dishwasher door cover back on with screws
Parts Used:
-
DANIEL from BRADENTON, FL
-
Difficulty Level:Difficult
-
Total Repair Time:30 - 60 mins
-
Tools:Screw drivers
5 of 5 people
found this instruction helpful.
Was this instruction helpful to you?
Thank you for voting!
Original hose needed replacement due to leaking holes
The replacement hose was not as long and the original and therefore did not fit into the track made for the original one. Though it was long enough to work, an additional 4 inches would have been an exact fit.
As a result, the replacement had to be duct taped to the side of the dishwasher to hold it in place. Otherwise, the new hose was of better quality that the flimsy original. All in all, I could have picked up 3 feet of rubber hose from an auto parts or hardware store cheaper and done the job just as well, if not better.
As a result, the replacement had to be duct taped to the side of the dishwasher to hold it in place. Otherwise, the new hose was of better quality that the flimsy original. All in all, I could have picked up 3 feet of rubber hose from an auto parts or hardware store cheaper and done the job just as well, if not better.
Parts Used:

-
David from SPRING HILL, FL
-
Difficulty Level:A Bit Difficult
-
Total Repair Time:30 - 60 mins
-
Tools:Pliers
5 of 5 people
found this instruction helpful.
Was this instruction helpful to you?
Thank you for voting!
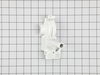
The small "nubs" on the assembly had worn off.
After several years of use and cleaning the small "nubs" that held the locking peice on the assembly under the jet arm had worn off. This allowed the whole thing to spin and the dishes weren't getting clean. Finding the part on the site was easy, it arrived amazingly fast and all is up and working great. I have used Parts Select 2 or 3 times in the past and have always had the same great results. Saved me a bunch in repair bills. Thanks
Parts Used:
-
Peggy from Minerva, OH
-
Difficulty Level:Really Easy
-
Total Repair Time:Less than 15 mins
-
Tools:Screw drivers
5 of 5 people
found this instruction helpful.
Was this instruction helpful to you?
Thank you for voting!