




















CDB900NB5A Crosley Dishwasher - Instructions
Keep searches simple. Use keywords, e.g. "leaking", "pump", "broken" or "fit".
Dishwasher leaking at the bottom of door
The door seal comes off easy. No need to take apart the door. The new seal fits snug. Make sure the notch on the right side of the door seal is installed to the right side of the bottom of door
Parts Used:

-
Richard from CASTLE ROCK, CO
-
Difficulty Level:Really Easy
-
Total Repair Time:Less than 15 mins
10 of 11 people
found this instruction helpful.
Was this instruction helpful to you?
Thank you for voting!
pump failing
The pump was progressively getting noisier over time to the point we could hear it in the back of the house. The dishes were always clean though. Turned off breaker. Removed two screws attaching unit to cabinet. Pulled out unit as far as I could and disconnected power. Turned unit slightly so I could reach water connection and disconnected it. Disconnected flexible drain hose, then could pull unit completely out of cabinet. Turned on it's side so I could access the motor. Removed two screws, steel retaining clip, then motor. Came with 2 new O rings which I lubricated and replaced. Reinstalled everything and problem solved, nice and quiet. One hour 15 minutes total.
Parts Used:
-
matthew from DULUTH, GA
-
Difficulty Level:Easy
-
Total Repair Time:1- 2 hours
-
Tools:Nutdriver, Pliers, Screw drivers
9 of 9 people
found this instruction helpful.
Was this instruction helpful to you?
Thank you for voting!
Dishwasher made squealing noise during drain portion of cycle
Replaced drain pump. It helped some but still hear some squealing. I suspect the main pump might be worn as well. The drain pump did have some "looseness" to it compared to the new part.
Parts Used:
-
Mark from NAPLES, FL
-
Difficulty Level:Really Easy
-
Total Repair Time:15 - 30 mins
-
Tools:Screw drivers
16 of 31 people
found this instruction helpful.
Was this instruction helpful to you?
Thank you for voting!
Washing poorly
Removed old spray arm, fitted new spray arm. VEry easy. Sorry I didn't do it months ago
Parts Used:
-
Donal from Dunwoody, GA
-
Difficulty Level:Really Easy
-
Total Repair Time:Less than 15 mins
10 of 13 people
found this instruction helpful.
Was this instruction helpful to you?
Thank you for voting!
Broke nubs off of stem when cleaning
I took the bottom parts out. This can basically be done without tools. You need a phillips to unscrew 3 screws to remove the stem. Then easily replace with the new one. Putting the spiny washing part was kinda weird because I was afraid to break the nubs off again. I took the whole bottom carriage out so I could see better, pushed down kinda hard and twisted the right way (figure out which way needs to be twisted before hand by looking through the bottom of the stem).
Parts Used:
-
Glen from Chicago, IL
-
Difficulty Level:Really Easy
-
Total Repair Time:Less than 15 mins
-
Tools:Screw drivers
9 of 10 people
found this instruction helpful.
Was this instruction helpful to you?
Thank you for voting!
Water leak underneath dishwasher
Unplugged dishwasher, removed the 2 wires clipped to the heating element, removed both cracked nuts, replaced with new nuts from PartSelect, clipped on wires, plugged in and did a test cycle. Based upon service quote from Best Buy, I saved myself $125.00 for just the call out, not including parts and labor.
Parts Used:

-
Richard from New Orleans, LA
-
Difficulty Level:Really Easy
-
Total Repair Time:Less than 15 mins
-
Tools:Nutdriver, Screw drivers, Wrench (Adjustable)
11 of 16 people
found this instruction helpful.
Was this instruction helpful to you?
Thank you for voting!
Bottom spray arm got stuck and melted
First I removed the bottom dish rack to gain access to the spray arm. I proceeded by pulling straight up on the bottom spray arm, it disconnected with gentle force. The replacement part was not identical, so I determined that it would work by inspecting hole patterns and heat shield configuration. Then I gently pushed the new spray arm onto the water supply tube making sure that the spray arm snapped into place. Due to extremely fast ground shipping (less than 20hrs from order to my door) the repair was done within 24 hrs! Boy...was my wife pleased!
Parts Used:
-
Thomas from Ebensburg, PA
-
Difficulty Level:Really Easy
-
Total Repair Time:Less than 15 mins
9 of 11 people
found this instruction helpful.
Was this instruction helpful to you?
Thank you for voting!
Old spray arm melted and clogged, had popped off once and laid against heat coil.
Popped off the old spray arm ... INTENTIONALLY, and put new one in. Had to lift off small strainer to allow old arm to release! Be sure to turn arm until it clicks into place, return small strainer/clip, and you are in business!
Most trouble I had was getting this old bo
y up off the floor afterward.
Dished so much cleaner now!
Most trouble I had was getting this old bo
y up off the floor afterward.
Dished so much cleaner now!
Parts Used:
-
Jerry from TUCSON, AZ
-
Difficulty Level:Really Easy
-
Total Repair Time:Less than 15 mins
7 of 7 people
found this instruction helpful.
Was this instruction helpful to you?
Thank you for voting!
The soap dispenser didn’t dispense the soap
After shutting off power to the dishwasher, I removed the two screws holding the door cover on the inside of the door sides, about 8 inches from the bottom of the door. I slid the cover down and off, and unplugged the wires to the dispenser. Then I removed the six screws holding the dispenser in place, removed the old dispenser, installed the new one, replaced the six screws and plugged the wires back in. The door cover and the two screws was all that was left. It took about ten minutes. Easy.
Parts Used:
-
Bernard from ACUSHNET, MA
-
Difficulty Level:Very Easy
-
Total Repair Time:Less than 15 mins
-
Tools:Screw drivers
7 of 7 people
found this instruction helpful.
Was this instruction helpful to you?
Thank you for voting!
plastic on the friction cable broke, and left the dishwasher door hanging open
I removed the bottom front of the unit, removed broken friction cable, hooked the new friction cable to the door, attached the cable to the spring, then reattached the spring in the hole provided in the back frane of the unit... Dissappointing how cheaply made these parts are, the dishwasher is just over 1 year old, these friction cables should be made to last longer....
Parts Used:
-
Chester from Sarver, PA
-
Difficulty Level:Really Easy
-
Total Repair Time:Less than 15 mins
-
Tools:Screw drivers
7 of 7 people
found this instruction helpful.
Was this instruction helpful to you?
Thank you for voting!
Upper spray arm fell/broke off
I researched the problem we had with our dishwasher and found the Parts Select website. My husband and I figured out how to remove the broken part and I selected and purchased the replacement.
The part was shipped quickly and when it arrived I changed the broken part with the replacement in less than five minutes. It seems to be working just fine.
I have added Parts Select to our "favorites" in case we have problems with any of our other appliances. Thanks Parts Select. :)
The part was shipped quickly and when it arrived I changed the broken part with the replacement in less than five minutes. It seems to be working just fine.
I have added Parts Select to our "favorites" in case we have problems with any of our other appliances. Thanks Parts Select. :)
Parts Used:
-
Sharon from Clinton Township, MI
-
Difficulty Level:Really Easy
-
Total Repair Time:Less than 15 mins
7 of 7 people
found this instruction helpful.
Was this instruction helpful to you?
Thank you for voting!
My dishwasher was leaking
This was too easy. I pulled out the bottom rack, spread apart the two clips which are at the bottom of the spray arm with my fingers and pulled out the old broken spray arm. The damage was visible. Then I took the new spray arm ( which looked different but still fit nicely) and gently pushed it into place. Done!
Parts Used:
-
Vincent from CORAM, NY
-
Difficulty Level:Really Easy
-
Total Repair Time:Less than 15 mins
8 of 10 people
found this instruction helpful.
Was this instruction helpful to you?
Thank you for voting!
leaking water under door
Well, I actually was unable to make a repair.
Initially I inspected the door gasket and it appeared to be hardened, so i thought a new gasket would fix the problem.
I ordered new gaskets and went back to make the repair. Well, as I was removing the door gasket, I noticed the door bottom had been damaged and was deformed beyond repair, which was the real reason it was leaking.,
Initially I inspected the door gasket and it appeared to be hardened, so i thought a new gasket would fix the problem.
I ordered new gaskets and went back to make the repair. Well, as I was removing the door gasket, I noticed the door bottom had been damaged and was deformed beyond repair, which was the real reason it was leaking.,
Parts Used:
-
John from PEABODY, MA
-
Difficulty Level:Difficult
-
Total Repair Time:More than 2 hours
-
Tools:Nutdriver, Pliers, Screw drivers, Socket set, Wrench (Adjustable)
8 of 10 people
found this instruction helpful.
Was this instruction helpful to you?
Thank you for voting!
Hinges bent , my kid fell on door while it was open
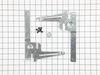
I went to your website found part# and parts diagram and ordered parts . I picked standard shipping . That evening e-mailed me they were instock and shipped also gave tracking # thet parts were here the next day.I removed the front dec panel then the 4 nut& bolts holding door to hinges(with door in closed position).Then I removed the 2 screws holding the hinges to the frame/axle. Replaced hinges with new ones .Put screws back in frame/axle . Put 4 nut and bolts back to secure door to hinges . Then i reinstalled under counter put new wheels on lower rack . I then filled it with dishes and ran a long cycle checked for leaks THEIR WERE NONE!!! THANK GOD !! Job complete, Thanks parts direct for a well designed website and detailed pics and parts#. TIM
Parts Used:

-
Timothy from North Haven, CT
-
Difficulty Level:Easy
-
Total Repair Time:30 - 60 mins
-
Tools:Screw drivers, Socket set
8 of 11 people
found this instruction helpful.
Was this instruction helpful to you?
Thank you for voting!
Replace sump gasket
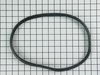
#1 rule, make sure you valve off the water before removing any hoses. Remove wire trays inside dishwasher and then pull out dishwasher far enough to disconnect water line and power cord. Remove center piece and screen covering sump inside the dishwasher. Turn dishwasher on its side and remove hoses to sump and pump. Disconnect power to sump pump. Loosen retaining nuts that secure the sump and remove. Replace old gasket on sump with new. Turn dishwasher upright. Be careful with placement of new gasket when reinserting sump so that the gasket doesn't come out of position and the sump is centered properly. Secure with retaining nuts from bottom. Reconnect power connector and hoses to sump. Pour enough water into the dishwasher to verify gasket doesn't leak... look with flashlight under dishwasher for signs of water dripping from sump. Reinstall screen and centerpiece in sump inside the dishwasher. Reconnect water line and power cord. Run through wash cycle while monitoring for leaks under dishwasher. Reinstall wire trays.
Piece of cake as long as you get the gasket installed properly and the sump centered correctly... do not overtighten the retaining nuts or it may force the gasket out of position when the screen is secure with the center locking piece over the sump.
Piece of cake as long as you get the gasket installed properly and the sump centered correctly... do not overtighten the retaining nuts or it may force the gasket out of position when the screen is secure with the center locking piece over the sump.
Parts Used:
-
Greg from Rockwall, TX
-
Difficulty Level:A Bit Difficult
-
Total Repair Time:30 - 60 mins
-
Tools:Nutdriver, Wrench (Adjustable)
15 of 32 people
found this instruction helpful.
Was this instruction helpful to you?
Thank you for voting!