




















CDB3100AWT Magic Chef Dishwasher - Instructions
Keep searches simple. Use keywords, e.g. "leaking", "pump", "broken" or "fit".
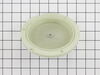
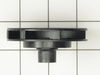
ratteling noise
unscrew screen and cover and unbolt impeller replace with new parts. everything goes back together easily, anyone with even minimal repair skills should be able to do this repair.
Parts Used:
-
gregory from Staten Island, NY
-
Difficulty Level:Easy
-
Total Repair Time:Less than 15 mins
-
Tools:Nutdriver, Screw drivers
2 of 2 people
found this instruction helpful.
Was this instruction helpful to you?
Thank you for voting!
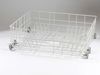
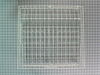
Rust and corrosion on the dishracks
I removed the bottom rack by simply rolling it out of the dishwasher, and removed (unsnapped) the rotating spray assembly. It was easily snapped into the center of the new dishrack. Next, I removed the roller stops from the rail holding the upper dishrack by following the marks (arrows) on the stops. I rolled out the upper dishrack, and rolled in the new one. Finally, I snapped the roller stops back into position.
Parts Used:
-
Amy from Chandler, AZ
-
Difficulty Level:Really Easy
-
Total Repair Time:Less than 15 mins
3 of 5 people
found this instruction helpful.
Was this instruction helpful to you?
Thank you for voting!
Leaks onto floor from lower section
First I replaced the door gasket as every one else. This cut drips about 30%. I then discoverd that the Rinse Aid circular dispenser cap was opened about half way. I turned the cap tightly clockwise to close and cut drips to 90% total. I czn live with the other 10%,
Parts Used:

-
Bernice from New Vernon, NJ
-
Difficulty Level:Really Easy
-
Total Repair Time:15 - 30 mins
2 of 2 people
found this instruction helpful.
Was this instruction helpful to you?
Thank you for voting!
Lower left corner of the door was leaking every so often.
I first made sure the new gasket was long enough and it matched the original. Next I used the tip of a screwdriver to pick out a corner of the old gasket and then pulled the entire thing out. I noticed the old one stopped at the bottom of the gasket well. The new one was much longer and I thought I might have to cut it to length. Well I'm glad I didn't. If you start on the right side and work your way up and around with a 2 in. piece longer then what the old one was. I carefully tucked it in the bottom and closed the door. Glad I didn't cut the new one. Instructions would have been nice. Overall an easy fix. I'm very mechanically inclined so I knew better.
Parts Used:
-
Frank from Ridgefield, CT
-
Difficulty Level:Easy
-
Total Repair Time:15 - 30 mins
-
Tools:Screw drivers
2 of 2 people
found this instruction helpful.
Was this instruction helpful to you?
Thank you for voting!
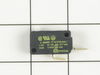
After 22 years of virtually trouble -free service, I could tell by the sound that something was wrong. Water fill ran too long. Float not stuck. Checked and found float switch stuck.
Very simple. Remove bottom panels. Remove one screw holding old switch in place. Move wire connections from old switch to new one. Cleaned and lubed the switch actuator. Mounted new switch. Checked that float and actuator worked freely. Left bottom panels off till I ran a load - just to be sure all was OK. Remount bottom panels...Done! P.S. Don't forget to turn power off to dishwasher any time you work on it!!
Parts Used:
-
Marc from GLENDALE, NY
-
Difficulty Level:Very Easy
-
Total Repair Time:15 - 30 mins
-
Tools:Screw drivers
2 of 2 people
found this instruction helpful.
Was this instruction helpful to you?
Thank you for voting!
lower rack rusted through all over
Took rack out of box, son removed water tower from old rack, put it on new rack, rolled new rack into dishwasher. Presto! Done!
Parts Used:
-
Judy from FENTON, MI
-
Difficulty Level:Really Easy
-
Total Repair Time:Less than 15 mins
2 of 2 people
found this instruction helpful.
Was this instruction helpful to you?
Thank you for voting!
When I would run my dishwasher, water would pool on the right side front of the washer. It was even dripping down into the basement. When I figured out it might be the the front door gasket, I ordered the part.
The repair was very easy! I simply pulled out the old gasket from around the front part of the dishwasher. I cleaned the area with a damp rag from any residue that was left on. I bent the long gasket in half and and pushed it in starting at the center of the dishwasher and went down one side at a time until the whole gasket was in. I then ran a short cycle on the dishwasher to make sure it was properly in place and the problem was fixed. NO MORE WATER ON THE FLOOR! I was so very happy to know my problem was fixed and I didn't need to buy a new dishwasher! It's been running great! :) ~ Elizabeth ~
Parts Used:
-
Elizabeth from CHEEKTOWAGA, NY
-
Difficulty Level:Very Easy
-
Total Repair Time:Less than 15 mins
2 of 2 people
found this instruction helpful.
Was this instruction helpful to you?
Thank you for voting!
Leaky door
-
George from Whitinsville, MA
-
Difficulty Level:Really Easy
-
Total Repair Time:Less than 15 mins
-
Tools:Screw drivers
2 of 2 people
found this instruction helpful.
Was this instruction helpful to you?
Thank you for voting!
Wouldn't come clean.
New pump housing filter was needed as the old one was plugged and distorted.
I
I
Parts Used:
-
Keith from Beaver Dam, WI
-
Difficulty Level:Easy
-
Total Repair Time:30 - 60 mins
-
Tools:Nutdriver
2 of 2 people
found this instruction helpful.
Was this instruction helpful to you?
Thank you for voting!
Soapy water leaking from bottom of dishwasher door
The dishwasher was running perfectly, but over time it leaked more and more. We were ready to throw it out, when I searched the internet and saw stories about a tiny gasket commonly failing. I couldn't believe that could be the trouble, but ordered the $3.75 part. Unscrewed the door, slipped out the old gasket and slipped on the new one. Screwed the door back. And the result? THE LEAK IS FIXED! Unbelievable. The old gasket had gotten stiff, probably exposure to soap, and it wasn't sealing properly. That $3.75 part saved us hundreds and hundreds of dollars and will give us extra years of use from our dishwasher.
Parts Used:
-
Ernest from Santa Ana, CA
-
Difficulty Level:Really Easy
-
Total Repair Time:30 - 60 mins
-
Tools:Socket set
2 of 2 people
found this instruction helpful.
Was this instruction helpful to you?
Thank you for voting!
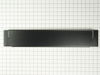
wanted the dishwasher to be black, instead of white
Ordered 3 parts first ..all came within two biz days..forgot the toe panel, called it was here the next day! The people that assisted me were wonderful! My husband did the repair. the dishwasher looks like new!!!!! I will order from Part Select again and again...extremley pleased. Now if only we could cover the Refrigerator in Black it would look like a whole new kitchen!
Parts Used:
-
Cynthia from Demoine, IA
-
Difficulty Level:Really Easy
-
Total Repair Time:30 - 60 mins
-
Tools:Nutdriver, Screw drivers
2 of 3 people
found this instruction helpful.
Was this instruction helpful to you?
Thank you for voting!
No water from rotating lower spray arm or center spindle; soap dispenser lid would not open.
Had service man: stated I would need new motor/pump at $400 complete. I didn't like the interior of new dishwashers. Nothing to lose, so I verified that the motor was working; reviewed short PartSelect video. Ref: very helpful PartSelect assembly diagrams with parts list. THANKS PS! Removed two dish racks (top rack: extend fully and flip the roller-keeper clips. Pull rollers and rack-pins apart) Then I started taking the pump apart all the way down to the pump base (fits into tub with seal - did not replace that seal). Very intuitive - some parts are tight and must be encouraged to come apart; take care of seals and o-rings; take notes of sequence if necessary. Look for parts requiring replacement. Unscrew Spray Tower Lower Extension Nozzle and lift off Spray Arm and two lower spray arm seals - check seals for wear. Unscrew pencil-like Spray Arm Support Nut. Cause: I found a totally-clogged Pump Housing Filter, a bit of steel wool about the size of my thumb (same size as water supply opening in bottom), and small piece of broken glass. Cleaned all parts coated with lime; new Pump Housing Filter (could not clean adequately). Cleaned the screens underside of filter support (difficult) with brush and wire. Replaced o-rings for Wash Impeller and Drain Impeller as a matter of principle. Only alignment requirement is with bottom water supplly hole. Everything works like new now! Recommendation: clean Pump Housing Filter annually.
Parts Used:


-
ROBERT from MORTON, IL
-
Difficulty Level:Easy
-
Total Repair Time:1- 2 hours
-
Tools:Nutdriver, Screw drivers
2 of 3 people
found this instruction helpful.
Was this instruction helpful to you?
Thank you for voting!
handle cracked and broke
My son was able to take the inside panel off to access area for handle to be replaced. A removal of approximately 12 screws and a little glue to glue felt pads in place VIOLA all fixed! Love this dishwasher so quiet and not ready to give it up.
Parts Used:
-
Ann Marie from Gulfport, MS
-
Difficulty Level:Really Easy
-
Total Repair Time:15 - 30 mins
-
Tools:Screw drivers
3 of 6 people
found this instruction helpful.
Was this instruction helpful to you?
Thank you for voting!
silverware basket bottom was broken
Took the handle off the old basket and put it on the new one and it was done.
Parts Used:

-
Betty Jean from Methuen, MA
-
Difficulty Level:Really Easy
-
Total Repair Time:Less than 15 mins
2 of 3 people
found this instruction helpful.
Was this instruction helpful to you?
Thank you for voting!
leak bottom right of door
I pulled out the old gasket and put in the new one. You need to stretch it a bit as you guide it in the track.
It was very easy but did not solve the problem.
Apparently, Maytag dishwashers are known for a leaky soap dish which I figured out after the door gasket was replaced. The problem is usually with the soap dish latch. You need to take the inner door off, disassemble the soap diehs, out a new gasket and latch on, reassemble, and you should be all set.
It was very easy but did not solve the problem.
Apparently, Maytag dishwashers are known for a leaky soap dish which I figured out after the door gasket was replaced. The problem is usually with the soap dish latch. You need to take the inner door off, disassemble the soap diehs, out a new gasket and latch on, reassemble, and you should be all set.
Parts Used:
-
Sandra from Paxton, MA
-
Difficulty Level:Really Easy
-
Total Repair Time:Less than 15 mins
2 of 3 people
found this instruction helpful.
Was this instruction helpful to you?
Thank you for voting!