




















BX521VCPWR (P1325030W W) Amana Refrigerator - Instructions
Keep searches simple. Use keywords, e.g. "leaking", "pump", "broken" or "fit".
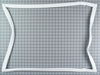
freezer door gasket needed replacing
Unplug refrigerator. Open freezer door. Lift the old gasket from the edge closest to the center of the door to expose the hex-head screws. Get a nut driver the appropriate size (1/4" if I remember) and loosen, but do not remove all of the screws. Once loosened, the old gasket can be removed. Slip the new gasket in just like the old one was. Lift the edges closest to the center of the door and tighten the screws. Test the fit of the new gasket by closing the door and sighting carefully down each of the four seal lines. Typically there will be spots where there are gaps, that is, the gasket is not "pulled out" enough to contact the refrigerator body. This is due to kinks that occur to the gasket during shipping. A paper that comes with the gasket notes the effect and recommends using a hair dryer to remove the kinks. Although the recommendation is to use the dryer BEFORE putting the gasket on, I used the dryer after, when I could see exactly where the gaps were. After noting the spots, open the door and with the dryer on HIGH setting, wave the hot air stream back and forth for a minute or two on each spot. Pull each spot out by hand with the hot air off and if/when the gasket is cool enough to touch but still warm. Close the door, inspect and repeat the process if necessary. I was able to achieve a good seal all the way around this way.
Parts Used:
-
Jeffrey from Palo Alto, CA
-
Difficulty Level:A Bit Difficult
-
Total Repair Time:30 - 60 mins
-
Tools:Nutdriver, Screw drivers
139 of 154 people
found this instruction helpful.
Was this instruction helpful to you?
Thank you for voting!
The Bearing Cup Assembly was broken and ice would jamb against it during the ice making cycle.
I removed the ice maker from the refrigerator, by removing one screw on the underside bracket and loosening the two screws at the top side, then lifting the ice maker off the loosened screws. I then unplugged the electrical harness that supplies power from the refrigerator to the ice maker. I then disassembled the ice maker by removing the front cover which is snapped in place, then removing two recessed screws at the front. I removed the broken part, I then reassembled the ice maker with the new part. I replaced the two recessed screws at the front and snapped on the cover. Then I reinstalled the ice maker in the refrigator by plugging in the harness, slipping the ice maker over the loosened screws in the refrigerator and replacing the screw that was removed from the underside bracket. Tightening all the screws completed the project.
Parts Used:

-
David from Chester, CA
-
Difficulty Level:Really Easy
-
Total Repair Time:Less than 15 mins
-
Tools:Nutdriver, Screw drivers
108 of 138 people
found this instruction helpful.
Was this instruction helpful to you?
Thank you for voting!
Lights inside refrigerator not working
I used a flat-head screwdriver to pop out the old light rocker switch. Then, I unplugged the wires, plugged them into the new light rocker switch, and then popped the new switch into the hole. That's it! Lights began working again.
Parts Used:

-
Clint from Rayville, MO
-
Difficulty Level:Really Easy
-
Total Repair Time:Less than 15 mins
-
Tools:Screw drivers
136 of 252 people
found this instruction helpful.
Was this instruction helpful to you?
Thank you for voting!
Leak at fill tube
Removed two screws that held cover plate. remove cover plate. Remove water hose, and clamp, by compressing clamp with pliers. Remove fill tube by pulling HARD, from back.
Replace fill tube, check to be sure that it entered ice maker properly. Replace hose and clamp.
Replace cover and screws.
Replace fill tube, check to be sure that it entered ice maker properly. Replace hose and clamp.
Replace cover and screws.
Parts Used:


-
Richard from Yarmouth, ME
-
Difficulty Level:Really Easy
-
Total Repair Time:15 - 30 mins
-
Tools:Nutdriver, Pliers
59 of 75 people
found this instruction helpful.
Was this instruction helpful to you?
Thank you for voting!
Gaskets deformed, leaking
The pro's esimate was over $500 for this one... It's very helpful to have a power tool screwdriver/nut driver. Loosen up the screws (#8 x 1/2" hex-head screws on mine) which hold the gasket in place. These screws also hold the plastic inner-portion of the refrigerator door in place. On my fridge, the parts of the gasket at the top and bottom closest to the hinge had progressively become deformed, perhaps because the outer part of the plastic was not holding the gasket in place hard enough (in these locations, I improved the clamping action by removing the screw and adding a #10 washer). In many locations, the screws turned out to have been driven in hard enough to strip the metal, so a hardware store run was needed to purchase #10 x 1/2" screws - be warned. Before trying to mount the gasket, I worked it over with a hairdryer on the floor (used an old towel to protect floor), to get out the worst of the kinks, then mounted it on the door, tucking the bead between the inner and outer door all the way around. This can be hard enough that if you do have a power tool nut driver, it may be preferable to completely remove the inner door portion, mount the gasket, then screw it back in place. Once the screws are tightened, use the hairdryer to soften the areas which don't contact properly, working on the gasket with your fingers and/or by repeatedly opening and closing the door, until you have smooth contact all the way around. I did not remove the doors completely, simply stowed the freezer compartment stuff in an ice chest, and used cardboard to close the main refrigerator compartment.
Parts Used:
-
david from Creve Coeur, MO
-
Difficulty Level:A Bit Difficult
-
Total Repair Time:1- 2 hours
-
Tools:Nutdriver, Screw drivers
47 of 51 people
found this instruction helpful.
Was this instruction helpful to you?
Thank you for voting!
Light Switch broke
An easy job for smaller hands. Removed the two bolts holding the light cover. Removed two electrical connections from the old switch by pinching the retaining clip,removed the switch, snapped in the new one and re-attached the connectors. Your online illustrations helped me to know that the plastic housing for the light switch would only swing down so far and was not intended to be removed. Saved me from breaking that plastic cover's tabs. This home repair saved me more than 5 times the cost of hiring a professional to do it. Very happy homeowner.
Parts Used:
-
James Richard from St. Cloud, MN
-
Difficulty Level:Easy
-
Total Repair Time:Less than 15 mins
-
Tools:Socket set
48 of 76 people
found this instruction helpful.
Was this instruction helpful to you?
Thank you for voting!
Ice building around door and on mullions, gasket deformed
Other stories I've read here speak to difficulty of changing a gasket with the door on the appliance. Whoa! Take the door off, tape cardboard over the opening, lay the door on its back and proceed. You will avoid racking or twisting the door and having the new gasket fit worse than the old. You can also thaw ice which often forms inside a door over time. Reinstall the door taking pains to shim properly so the new gasket is not overcompressed or allowing a gap. A dollar bill is a good gauge. It should resist a bit as it is pulled out after closing the door on it. This was not exactly step-by-step, just offered as advice from a whole bunch of experience.
Parts Used:
-
David from Emporia, KS
-
Difficulty Level:A Bit Difficult
-
Total Repair Time:More than 2 hours
-
Tools:Nutdriver, Screw drivers, Socket set, Wrench set
29 of 31 people
found this instruction helpful.
Was this instruction helpful to you?
Thank you for voting!
Icemaker arm was broken
The tiny piece of plastic that holds the wire that shuts off the icemaker, broke early on with our fridge (after just a few months.) We superglued it, but last week it bit the dust for good.
Once I got this part, I removed the freezer door and trays, and pulled the icemaker out by removing 3 flathead screws and unplugging the cables. Laying in the freezer on the floor was a bit unconfortable, but not too bad.
Then I inspected the icemaker. There was no obvious way to remove the part without disassembling the front of the unit (where the motor is) to release the spindle and free the part, so I did that - 3 or 4 nuts was all that held it together. Once that was out, I removed the spindle, swapped out the part, and put it all back together and back in the freezer. Plugged it in and waited.
It took a while to start making ice. Like 5 hours. Now it's going pretty slow (much slower than before.) Haven't had time to look into it, but my suspicion is the rubber hose that feeds water into the icemaker is blocked with ice or kinked. In any case, we have ice now (but not a lot), and the unit shuts itself off properly. However, we went from having too much ice (thing never shut off) to too little (thing makes ice too slow), so I need to shoot for somewhere in the middle ;)
Once I got this part, I removed the freezer door and trays, and pulled the icemaker out by removing 3 flathead screws and unplugging the cables. Laying in the freezer on the floor was a bit unconfortable, but not too bad.
Then I inspected the icemaker. There was no obvious way to remove the part without disassembling the front of the unit (where the motor is) to release the spindle and free the part, so I did that - 3 or 4 nuts was all that held it together. Once that was out, I removed the spindle, swapped out the part, and put it all back together and back in the freezer. Plugged it in and waited.
It took a while to start making ice. Like 5 hours. Now it's going pretty slow (much slower than before.) Haven't had time to look into it, but my suspicion is the rubber hose that feeds water into the icemaker is blocked with ice or kinked. In any case, we have ice now (but not a lot), and the unit shuts itself off properly. However, we went from having too much ice (thing never shut off) to too little (thing makes ice too slow), so I need to shoot for somewhere in the middle ;)
Parts Used:
-
Jason from Austin, TX
-
Difficulty Level:A Bit Difficult
-
Total Repair Time:30 - 60 mins
-
Tools:Nutdriver, Screw drivers
33 of 45 people
found this instruction helpful.
Was this instruction helpful to you?
Thank you for voting!
The light switch on the refridgerator broke - no light.
Once I saw the replacement part I understood how to pry out the switch with a small screwdriver. Then just unplug the old one, plug in the new one and pop it into place.
The PartSelect site made it easy to correctly identify the correct part, it was inexpensive, and the shipping was fast.
I'm very pleased!
The PartSelect site made it easy to correctly identify the correct part, it was inexpensive, and the shipping was fast.
I'm very pleased!
Parts Used:
-
David from Albany, OR
-
Difficulty Level:Really Easy
-
Total Repair Time:Less than 15 mins
-
Tools:Screw drivers
36 of 56 people
found this instruction helpful.
Was this instruction helpful to you?
Thank you for voting!
No ice in ice maker
Turn water and refrigerator off, use hair to thaw the ice maker filler tube, then remove the filler tube inside the freezer. Next remove the water supply line cover plate in back of the refrigerator. Now remove the speed clip at the white pvc elbow and pull out the supply line. Next, grasp the pvc elbow with pliers and pull hard to remove. The new filler tube is a 1 piece design (filler tube and elbow combined) and needs to be cut to the proper length. Mark it inside the freezer, remove it and cut to length. Now coat the outside flange with caulk or PU glue and snap into the opening. Put the speed clip on the elbow first and center it. Ensure that the spreader insert is in place in the plastic tube, then slide the supply line into the elbow untill completely engaged. Replace cover.
Parts Used:
-
Dave from dunwoody, GA
-
Difficulty Level:A Bit Difficult
-
Total Repair Time:15 - 30 mins
-
Tools:Pliers, Screw drivers
28 of 37 people
found this instruction helpful.
Was this instruction helpful to you?
Thank you for voting!
broken support post
very easy.....
1. removed the food items from the shelf
2. raised the shelf and removed the broken support post
3. inserted the new support post and guided the drawer rails to rest in the new support slots
4. cleaned the glass shelf and replaced the food items
5. made my wife very happy now that the veg drawer opens and closed like new.
1. removed the food items from the shelf
2. raised the shelf and removed the broken support post
3. inserted the new support post and guided the drawer rails to rest in the new support slots
4. cleaned the glass shelf and replaced the food items
5. made my wife very happy now that the veg drawer opens and closed like new.
Parts Used:
-
James from Ft Wayne, IN
-
Difficulty Level:Really Easy
-
Total Repair Time:Less than 15 mins
23 of 25 people
found this instruction helpful.
Was this instruction helpful to you?
Thank you for voting!
The gasket was worn and the freezer door had a poor seal.
I removed all the food items from the door. I removed the old gasket by loosening up the screws at the top of the door. The rest of the old gasket pulled out easily from the rest of the door. While the gasket was off, I took the time to clean up the door. I startede at the top of the door, loosening up the screws but not removing them. I then replaced each side of the door seperately. I found it helpful to have a flat blade to help poke the gasket into place. Because I was in the kitchen, I used a metal spatula. The corners were the trickiest. Using a hand held hair dryer helped to soften the gasket when it became cold. The freezer and fridge have good seals now and the refrigerator is good as new.
Parts Used:
-
Kay from Nashville, IN
-
Difficulty Level:A Bit Difficult
-
Total Repair Time:1- 2 hours
-
Tools:Socket set
22 of 24 people
found this instruction helpful.
Was this instruction helpful to you?
Thank you for voting!
Fridge in great shape, except door seal/gasket.
The fridge is in great shape but the seals/gaskets were shot. Between me, the wife and the kids the fridge door seemed like it was in constant motion.
Measue the seals, NOT THE DOOR. I measued from the straightest part of the seal at the edges and came within an quarter of an inch of what was offered here.
You have to take the seal off in stages, if you loosen all of the screws, the door will fall apart. Pick an edge (I started at the top) undo all of the screws and pull the old gasket off.
Then put the new gasket on the top (loosen a couple of screws on the sides if you can't get it to fit) and use a putty knife or a dull butter knife to sit it in place.
Once the top is in, screw the top screws back in and then take out the screws on the next side that you will work on. Go around the rest of the door the same way.
This is not a hard job, but it does have a pain in the rear factor. You have to move quick, especially on the freezer, but once you get the hang of it , it gets easy. But until you get the hang of it, you will be using some four letter words:)
I hope it extends the life of my fridge by another five years, so it is worth the money if the fridge is expensive. It will probably cost $100 or so for 2 seals (in my case a fride and a freezer seal), so if your fridge isn't worth the cost, you would probably be better off replacing the entire fridge.
Measue the seals, NOT THE DOOR. I measued from the straightest part of the seal at the edges and came within an quarter of an inch of what was offered here.
You have to take the seal off in stages, if you loosen all of the screws, the door will fall apart. Pick an edge (I started at the top) undo all of the screws and pull the old gasket off.
Then put the new gasket on the top (loosen a couple of screws on the sides if you can't get it to fit) and use a putty knife or a dull butter knife to sit it in place.
Once the top is in, screw the top screws back in and then take out the screws on the next side that you will work on. Go around the rest of the door the same way.
This is not a hard job, but it does have a pain in the rear factor. You have to move quick, especially on the freezer, but once you get the hang of it , it gets easy. But until you get the hang of it, you will be using some four letter words:)
I hope it extends the life of my fridge by another five years, so it is worth the money if the fridge is expensive. It will probably cost $100 or so for 2 seals (in my case a fride and a freezer seal), so if your fridge isn't worth the cost, you would probably be better off replacing the entire fridge.
Parts Used:
-
martin from philadelphia, PA
-
Difficulty Level:A Bit Difficult
-
Total Repair Time:1- 2 hours
-
Tools:Nutdriver
20 of 22 people
found this instruction helpful.
Was this instruction helpful to you?
Thank you for voting!
Ice stripper broken on ice maker
I unplugged the fridge. Loosened the 2 top screws on the ice maker and removed the lower screw. I disconnected the wiring harness and removed the Ice maker. I removed the plastic timer cover in front. I then loosened the screws on the face of the ice maker and removed the broken ice stripper and replaced it with a new one. Re-tightened the screws on the face, installed the timer cover, plugged in the wiring harness, re-attached the ice maker. Plugged the fridge back in and walla, it was making ice in 30 minutes!
Parts Used:

-
Kenneth from New Braunfels, TX
-
Difficulty Level:Really Easy
-
Total Repair Time:Less than 15 mins
-
Tools:Screw drivers
17 of 24 people
found this instruction helpful.
Was this instruction helpful to you?
Thank you for voting!
light inside fridge was flickering and clicking
tested bulb good ,replaced door switch first(least expensive)then ordered light socket and circuitboard.If clicking sound is heard replace circuitboard first to save on return shipping because the switch and socket where ok
Parts Used:
-
bill from escondido, CA
-
Difficulty Level:Easy
-
Total Repair Time:15 - 30 mins
-
Tools:Nutdriver
20 of 35 people
found this instruction helpful.
Was this instruction helpful to you?
Thank you for voting!