




















BX518VW (P1324301W W) Amana Refrigerator - Instructions
Keep searches simple. Use keywords, e.g. "leaking", "pump", "broken" or "fit".
fz door loss a shim and door was resting on top of refrigirator door
Remove 3 screws, took top hinge out, fz door and inserted shim...done.
Parts Used:

-
julio from pembroke pines, FL
-
Difficulty Level:Really Easy
-
Total Repair Time:Less than 15 mins
-
Tools:Socket set
3 of 5 people
found this instruction helpful.
Was this instruction helpful to you?
Thank you for voting!
Light didnt go on
The light rocker switch wasnt working. I found the part on the web site. It was so easy. I used a screw driver to pop out the old one and pop the new one in. It took 5 min. Thanks!!!
Parts Used:

-
dorotea from staten island, NY
-
Difficulty Level:Really Easy
-
Total Repair Time:Less than 15 mins
-
Tools:Screw drivers
3 of 5 people
found this instruction helpful.
Was this instruction helpful to you?
Thank you for voting!
Broke light switch while cleaning
use kitchen knife to pry out. replaced switch assemble and pressed back into place. Could not have done this with out help from previous customers. Thanks
Parts Used:
-
Gail from Golden, CO
-
Difficulty Level:Really Easy
-
Total Repair Time:Less than 15 mins
2 of 3 people
found this instruction helpful.
Was this instruction helpful to you?
Thank you for voting!
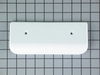
Freezer door handle was cracked
There is not much to tell. It was removing two screws, removing the hold handle and rescrewing the new handle.
Parts Used:
-
Daniel from Oklahoma City, OK
-
Difficulty Level:Really Easy
-
Total Repair Time:Less than 15 mins
-
Tools:Screw drivers
2 of 3 people
found this instruction helpful.
Was this instruction helpful to you?
Thank you for voting!
Ice from icemaker taste metallic; new ice maker directly from box
I did not do the repair yet, there is no schematic on how to route the hose; also no description of how to do the routing/connections.
Parts Used:

-
Samuel from ALEXANDRIA, VA
-
Difficulty Level:Difficult
-
Total Repair Time:More than 2 hours
2 of 3 people
found this instruction helpful.
Was this instruction helpful to you?
Thank you for voting!
Door rubbing on hinge
Installed missing spacer
Parts Used:

-
John from SAGINAW, MI
-
Difficulty Level:Very Easy
-
Total Repair Time:Less than 15 mins
-
Tools:Screw drivers
2 of 3 people
found this instruction helpful.
Was this instruction helpful to you?
Thank you for voting!
Ice maker ejector arm broke into.

-
Mary L. from Millsboro,, DE
-
Difficulty Level:Really Easy
-
Total Repair Time:Less than 15 mins
-
Tools:Screw drivers
16 of 46 people
found this instruction helpful.
Was this instruction helpful to you?
Thank you for voting!
New Ice maker was install but technician failed to transfer arm off old ice maker and put on new one..
Work was done by service tech. I ordered the arm for my mom to save time when tech came back to do the job correctly.
Parts Used:

-
Royal from RICHMOND, VA
-
Difficulty Level:Very Easy
-
Total Repair Time:15 - 30 mins
-
Tools:Pliers
2 of 4 people
found this instruction helpful.
Was this instruction helpful to you?
Thank you for voting!
broken hinge bearing on ice maker
Disconncted power, pulled plug on disconnect, loosened 3 ice maker attach screws, removed ice maker. carefully removed old broken part, to understand reasembly. Reinstalled new water fill & bearing part.. hung icemaker and tightened attach screws. Reattached electrical plug.. turned on power, it all worked. .took about 45 min to remove, 15 min to reinstall. Right tools needed re disassembly AND ASSEMBLY
Parts Used:

-
ROBERT from WESTFIELD, IN
-
Difficulty Level:Easy
-
Total Repair Time:30 - 60 mins
-
Tools:Nutdriver, Pliers, Screw drivers
3 of 7 people
found this instruction helpful.
Was this instruction helpful to you?
Thank you for voting!
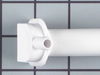
existing fill tube was leaking where the water line connected.
I found the instructions on line which seemed very simple but I soon learned otherwise. The instructions say to remove the water line and then firmly pull the fill tube out as it is a tight fit. I couldn't get the tube out and ended up removing the lower freezer door/tray, the upper tray and the icemaker where I found the water had frozen solid in the end of the tube. I used a hair dryer to melt the ice then I could easily remove the tube. After several attempts to install the new tube I finally inserted a 3/8" OD flex tube thru the passage then I was able to slide the new fill tube over this and get it in place. I then reinstalled the icemaker, upper tray and the door/tray assembly. Turned the water on the check for leaks then plugged the unit back in and all is working well.
Parts Used:
-
Ted from MORIAH, NY
-
Difficulty Level:Difficult
-
Total Repair Time:1- 2 hours
-
Tools:Nutdriver, Pliers
1 person
found this instruction helpful.
Was this instruction helpful to you?
Thank you for voting!
Ice maker broken. Quick fix
The plastic fill cup part is also used to hold one end of the wire “one/off” switch that is manually activated or activated when the ice tray is full. This wire piece fell out because one end, that is part of the plastic fill cup, broke off. The wire switch was fine.
The video demos show you exactly what to do. The repair man showed me a trick to speed up the testing process. The trick is to insert a wire jumper cable to actuate the ice maker and make it rotate. But this isn’t necessary.
Hardest part of this fix is emptying the freezer (bottom with a slide out door) and removing the door.
Why this part is so expensive is beyond me. But I’m happy it was available for a 24yo fridge that still works!!
The video demos show you exactly what to do. The repair man showed me a trick to speed up the testing process. The trick is to insert a wire jumper cable to actuate the ice maker and make it rotate. But this isn’t necessary.
Hardest part of this fix is emptying the freezer (bottom with a slide out door) and removing the door.
Why this part is so expensive is beyond me. But I’m happy it was available for a 24yo fridge that still works!!
Parts Used:
-
Tim from Berkeley, CA
-
Difficulty Level:Easy
-
Total Repair Time:1- 2 hours
-
Tools:Nutdriver, Screw drivers
1 person
found this instruction helpful.
Was this instruction helpful to you?
Thank you for voting!
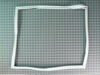
Replaced bad freezer door gasket
Removed screws and panel inside door. Cleaned and replaced gasket. Used blue painters tape for a few days to help keep door closed till gasket sealed properly. Easy repair.
Parts Used:
-
Gary C. from DOVER, PA
-
Difficulty Level:Really Easy
-
Total Repair Time:1- 2 hours
-
Tools:Nutdriver
1 person
found this instruction helpful.
Was this instruction helpful to you?
Thank you for voting!
Light switch broke
Pried out old part with screwdriver. Unplugged. When new part came, just plugged it in and pushed the part into place.
Parts Used:
-
Carolee from Spokane Valley, WA
-
Difficulty Level:Really Easy
-
Total Repair Time:Less than 15 mins
-
Tools:Screw drivers
2 of 4 people
found this instruction helpful.
Was this instruction helpful to you?
Thank you for voting!
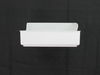
Ice maker bucket missing
Needed ice maker bucket for extra fridge. Part came the next day, and worked perfectly.
Parts Used:
-
Susan from Edgerton, KS
-
Difficulty Level:Really Easy
-
Total Repair Time:Less than 15 mins
1 person
found this instruction helpful.
Was this instruction helpful to you?
Thank you for voting!
Light rocker switch broke and refrigerator light couldn't go on.
I just popped out the old switch with a flat head screwdriver. Removed the connections and then installed new switch by reversing steps. Popped in back in and the light went on.
Parts Used:
-
Cathy from HOPATCONG, NJ
-
Difficulty Level:Very Easy
-
Total Repair Time:Less than 15 mins
2 of 4 people
found this instruction helpful.
Was this instruction helpful to you?
Thank you for voting!