




















ARR620 Amana Range - Instructions
Keep searches simple. Use keywords, e.g. "leaking", "pump", "broken" or "fit".
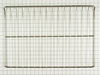
Replace oven racks
Very simple process of just ensuring you have the correct size racks and remove the old racks and replace them with the new ones.
Having ordered a lot of things on the internet, I am very pleased with using Part select and would "highly" recommend them to all!!
Having ordered a lot of things on the internet, I am very pleased with using Part select and would "highly" recommend them to all!!
Parts Used:
-
Gregory from Davenport, IA
-
Difficulty Level:Really Easy
-
Total Repair Time:Less than 15 mins
2 of 5 people
found this instruction helpful.
Was this instruction helpful to you?
Thank you for voting!
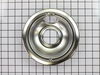
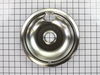
Drip pans needed to be replaced
1) removed heating elements. 2) removed drip pans. 3) installed new drip pans. 4) reinstalled heating elements
Parts Used:
-
Mark from ROSENBERG, TX
-
Difficulty Level:Very Easy
-
Total Repair Time:Less than 15 mins
1 of 2 people
found this instruction helpful.
Was this instruction helpful to you?
Thank you for voting!
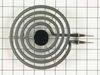
The three braces under the coils had weakened and fallen apart
I simply pulled out the old coils and plugged in the new ones. I saved the little pieces that accompanied each coil, because I didn't know what they were used for.
Parts Used:
-
Suzanne from COZAD, NE
-
Difficulty Level:Very Easy
-
Total Repair Time:Less than 15 mins
2 of 5 people
found this instruction helpful.
Was this instruction helpful to you?
Thank you for voting!
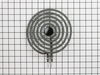
Burners didn't work
Shut off power to the stove.
I removed the screw that held the block in place. Then I lifted the top of the rage to get to the wires. I cut the wires from the old block and stripped back the insulation. Next I put the heat shrinking sleeve on. I attached the new block with the wire nuts, pulled the sleeve down and used a hair dryer to shrink them. Then you just hook it back on screw it in and your done.
I removed the screw that held the block in place. Then I lifted the top of the rage to get to the wires. I cut the wires from the old block and stripped back the insulation. Next I put the heat shrinking sleeve on. I attached the new block with the wire nuts, pulled the sleeve down and used a hair dryer to shrink them. Then you just hook it back on screw it in and your done.
Parts Used:

-
John from Norfolk, MA
-
Difficulty Level:Really Easy
-
Total Repair Time:15 - 30 mins
-
Tools:Pliers, Screw drivers
2 of 5 people
found this instruction helpful.
Was this instruction helpful to you?
Thank you for voting!
Burner broken
I removed the block, cut and spliced the wires to the new block and installed the burner. I used the new style block kit and saved about $30. It worked great!
Parts Used:
-
J. R. from Ellettsville, IN
-
Difficulty Level:Really Easy
-
Total Repair Time:15 - 30 mins
-
Tools:Screw drivers
1 of 2 people
found this instruction helpful.
Was this instruction helpful to you?
Thank you for voting!
Sockets burnt out.
Repair was very east. The suppliers package had all of the necessary parts ceramic wire nuts wire Ect. Excellent.
Will buy from Part Select Appliance again.
Will buy from Part Select Appliance again.
Parts Used:
-
James from Bear, DE
-
Difficulty Level:Really Easy
-
Total Repair Time:15 - 30 mins
-
Tools:Screw drivers
1 of 2 people
found this instruction helpful.
Was this instruction helpful to you?
Thank you for voting!
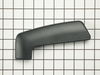
broken end cap held by two screws
-
WARD from WELLESLEY, MA
-
Difficulty Level:Really Easy
-
Total Repair Time:15 - 30 mins
-
Tools:Screw drivers
1 of 2 people
found this instruction helpful.
Was this instruction helpful to you?
Thank you for voting!
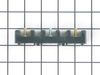
I snapped a bolt on the main power terminal block when connecting the pigtail.
Removed the small metal panel covering the main power terminal in back of the electric range. Removed the nuts holding the red, white and black electrical wires from the range using the appropriate socket (there will be two nuts on each bolt end). Removed the two screws holding the main power terminal block with appropriate screw driver. Connect the new main power terminal block to the range using the two screws. Reconnect the red, black and white electrical wires coming from the range using one nut for each wire. IMPORTANT: do no over tighten the nuts because the bolts could snap. Reconnect the pigtail and secure the small metal panel covering the main power panel.
Parts Used:
-
Frank from Palm Coast, FL
-
Difficulty Level:Easy
-
Total Repair Time:15 - 30 mins
-
Tools:Screw drivers, Socket set
3 of 8 people
found this instruction helpful.
Was this instruction helpful to you?
Thank you for voting!
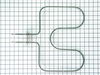
The bake element did not get hot any longer
Unscrewed the 2 screws in the back of the element. Disconnected the unit from the bake of the oven, replaced the two ends of the new element and screwed in the 2 screws. Oven works great! Took less than 5 minutes to complete.
Thank you for the FAST delivery!!
Thank you for the FAST delivery!!
Parts Used:
-
Donna from Lodi, CA
-
Difficulty Level:Really Easy
-
Total Repair Time:Less than 15 mins
-
Tools:Screw drivers
1 of 2 people
found this instruction helpful.
Was this instruction helpful to you?
Thank you for voting!
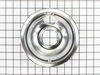
drip-bowls wore out
i read the installation instructions and followed them. first i made sure that each heating element was off. next i carefully removed each one (a total of 4) from it's plug and lifted the worn out drip-bowl up and replaced it with the new one. finally i pluged in (a total of 4) heating elements and turned them on to make sure them were working and they did.
Parts Used:
-
Ronald E from Rochester, NY
-
Difficulty Level:Really Easy
-
Total Repair Time:Less than 15 mins
1 of 2 people
found this instruction helpful.
Was this instruction helpful to you?
Thank you for voting!
Simple - needed to replace the drip pans on the stove between tenants in a rental apartment
This wasn't much of a repair -- rather a replacement of a simple abused part. At the same time, PartSelect allowed me to order what I needed after two failed attempts to buy replacements that would fit the range. I'll remember PartSelect if we need parts for other older appliances in the rental units.
Parts Used:
-
Tama from Pacific Grove, CA
-
Difficulty Level:Really Easy
-
Total Repair Time:Less than 15 mins
1 of 2 people
found this instruction helpful.
Was this instruction helpful to you?
Thank you for voting!
Terminal block arc'ed because a wire had become loose.
Ordered and received the terminal block. Installed it along with a new 220V power cord and the appropriate insulator . Ensured the terminals were tight with a nut driver. Reinstalled cover. Then, using the control panel, I did a function check on all the heating elements, clock, oven light, to satisfy all operational requirements. All checked good! And, I was relieved that the control panel had not been shorted out as the terminal block was due to a loose connection. Easy fix.
Parts Used:

-
Larry from Scranton, KS
-
Difficulty Level:Really Easy
-
Total Repair Time:Less than 15 mins
-
Tools:Nutdriver, Screw drivers
1 of 2 people
found this instruction helpful.
Was this instruction helpful to you?
Thank you for voting!
My drip pans were in bad shape
I removed the old and repaced with new. I never ordered anything one day and got it the next. I'm impressed
Parts Used:
-
Sandra from Oldsmar, FL
-
Difficulty Level:Really Easy
-
Total Repair Time:Less than 15 mins
2 of 5 people
found this instruction helpful.
Was this instruction helpful to you?
Thank you for voting!
no heat element burned out
removed 2 philips screws holding element, un plugged element. new element arrive next day, insalled in less then 1 min. turned on, setoven for 375 pizza in 20 min later
Parts Used:
-
michael from columbus, NE
-
Difficulty Level:Really Easy
-
Total Repair Time:Less than 15 mins
-
Tools:Screw drivers
1 of 2 people
found this instruction helpful.
Was this instruction helpful to you?
Thank you for voting!
Something got pushed into the control panel and the end cap cracked at the screw locations.
First I removed the three screws, then removed the old end cap, cleaned the area, and reinstalled the new end cap, then attached with the three screws.
Parts Used:
-
Michael from Baltimore, MD
-
Difficulty Level:Really Easy
-
Total Repair Time:Less than 15 mins
-
Tools:Screw drivers
1 of 2 people
found this instruction helpful.
Was this instruction helpful to you?
Thank you for voting!