




















AER6603SFB5 Amana Range - Instructions
Keep searches simple. Use keywords, e.g. "leaking", "pump", "broken" or "fit".
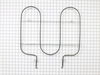
burned out upper element
turn the light on in the oven go to the breaker box and shut off power to the oven when light is out is good indicator remove two screws in back of oven that secure element to back then remove two screws on top inside the oven to almost finish removal. phillips head screwdriver and needle nose pliers and two small spring loaded clamps are all you will need to accomplish thismove the upper element side to side until the connectors are exposed in the back of the stove pull the two wires out about 4 inches should be enough place the spring loaded clamps on each wire so as to not allow them to slip back in the stove body. take the needle nose and while holding the clamp remove the connector from each wire once this is done place the new element in the stove and reconnect the clips on the end off the element move the wires and connectors back into the openings on the stove and replace the two screws replace the two upper screws check all screws for tightness go to the breaker box and turn on the power takes about thirty minutes
Parts Used:
-
jack from kalispell, MT
-
Difficulty Level:Easy
-
Total Repair Time:15 - 30 mins
-
Tools:Pliers, Screw drivers
Was this instruction helpful to you?
Thank you for voting!
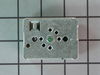
8 Inch electric burner not getting hot
I determined the problem by swapping the 8 inch burner with a 6 inch burner. the 8 inch got hot when connected to the 6 inch wire harness. This told me that the 8 inch burner was good. The 6 inch failed to get hot so I determined the next logical thing was the power to the 8 inch burner. I used a multi meter to determine that power was getting into the control unit but no voltage was getting out. The controller was bad. I ordered a new controller and after unplugging the stove, replaced the controller in about 10 minutes. (Critical part of repair is to unplug unit from wall -220 volts!)
Parts Used:
-
John from Dover, NJ
-
Difficulty Level:Easy
-
Total Repair Time:15 - 30 mins
-
Tools:Pliers, Screw drivers
Was this instruction helpful to you?
Thank you for voting!
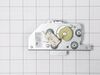
Gas range would not go into self cleaning mode. When pushing the self clean button, would get three beeps!
The malfunction was narrowed down to the oven door motor lock, located at the upper left back of the unit. Removed two panels from the back of the unit, 8 screws. Then the motor, 2 screws, 4 wire connectors. Reversed the procedure for the installation, and solved the problem. About 30=35 minutes for the job. If your handy at all, it should not be a problem.
Parts Used:
-
Lee from Saint James, NY
-
Difficulty Level:Easy
-
Total Repair Time:15 - 30 mins
-
Tools:Pliers, Screw drivers
Was this instruction helpful to you?
Thank you for voting!
Broil heater exploded. The corner was burned/ corroded.
Unplug power. Remove panel on the back. Unplug heater.From front remove 3 screws and remove heater. Installed new heater. On the back restored connections - squized the lugs to have better connection. Put panel back. Plug the power and see if the coil get red. It looked good. Used oven few times it works fine. Difficoult part is to clean oven all around from accumulated grease. First repair for this stove, most of the time spend on figuring out what to open, no instructions.
Parts Used:
-
Amadeusz from Simi Valley, CA
-
Difficulty Level:Really Easy
-
Total Repair Time:30 - 60 mins
-
Tools:Pliers, Screw drivers
Was this instruction helpful to you?
Thank you for voting!