




















ABL2222FES Refrigerator - Instructions
Keep searches simple. Use keywords, e.g. "leaking", "pump", "broken" or "fit".
COILS WAS ICING ON REFRIGRATOR SOLID ICED FOUND ENTIRE COILS
CHECK DEFROST THERMOSTAT WITH VOLT OHM METER AND FOUND THERMOSTAT BAD ALSO OHMED OUT HEATER AND HEATER CHECKED OK INSTALLED HEAT SRINK CONNECTORS ON NEW DEFROST THERMOSTAT PUT SYSTEM BACK INTO O
PRATION ALSO CHANGED WATER FILTER ON REFERGRATOR
SYSTEM WORKING OK AND NO ICING OF COILS THANKS WADE BOYLES
PRATION ALSO CHANGED WATER FILTER ON REFERGRATOR
SYSTEM WORKING OK AND NO ICING OF COILS THANKS WADE BOYLES
Parts Used:

-
WADE from PILOT MTN, NC
-
Difficulty Level:Very Easy
-
Total Repair Time:1- 2 hours
-
Tools:Nutdriver, Pliers, Screw drivers, Socket set
5 of 5 people
found this instruction helpful.
Was this instruction helpful to you?
Thank you for voting!
water leaked when the paddel was pushed
Followed the video on parts page. I was worried I would brake the cover but learned from the video the right way to remove the front plate. I found the video very informing. Thank you for saving me a service call and the part cost was minimal compared to a new refrigerator .
Parts Used:

-
Monica from EDMOND, OK
-
Difficulty Level:Really Easy
-
Total Repair Time:30 - 60 mins
-
Tools:Nutdriver, Pliers, Screw drivers
6 of 8 people
found this instruction helpful.
Was this instruction helpful to you?
Thank you for voting!
Freezer would not defrost, refrigerator was warm, no airflow into fridge
Info on your site allowed me to determine the most likely cause of the problem, defrost thermostat, and that fixed it. Good installation instructions on the site too. Part was super easy to install. Hardest part was removing the snap-in/screwed-in plastic parts that held the sliding baskets and back panel in place. Didn't break any.....Thank You!
Parts Used:
-
SCOTT from ELECTRIC CITY, WA
-
Difficulty Level:Easy
-
Total Repair Time:30 - 60 mins
-
Tools:Screw drivers, Socket set
6 of 8 people
found this instruction helpful.
Was this instruction helpful to you?
Thank you for voting!
Power cord was cut
I removed the 5/16 inch hex head nuts holding the rear access panel where the power cord was connected. Once removed, I released the Molex plug and ground wire. I connected the new cord, screwed in the ground and installed the rear panel. Having the exact OEM part made the job quick and easy.
Parts Used:

-
Frederick from Hanover, MA
-
Difficulty Level:Easy
-
Total Repair Time:15 - 30 mins
-
Tools:Nutdriver
6 of 8 people
found this instruction helpful.
Was this instruction helpful to you?
Thank you for voting!
My old icemaker lost some of the nonstick surface and the ice didn't want to come out
I unhooked the wire harness from the ref. and took out three screws and pulled the old unit out. I than changed a few parts from the old icemaker to the new and reattached the new ice maker to the ref. and plugged the wire back in. everything is working fine. No problems. Also I was very happy with the ordering process. Thank you!!
Parts Used:

-
Thomas from Ruth, MI
-
Difficulty Level:Easy
-
Total Repair Time:15 - 30 mins
-
Tools:Screw drivers
6 of 8 people
found this instruction helpful.
Was this instruction helpful to you?
Thank you for voting!
Icemaker would not fill with water.
Removed screw under ice maker. Tilted ice maker up to remove unit from upper two screws. Disconnected plug at rear of freezer. Attached wiring harness, baler arm and cover from old to new ice maker. Reinstalled in reverse order. Had ice within one hour. Very easy fix.
Parts Used:
-
Linford from Cedarville, NJ
-
Difficulty Level:Really Easy
-
Total Repair Time:15 - 30 mins
-
Tools:Screw drivers
7 of 11 people
found this instruction helpful.
Was this instruction helpful to you?
Thank you for voting!
froze and cracked
unsrewed the back plate, removed three tubes. Then I removed old valve and replaced with new. Pluged two harnesses back in the new valve. Truned water on and checked for leaks and operated the filtered water tap and the ice maker. All went well.
I really like your site for the pictures included with the part, I like to see what I'm ordering.
I really like your site for the pictures included with the part, I like to see what I'm ordering.
Parts Used:

-
Charles from FISHERS, IN
-
Difficulty Level:Really Easy
-
Total Repair Time:15 - 30 mins
-
Tools:Nutdriver
6 of 8 people
found this instruction helpful.
Was this instruction helpful to you?
Thank you for voting!
Drawer glide broke

-
James from Woodridge, IL
-
Difficulty Level:Really Easy
-
Total Repair Time:Less than 15 mins
-
Tools:Screw drivers
7 of 11 people
found this instruction helpful.
Was this instruction helpful to you?
Thank you for voting!
The Switch Broke...Absolutely Fell Apart.
I simply removed the old switch using 2 small screwdrivers and the old switch case popped out. I then upluged the wires from the old switch and reversed the process. Didn't take longer than 5 minutes begining to end! Thank you for the great service! Duncan quaid
Parts Used:

-
Duncan from Metairie, LA
-
Difficulty Level:Really Easy
-
Total Repair Time:Less than 15 mins
-
Tools:Screw drivers
5 of 5 people
found this instruction helpful.
Was this instruction helpful to you?
Thank you for voting!
The toe grille broke when we 1st put it on
-
Rana from Pittsburg, KS
-
Difficulty Level:Really Easy
-
Total Repair Time:Less than 15 mins
5 of 5 people
found this instruction helpful.
Was this instruction helpful to you?
Thank you for voting!
The ice maker stopped making ice.
I did a few tests with the old ice maker and determined that it was the ice maker itself that was faulty. The replacement part I ordered exceeded my expectations in the time it took to get the part. I reused the arm, wire harness and clamps from the old icemaker. Then it was a simple install into the bottom freezer compartment, turning on the water supply and bingo...lots of ice cubes.
Parts Used:
-
Thomas from Cupertino, CA
-
Difficulty Level:Easy
-
Total Repair Time:15 - 30 mins
-
Tools:Nutdriver
5 of 5 people
found this instruction helpful.
Was this instruction helpful to you?
Thank you for voting!
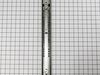
Broken black plastic spring mechanism inside freezer rail
Remove rail and removed broken black plastic spring mechanism with new one and then replace rail.
Parts Used:
-
Ronald from WESTERVILLE, OH
-
Difficulty Level:Really Easy
-
Total Repair Time:30 - 60 mins
-
Tools:Nutdriver, Screw drivers
7 of 12 people
found this instruction helpful.
Was this instruction helpful to you?
Thank you for voting!
needed a replacement crisper pan drawer for fridge
The part came the next day, very quick. The wrong size ended up in box we recieved. The part # we ordered was correct, just a mix up in the packaging process. I called and the customer service dept. had a new correct crisper pan delivered to my door two days later. Even with the mix up it was very fast and a good price compared to other sites. I would order again in the future.
Parts Used:

-
Angela from Oconomowoc, WI
-
Difficulty Level:Really Easy
-
Total Repair Time:Less than 15 mins
5 of 6 people
found this instruction helpful.
Was this instruction helpful to you?
Thank you for voting!
Water Fill Cup Broke
The Ice maker unit had to be removed and the shaft had to also be removed, which required dis-assembling the motor drive. The thickness of the shaft and the bearing fill cup prevents it from simply pushing it in place. Other than that I have Ice.
Parts Used:

-
Sam from Las Vegas, NV
-
Difficulty Level:A Bit Difficult
-
Total Repair Time:30 - 60 mins
-
Tools:Screw drivers
5 of 7 people
found this instruction helpful.
Was this instruction helpful to you?
Thank you for voting!
Refrigerator light would not stay on
Removed the 2 screws holding the light bulb shield, then the 4 uolding the metal panel. Unplugged the olw door switch and replaced.
reassembled the pieces.
reassembled the pieces.
Parts Used:
-
Dave from Manchester Center, VT
-
Difficulty Level:Easy
-
Total Repair Time:15 - 30 mins
-
Tools:Nutdriver, Socket set
4 of 4 people
found this instruction helpful.
Was this instruction helpful to you?
Thank you for voting!