




















ABL2222FES Refrigerator - Instructions
Keep searches simple. Use keywords, e.g. "leaking", "pump", "broken" or "fit".
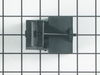
Not freezing or keeping thing cold in fridge
Once I got the right part the repair was quick and easy. All I had to do is get the old part off with a screwdriver and curved needle nose pliers and the old part came right off. The new part went in just as easy. Quick and easy. Less than 15 minutes.
Parts Used:
-
BRUCE from AMMON, ID
-
Difficulty Level:Really Easy
-
Total Repair Time:Less than 15 mins
-
Tools:Pliers, Screw drivers
8 of 10 people
found this instruction helpful.
Was this instruction helpful to you?
Thank you for voting!
refrigerator made noise, smelt hot
While investigating problem (at 11:30PM of course) I saw the overload burst into flames. Problem Identified! Easily found and ordered part. Next day delivery. Exact same part easily plugged in. Total refrigerator down time was less than 40 hrs.
Thanks,
Terry
Thanks,
Terry
Parts Used:

-
Terry from Pittsfield, NH
-
Difficulty Level:Easy
-
Total Repair Time:15 - 30 mins
-
Tools:Nutdriver, Screw drivers
9 of 13 people
found this instruction helpful.
Was this instruction helpful to you?
Thank you for voting!
The Freezer defrosted and everything on the top and the bottom spoiled
i had used your web site before and i read several problems that your readers had. i went to the back of the unit, removed the bottom cover and right there the i found the run capacitor and i chaged it. since i had only ordered this part to save money i went back and ordered the Start Device which when i took it off it was completely burned. the replacement part came labeled with 2 different compressor #, so i picked the one that i had and unpluged each wire. the part may differ from the one that it's in the unit but it worked when i pluged everything back on. it also helps to take a picture of everything before removing the wires in case you have to leave it and come back later. i hope to use this refrigerator another 10 years. thank you all for your help.
Parts Used:

-
Jorge from Miami, FL
-
Difficulty Level:Easy
-
Total Repair Time:15 - 30 mins
-
Tools:Nutdriver
10 of 16 people
found this instruction helpful.
Was this instruction helpful to you?
Thank you for voting!
Power surge cause compressor to stop functioning
Followed the YouTube video linked to the Compressor Start Device and Capacitor I purchased. The repair was just as easy as the technician in the video said it would be. Removed the back panel, remove the clamp, worked the Compressor Start Device and Capacitor off the electrical prongs and replace it with the new one. After I reassemble the refrigerator, it was fully operational. Very easy to do and only required a few tools.
Parts Used:
-
Alvin from ORANGE PARK, FL
-
Difficulty Level:Really Easy
-
Total Repair Time:15 - 30 mins
-
Tools:Pliers, Screw drivers, Socket set
7 of 7 people
found this instruction helpful.
Was this instruction helpful to you?
Thank you for voting!
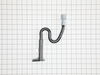
leaking water onto floor
replaced the poorly designed "duck bill" drain with this P trap. Very simple repair done by accessing through the back of the refrigerator. The video on this website walked me right through the repair. It did however fail to mention that the ice has to be removed from the inside. I had to remove the drawer face and pull outs. Then the ice maker and back panel are removed. I used a heat gun and screwdriver to chip and melt the ice build up. If one had the luxury of having another refrigerator to move food in to you could just unplug the unit until the ice melts.
Parts Used:
-
Mark from ALTO, MI
-
Difficulty Level:Really Easy
-
Total Repair Time:30 - 60 mins
7 of 8 people
found this instruction helpful.
Was this instruction helpful to you?
Thank you for voting!
Broken Piece

-
anthony from georgetown, IL
-
Difficulty Level:A Bit Difficult
-
Total Repair Time:30 - 60 mins
-
Tools:Screw drivers
7 of 8 people
found this instruction helpful.
Was this instruction helpful to you?
Thank you for voting!
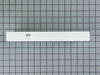
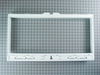
Busted shelf / divider
Repair was a piece of cake. My only wish would have been a little more informed on a few other parts I could have replaced as well. It obviously would have increased my cost, but would have simplified the install process, and still would have been cheaper then calling a service guide. I would recommend buying and installing the new gaskets when doing this. And possibly the steel support bar that goes threw the plastic shelf. Removing that bar was the most difficult task, difficult only that if you used to much force, SNAP!! and then your pissed! and have to start all over.
Parts Used:
-
Rocco from Elmhurst, IL
-
Difficulty Level:Easy
-
Total Repair Time:30 - 60 mins
9 of 14 people
found this instruction helpful.
Was this instruction helpful to you?
Thank you for voting!
The plastic wheel broke in half at the right front of the refrigerator.
The good news is that the part (the wheel was available.) I bought two in the event that the other wheel may break in the future. The bad news is that the housing that holds the wheel was riveted together by the wheel axle. It would have been nice to know that before I bought the part and if the housing with the wheel installed was available. The refrigerator was at my summer house a hundred miles away. Anyway, we had to grind the end of the riveted axle to dislodge it from the wheel housing. With the axle dislodged from the housing we were able to install the wheel and then hammer the end of the axle flat to keep in place, like the original rivet installation. It is not perfect but it held and should be fine. I am glad I was able to get the part and will be back in the future, if in need of other parts.
Parts Used:

-
Ralph from Camillus, NY
-
Difficulty Level:A Bit Difficult
-
Total Repair Time:30 - 60 mins
-
Tools:Pliers, Screw drivers, Socket set
7 of 8 people
found this instruction helpful.
Was this instruction helpful to you?
Thank you for voting!
light not working in fridge
It was so easy!
Thanks for the rush to my home on the part.
I just unscrewed the plate that locks in the light switch (screwdriver) and unplugged the old faulty part and plugged in the new switch, screwed the cover back on and I was done!
Easy!
And I am not Mr. Fix-it!
Thanks for the rush to my home on the part.
I just unscrewed the plate that locks in the light switch (screwdriver) and unplugged the old faulty part and plugged in the new switch, screwed the cover back on and I was done!
Easy!
And I am not Mr. Fix-it!
Parts Used:

-
Michael from East Meadow, NY
-
Difficulty Level:Really Easy
-
Total Repair Time:Less than 15 mins
-
Tools:Screw drivers
7 of 8 people
found this instruction helpful.
Was this instruction helpful to you?
Thank you for voting!
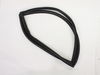
torn refrigerator gasket
went your web site.It said I did not need to remove any parts.So removed the old one and installed the new one while talking on the telphone.
Parts Used:
-
Steven from Lyles, TN
-
Difficulty Level:Really Easy
-
Total Repair Time:Less than 15 mins
7 of 8 people
found this instruction helpful.
Was this instruction helpful to you?
Thank you for voting!
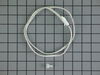
Freezer temperature goes down to -20*F before compressor stops but refrigerator side remains normal 38*F and compressor makes a grunting noise while running.
Unplug ref then remove lower(freezer) panel plus trays and thermistor’s cover/holder then remove the evaps cover. I found the evaps all frozen up. Cut and remove old thermistor, strip wires 1/2 inch then cut the new thermistor wires to length and strip 1/2 inch, use the enclosed insulated crimp type connector and put back everything in the reverse order. It works great afterwards.
Parts Used:
-
Aquilino O from VALLEJO, CA
-
Difficulty Level:Easy
-
Total Repair Time:1- 2 hours
-
Tools:Nutdriver, Screw drivers
6 of 6 people
found this instruction helpful.
Was this instruction helpful to you?
Thank you for voting!
3-year-old refrigerator wouldn't cool, digital temp. control stopped working
The digital display numbers (0= off and 7=coldest setting) controlled by the ECB would continually be replaced by straight lines, and the refrigerator would stop cooling. I tried unplugging it for a while. After plugging it in again, it worked (the digital display came on, I set it to "4" and it reached the proper temp), but the problem occurred again the following day, and then it stopped cooling entirely. I ordered the ECB, and it arrived in 3 business days. I watched the installation instruction video, took my time, double-checked the vid a few times to make sure I was doing it correctly, and replaced the ECB by myself in less than an hour. The refrigerator has been running without problems for 3 weeks now. My fridge had a different light bulb configuration than the one in the video, but everything else was the same, and it was a simple repair.
Parts Used:

-
Rebecca from SAINT JOHN, IN
-
Difficulty Level:Easy
-
Total Repair Time:30 - 60 mins
-
Tools:Screw drivers
6 of 6 people
found this instruction helpful.
Was this instruction helpful to you?
Thank you for voting!
ice maker dripped water into ice bin, freeezing into large block of ice,
turn off water and unplug fridge. remove ice maker bottom mounting screw. just loosen the 2 top mounting screws. unplug wire harness from back of fridge. remove old icemaker from freezer compartment. once removed, salvage square endcover and reinstall on new maker. unfasten wire harness from old maker and reinsatll on new one. reinsert thermal wire in new ice maker holding bracket. remove second wiring bracket and reinstall on new maker to hold remaining wires (not mentioned on "how to-" video). remove old ice maker on/off bale and reinstall on new one. remount new maker to top mounting screws, reinsert harness plug into fridge. replace bottom screw,
Parts Used:

-
charles from PHOENIX, AZ
-
Difficulty Level:Easy
-
Total Repair Time:30 - 60 mins
-
Tools:Nutdriver
6 of 6 people
found this instruction helpful.
Was this instruction helpful to you?
Thank you for voting!
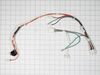
Defrost cycle not kicking in. Refrigerator not cooling. Freezer working.
I replaced the control board first. The freezer back panel frosted up and the refrigerator warmed up again. Then I force (short option vs long) defrosted the refrigerator. However, a few days later the defrost issue came back again. Force defrost no longer worked, though likely due to a severe ice build up behind the freezer panel. I ordered the wire harness. I took off the freezer door (loosen four screws only), removed the tray rails, ice maker, thermostat housing and vent mounted on the freezer panel. The rails and the vent are a bit tricky to remove since no directions exist. I then removed the fan above the coils and then removed the wire harness. Installing the new harness is easy except that I had to modify one of the ground connections for it to mount properly. I tested the unit for 72 hours. The defrost cycle eventually kicked in (dripping onto a pan and sizzling sound). I then reinstalled all parts. No frost build up. Good to go!
Parts Used:
-
Brian from DUVALL, WA
-
Difficulty Level:A Bit Difficult
-
Total Repair Time:More than 2 hours
-
Tools:Screw drivers, Socket set
6 of 6 people
found this instruction helpful.
Was this instruction helpful to you?
Thank you for voting!
Compressor relay failed so I ordered from Parts Select
-
David from Dry Ridge, KY
-
Difficulty Level:Really Easy
-
Total Repair Time:Less than 15 mins
8 of 12 people
found this instruction helpful.
Was this instruction helpful to you?
Thank you for voting!