




















9119238210 Kenmore Range - Instructions
Keep searches simple. Use keywords, e.g. "leaking", "pump", "broken" or "fit".
The control knob stem broke off when I moved the stove.
I located and removed 2 sets of hex-head screws under the front lip of the cooktop, then lifted the entire cooktop to access the burner controls. Removed the wires and taped them, and took out the old control after removing 2 phillips head screws. Installed replacement part easily. Only tricky part is that the various shaft adapters don't quite work with my knob. I'll fix it completely with a bit of epoxy and the adapters they sent.
Parts Used:

-
Jonathan from Harvard, MA
-
Difficulty Level:Easy
-
Total Repair Time:15 - 30 mins
-
Tools:Nutdriver, Pliers, Screw drivers
3 of 10 people
found this instruction helpful.
Was this instruction helpful to you?
Thank you for voting!
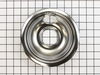
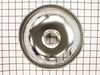
Live in an apartment and they had generic drip pans on the stove causing pots to tilt when cooking.
Replaced drip pans that the apartment Superintendent had in place with the correct drip pans and now cooking is beautiful again! No more uneven cooking on the stove top.
Parts Used:
-
Jennifer from Cleveland, OH
-
Difficulty Level:Really Easy
-
Total Repair Time:Less than 15 mins
0 of 1 people
found this instruction helpful.
Was this instruction helpful to you?
Thank you for voting!
Finish coming off of bowls
Removed burner from each one. removed drip bowl. Inserted new bowl. Replaced burner. Excellent help from order people so I got the correct bowl was irreplacable.
Parts Used:
-
Robert from Ledyard, CT
-
Difficulty Level:Really Easy
-
Total Repair Time:Less than 15 mins
0 of 2 people
found this instruction helpful.
Was this instruction helpful to you?
Thank you for voting!
instructions could be better
it was hard to figure out the instructions from A switch to B switch to my switch. The first switch was no good the second one was good. prayer book didn't hurt.thank
Parts Used:
-
WILLARD from GLOVERSVILLE, NY
-
Difficulty Level:A Bit Difficult
-
Total Repair Time:30 - 60 mins
-
Tools:Pliers, Screw drivers
0 of 6 people
found this instruction helpful.
Was this instruction helpful to you?
Thank you for voting!
Burners would not lay flat
Removed the burner elements, removed and disposed of old drip pans, cleaned the area, relaced with new drip pans and replaced the burner elements. Verified all burners were level - good as the day it was new!
Parts Used:
-
Alfred from Forest, VA
-
Difficulty Level:Really Easy
-
Total Repair Time:Less than 15 mins
8 of 36 people
found this instruction helpful.
Was this instruction helpful to you?
Thank you for voting!
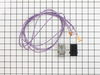
Right Front [surface burner terminal block kit]
We did the repair by following the inclosed instructions. we are elderly retired average ages 82. This was our first repair and it went very well. We are so pleased to have saved over $80.00 compared with hired labor 3 yre. ago for the same part. Thanks so much for your good service.
Parts Used:
-
Wayne from Montoursville, PA
-
Difficulty Level:Really Easy
-
Total Repair Time:Less than 15 mins
-
Tools:Nutdriver, Screw drivers
Was this instruction helpful to you?
Thank you for voting!
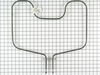
toasted heating element
Could not have been easier and I would never call myself a handyman by any stretch. Unscrewed 2 screws pulled the element out of the 2 connectors, plugged the new one back in and put the screws back in and DONE. It took less than 5 minutes and if I can do it anyone can.
Parts Used:
-
Tom from Florence, KY
-
Difficulty Level:Really Easy
-
Total Repair Time:Less than 15 mins
-
Tools:Screw drivers
Was this instruction helpful to you?
Thank you for voting!
Clips needed to re attach heating element
Pulled out old with pliers. Twisted new clips in per instructions.
Parts Used:
-
Dennis from Orlando, FL
-
Difficulty Level:Really Easy
-
Total Repair Time:Less than 15 mins
-
Tools:Pliers
Was this instruction helpful to you?
Thank you for voting!
Drawer guide
-
Lee from Grass Valley, CA
-
Difficulty Level:Really Easy
-
Total Repair Time:Less than 15 mins
-
Tools:Screw drivers
Was this instruction helpful to you?
Thank you for voting!
Knob had broken off
My husband was able to easily remove and replace the switch and know with-in 15 minutes.
Parts Used:
-
DeeAnn from Clinton, MO
-
Difficulty Level:Really Easy
-
Total Repair Time:Less than 15 mins
-
Tools:Screw drivers
Was this instruction helpful to you?
Thank you for voting!
Finding a drip pan that fit so that pots could sit level.
Ordered the drip pan from ParSelect.com. Unplugged element and took out old pan. Placed new pan in and replaced element. For the first time in many years, the part fit.
Parts Used:
-
Ann B from Hueytown, AL
-
Difficulty Level:Really Easy
-
Total Repair Time:Less than 15 mins
Was this instruction helpful to you?
Thank you for voting!
the wires were not long enough to use the original path.
the original path was from the right front control knob around the back of the range and left side of range,which i dismantaled to install the new wires to the right front burner. When I found them to be to short I had to also dismantal the right side so the wires could be routed there. The new wires worked fine but did take some extra time.
Parts Used:
-
Ronald L. from Cedaredge, CO
-
Difficulty Level:A Bit Difficult
-
Total Repair Time:30 - 60 mins
-
Tools:Nutdriver, Screw drivers
Was this instruction helpful to you?
Thank you for voting!
Burner was unreliable...would stop working...I had already replaced the burner
I did as the video suggested.....I cut the old wires and spliced new ones already attached to the new terminal block. It would have been nice to have some instructions with the parts as I expected one piece but had to connect the wires to the new block and the new metal cover. I was guessing a bit. Also, I needed to use the holder strip off my old part so that it displaced the new part back far enough to insert the burner connections. That meant finding a screw and nut small enough to allow the metal cover to fit on the block. But the burner works great. I've learned that any repair requires some ingenuity.
Parts Used:
-
Lelia from Vienna, VA
-
Difficulty Level:A Bit Difficult
-
Total Repair Time:15 - 30 mins
-
Tools:Pliers, Screw drivers
Was this instruction helpful to you?
Thank you for voting!
rht. front element would not heat properly
I read parts select instructions and i was done in less than 30 minutes. Since 1988, this is the 1st. part that I had to replace. I now have parts select on my favorites list.
Parts Used:
-
Rod from Huron, OH
-
Difficulty Level:Really Easy
-
Total Repair Time:15 - 30 mins
-
Tools:Screw drivers
Was this instruction helpful to you?
Thank you for voting!
element heat wouldn vary
slid the range away from wall. disconnect power. removed back,compared switches and marked wires.installed new switch and wires.the adapter for the control knob was a problem it left the knob out futher than original i had to modify the plastic adapter and got it close enought! the most time spent was cleaning up the floor before putting the range back.
Parts Used:
-
Leonard from Winter, WI
-
Difficulty Level:Really Easy
-
Total Repair Time:15 - 30 mins
-
Tools:Nutdriver, Pliers, Screw drivers
Was this instruction helpful to you?
Thank you for voting!