




















91147692100 Kenmore Microwave Oven Combo - Instructions
Keep searches simple. Use keywords, e.g. "leaking", "pump", "broken" or "fit".
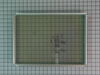
Inside glass on the wall Oven shattered.
Cleaned up the broken glass. Ordered the replacement part. Removed the door from the oven. Carried it to a safe place to work on. Disassembled by removing the screws, removed the bad part. Installed the new glass pack and in reverse order of taking apart reassembaled the door. Reinstalled the door on the oven. Now the oven is working again like new.
Parts Used:
-
Donnie from Tallahassee, FL
-
Difficulty Level:Easy
-
Total Repair Time:1- 2 hours
-
Tools:Nutdriver, Screw drivers
18 of 24 people
found this instruction helpful.
Was this instruction helpful to you?
Thank you for voting!
Touch pad failed to respond to any programming effort
Went to onlin source, found a couple youtube videos then went to the GE site which had a not-too-easy that find trouble shooting guide. It was extremely helpful as it described a fuse as a fix 80% of the time for touch paid failure. I really didn't believe it would b a fuse, but it was the cheapest fix, $8. I got the fuse and was surprised to fine there are two of them on this model. I took a guess and replaced the top one ( neither fuse was black or burned to indicate a failure but the top one was a bit mor greyish). put it all back together and it works fine.
Parts Used:

-
charles from SARASOTA, FL
-
Difficulty Level:Easy
-
Total Repair Time:30 - 60 mins
-
Tools:Screw drivers
13 of 14 people
found this instruction helpful.
Was this instruction helpful to you?
Thank you for voting!
microwave stopped working
took off upper grille and touch pad and removed the old line fuse and replaced with a new fuse ...turned on it is working fine...sources of help: UTube and GE manuel
Parts Used:
-
John from OWOSSO, MI
-
Difficulty Level:Easy
-
Total Repair Time:30 - 60 mins
-
Tools:Pliers, Screw drivers
13 of 15 people
found this instruction helpful.
Was this instruction helpful to you?
Thank you for voting!
Interior light needed replaced
Unplugged the appliance for safety. Removed two 1/4" screws that held the assembly in place. Carefully removed the wire guard that retains the glass shield. Unscrewed old light bulb and replaced with new part. Reversed the steps after cleaning glass cover.
Parts Used:

-
Leo from TWIN FALLS, ID
-
Difficulty Level:Really Easy
-
Total Repair Time:Less than 15 mins
-
Tools:Nutdriver
22 of 43 people
found this instruction helpful.
Was this instruction helpful to you?
Thank you for voting!
Actual temperature in oven was not consistent with the temperature setting
I am a 69 year old woman. I watched the Repair Clinic YouTube Video before I started. I then pulled stove away from wall and unplugged it. Took off oven door and removed the top oven rack. Loosened and removed the screw holding the temperature sensor located inside at the top center back wall of the oven. Pulled the sensor through the opening until the plastic plug came through. Unplugged and removed it and plugged in the new sensor. Fished it back through the opening. Replaced the bracket to the back wall of the oven and tightened the screw. Replaced the oven rack and stove door. Plugged it back in and moved it back into place. I turned on the oven and let is heat for over 30 minutes and the internal temperature was correct with the setting.
Parts Used:

-
Martha from WILMINGTON, OH
-
Difficulty Level:Very Easy
-
Total Repair Time:Less than 15 mins
-
Tools:Socket set
11 of 11 people
found this instruction helpful.
Was this instruction helpful to you?
Thank you for voting!
Microwave does not have power at all, though outlet has power
unplugged power cable / unhooked front vent / unscrew the monitor panel / slide up to dislodge / take the fuse out and put in the new one in / fuse is located right in front of monitor panel once its open might be covered by wirings / you can unpin the cables from the panel to make it easier for you just make sure to put it back properly or you can have somebody hold the panel for you. Installing the fuse is easy waiting for the parts is crazy......
Parts Used:
-
Ronie from BRIARWOOD, NY
-
Difficulty Level:Really Easy
-
Total Repair Time:Less than 15 mins
-
Tools:Screw drivers
10 of 11 people
found this instruction helpful.
Was this instruction helpful to you?
Thank you for voting!
Oven on range did not work properly
My oven bake element melted one day. I had my husband replace it and for a short while it worked. Then it quit but then our broil element would not shut off. My husband said that it might be the heat sensor. We checked here in town and that element cost over $80. Since we have order from Parts Select before we decide to do so again. When we received the heat sensor my husband replaced it taking out the original heat sensor. This did not work as the broil element still would not turn off. I call the repair man and I found out that the initial melt down of the bake element also effected the main circut board that had to e replaced.
Parts Used:
-
Dinah from Juneau, AK
-
Difficulty Level:Very Difficult
-
Total Repair Time:More than 2 hours
-
Tools:Socket set
10 of 13 people
found this instruction helpful.
Was this instruction helpful to you?
Thank you for voting!
Oven not holding a consistant temperature. Found the replacement part easily on you website.Thanks to your photo.
First turned off power at breaker box. Pulled stove out to remove the half dozen hex screws on the back panel.(some nuts were stripped)Removed old oven sensor inside oven held by one hex screw and replaced it with the new part. Oven works great now! Repair job was done by husband Mike.
Parts Used:
-
Cindy from Murrells Inlet, SC
-
Difficulty Level:Easy
-
Total Repair Time:15 - 30 mins
-
Tools:Nutdriver
10 of 14 people
found this instruction helpful.
Was this instruction helpful to you?
Thank you for voting!
Twice I ordered the oven light bulb & each time the light bulb was defected
I had to call for a appointment for repair with GE Appliance because I thought then it . .was something electrical. The technician came out & checked everything out, turned out it was not electrical, The technician went out to his truck got a light bulb from his truck, put it in & it worked. It cost me $121.00 for trip charge from GE appliance for a light bulb that worked, your light bulbs were defective twice. Very disappointed with your products, cost me alot of money for a good light bulb thru GE appliance
Parts Used:
-
Barbara from BELLEVUE, WA
-
Difficulty Level:Very Difficult
-
Total Repair Time:Less than 15 mins
17 of 36 people
found this instruction helpful.
Was this instruction helpful to you?
Thank you for voting!
Blown fuse in microwave
One small Phillips screwdriver and one fuse puller (I used cord). Unplug unit. Remove the two screws on the vent face plate. Remove the one screw on the panel assembly. Gently let hang. Pull the fuse located on the upper left wall. Replace fuse. Reassemble.
Parts Used:
-
Frank from VIPER, KY
-
Difficulty Level:Very Easy
-
Total Repair Time:15 - 30 mins
-
Tools:Screw drivers
8 of 9 people
found this instruction helpful.
Was this instruction helpful to you?
Thank you for voting!
Heat sensor malfunction
Disconnect power, then remove racks from oven, locate heat sensor by the broiler element. Use ratchet with extension and correct socket to remove the bolt directly under the heat sensor, pull the sensor out till you see the plug, disconnect the plug and then connect new sensor to it push wire back thru and then rebolt the new sensor on, thats it...
Parts Used:
-
Diane from BUTLER, PA
-
Difficulty Level:Really Easy
-
Total Repair Time:Less than 15 mins
-
Tools:Socket set
7 of 7 people
found this instruction helpful.
Was this instruction helpful to you?
Thank you for voting!
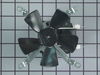
Lots of fan noise with f2 error code when oven on
Made triple sure electricity off. GE designed excellent access to box above oven. Remove three bolts above oven door on bottom of control panel. Slightly raise panel to take off control panel, let hang by wires. Fan in back wall behind panel and has two wires that unplug, four screws to remove. Plug in new fan, input 4 screws. Partselect excellent guide to make sure correct part was ordered, and very timely delivery. $85.00 part instead of $1500.00 new oven. Tip - Note that fan burns out when auto clean turned on. Stop doing that and problem doesn't repeat.
Parts Used:
-
lloyd from lorena, TX
-
Difficulty Level:Really Easy
-
Total Repair Time:15 - 30 mins
-
Tools:Screw drivers, Socket set
7 of 7 people
found this instruction helpful.
Was this instruction helpful to you?
Thank you for voting!
Oven is off 10 degrees
I changed out the sensor and still same problem. Change out Thermosat and still same problem.
I call the help number and emailed the help but I got nothing but have to many calls because of the virus situation.
Still need help.
I’m an electrician and I don’t want to call a service technician and pay that big bill.
Can anyone there help me out, if so please call.
Ike Stanton
678-525-6644
I call the help number and emailed the help but I got nothing but have to many calls because of the virus situation.
Still need help.
I’m an electrician and I don’t want to call a service technician and pay that big bill.
Can anyone there help me out, if so please call.
Ike Stanton
678-525-6644
Parts Used:
-
Ike from LOGANVILLE, GA
-
Difficulty Level:Very Difficult
-
Total Repair Time:30 - 60 mins
-
Tools:Screw drivers
7 of 8 people
found this instruction helpful.
Was this instruction helpful to you?
Thank you for voting!
Oven temperature would not go above 240 degrees
Pulled the oven out and unplugged it. Removed five screws and the back cover. Disconnected the electrical connection. Removed one screw and pulled the sensor out. Installed the sensor and screw. Made the electrical connection on the back, replaced the cover and five screws. Plugged the electrical cord back in and tested the oven temperature compared to the setting. Worked great. My wife then made a small batch of muffins to test it out and they were good.
Parts Used:
-
Glenn from Grapevine, TX
-
Difficulty Level:Really Easy
-
Total Repair Time:15 - 30 mins
-
Tools:Nutdriver
7 of 9 people
found this instruction helpful.
Was this instruction helpful to you?
Thank you for voting!
F2 error; over heating, unknown reason
-
Tim from LEAVENWORTH, WA
-
Difficulty Level:Very Easy
-
Total Repair Time:15 - 30 mins
-
Tools:Nutdriver, Screw drivers
6 of 6 people
found this instruction helpful.
Was this instruction helpful to you?
Thank you for voting!