




















79094212403 Kenmore Range - Instructions
Keep searches simple. Use keywords, e.g. "leaking", "pump", "broken" or "fit".
Clock Timer would turn off during use of oven
Pulled oven away from wall and unplugged. Removed back panel with nut driver. Took a picture of wiring on bad clock/timer. Removed wiring and installed new one.
Parts Used:
-
Mike from Beverly Hills, FL
-
Difficulty Level:Easy
-
Total Repair Time:1- 2 hours
-
Tools:Nutdriver
22 of 39 people
found this instruction helpful.
Was this instruction helpful to you?
Thank you for voting!
Oven Door could not close tightly
My problem with the door was a bit serious because not only would I lose heat from the top of the door, but could not use the convection oven unless the door closed tightly.
However, the repair could not have gone easier. The instructions were very simple and totally accurate. I would suggest that anyone doing this job with a door that has full glass across the front should have a helper neaby. The door is quite heavy.
This probably the easiest repair job I have ever done, and I have done many.
However, the repair could not have gone easier. The instructions were very simple and totally accurate. I would suggest that anyone doing this job with a door that has full glass across the front should have a helper neaby. The door is quite heavy.
This probably the easiest repair job I have ever done, and I have done many.
Parts Used:
-
Frank from Gwynn Oak, MD
-
Difficulty Level:Really Easy
-
Total Repair Time:30 - 60 mins
-
Tools:Screw drivers, Wrench set
14 of 16 people
found this instruction helpful.
Was this instruction helpful to you?
Thank you for voting!
burner wont heat all of the time
removed old terminal block . cut wires and spliced new terminal block and insulated with shrink wrap. Very eazy
Parts Used:
-
Daivid from North Attleboro, MA
-
Difficulty Level:Really Easy
-
Total Repair Time:15 - 30 mins
-
Tools:Screw drivers
14 of 17 people
found this instruction helpful.
Was this instruction helpful to you?
Thank you for voting!
oven door would not close all the way
Removed the door and the inner panel of the door and replaced the hinges. Replaced the screws and put the oven door back on. It closes tight now just like new. I have now ordered the replacement cap so my oven looks like new again.
I only have one suggestion to make the installation easier. If the manufacturer would prethread the holes in the new parts, it would save time from having to prethread the holes with the screws, prior to installing them.
I only have one suggestion to make the installation easier. If the manufacturer would prethread the holes in the new parts, it would save time from having to prethread the holes with the screws, prior to installing them.
Parts Used:
-
Cheryl from Wellsburg, IA
-
Difficulty Level:A Bit Difficult
-
Total Repair Time:30 - 60 mins
-
Tools:Screw drivers
11 of 12 people
found this instruction helpful.
Was this instruction helpful to you?
Thank you for voting!
burner wouldnt heat
-
Doug from Ashton, IA
-
Difficulty Level:Really Easy
-
Total Repair Time:15 - 30 mins
11 of 13 people
found this instruction helpful.
Was this instruction helpful to you?
Thank you for voting!
Aluminum foil accidentally put on bottom panel ....burnt up, left non removable residue.
After 15 minutes of frustration and back breaking I removed the oven door and had much better access to the panel, from there on it was all down hill.
Parts Used:
-
lewis from COLDWATER, MI
-
Difficulty Level:Easy
-
Total Repair Time:15 - 30 mins
-
Tools:Screw drivers
10 of 11 people
found this instruction helpful.
Was this instruction helpful to you?
Thank you for voting!
Oven would kick off after preheating to temp.
Sensor very accessible. Pull off the back panel, disconect the sensor and slide out from back of oven. The original plug was cut off the sensor, as well as the new one to get the proper connector type on the new sensor. Soldered and heat shrink, and presto we had our new sensor ready for install. Install was about 5 minutes which included putting the back panel on the range. Pretty easy and works like new. Total time for project was about 20 minutes.
Parts Used:
-
Mary from Castle Rock, CO
-
Difficulty Level:Easy
-
Total Repair Time:15 - 30 mins
-
Tools:Nutdriver
12 of 18 people
found this instruction helpful.
Was this instruction helpful to you?
Thank you for voting!
Oven light stayed on & smelled like electrical burning.
Wife was cooking our thanks giving turkey, when an oder of burning was noticed. I walked over to the oven and smelled the area of oven light, it was bad. I turned off and unpluged oven. Got a screw driver, unscrewed 4 screws then noticed the burned switch from under the oven top. removed 3 wires, covered w/ elec. tape, and pulled oven light switch out front. looked at part number and ordered online. We were able to cook our turkey and enjoyed our meal.
Parts Used:
-
Vincent from Brunswick, GA
-
Difficulty Level:Easy
-
Total Repair Time:15 - 30 mins
-
Tools:Screw drivers
16 of 35 people
found this instruction helpful.
Was this instruction helpful to you?
Thank you for voting!
element stays on high
found your website ,asked the question, got an answer, recieved a diagram and a possible problem diagnosis. obtained the part threw PartSelect quickly. took the knob off unscrewed two screws out ,disconnected the terminals and reconnected to new switch put the two screws back in and put the knob on!!! thanks ncountry "
Parts Used:
-
Billie from Arlington, WA
-
Difficulty Level:Really Easy
-
Total Repair Time:More than 2 hours
-
Tools:Screw drivers
8 of 11 people
found this instruction helpful.
Was this instruction helpful to you?
Thank you for voting!
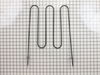
Watch the video on line and it was really that easy to replaced the elements
-
Joseph from HATBORO, PA
-
Difficulty Level:Very Easy
-
Total Repair Time:Less than 15 mins
-
Tools:Screw drivers
6 of 6 people
found this instruction helpful.
Was this instruction helpful to you?
Thank you for voting!
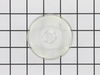
broken lens over oven light
Your service was OUTSTANDING...Ordered one afternoon, and before lunch time the next day, the delivery man rang my door bell...Thanks a bunch for you excellent service.....
Parts Used:
-
Leslie from Warsaw, VA
-
Difficulty Level:Really Easy
-
Total Repair Time:Less than 15 mins
11 of 22 people
found this instruction helpful.
Was this instruction helpful to you?
Thank you for voting!
Aluminum foil baked on surface
Took out 2 screws, removed panel.
When you put the panel in don’t push it tight to the front or the screws won’t align. Just place in gently and the screws will align
When you put the panel in don’t push it tight to the front or the screws won’t align. Just place in gently and the screws will align
Parts Used:
-
Cindy from RHINELANDER, WI
-
Difficulty Level:Easy
-
Total Repair Time:Less than 15 mins
-
Tools:Screw drivers
5 of 5 people
found this instruction helpful.
Was this instruction helpful to you?
Thank you for voting!
Rusted leveling foot
I couldn't unscrew the leveling foot because it was rusted and corroded. The bracket holding it was easy to remove so I took the bracket with the corroded foot off and replaced it with the new foot and bracket. Very simple. I made sure I oiled it so it wouldn't rust again.
Parts Used:

-
Melinda from Three Rivers, MA
-
Difficulty Level:Really Easy
-
Total Repair Time:Less than 15 mins
-
Tools:Pliers, Screw drivers, Socket set, Wrench (Adjustable)
6 of 9 people
found this instruction helpful.
Was this instruction helpful to you?
Thank you for voting!
showing age
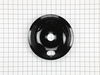
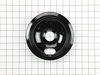
bought drip bowl from big box store and the 8 inch did not fit . yours fit perfect will use you for future diy jobs thank you
Parts Used:
-
Lisa from N MYRTLE BCH, SC
-
Difficulty Level:Really Easy
-
Total Repair Time:Less than 15 mins
5 of 6 people
found this instruction helpful.
Was this instruction helpful to you?
Thank you for voting!
Crack in inner door glass
Removed two screws that are attached to handle then removed four screws from bottom edge of oven door. I was then able to remove the outer door glass,this gave me access to the three inner glasses. After removing the retainer for the glass assembly,I was able to remove all three and replace the inner one.I reversed this proceedure to reassemble.
Parts Used:

-
Robert from Richmond, IN
-
Difficulty Level:Really Easy
-
Total Repair Time:1- 2 hours
-
Tools:Screw drivers
6 of 9 people
found this instruction helpful.
Was this instruction helpful to you?
Thank you for voting!