




















79094212403 Kenmore Range - Instructions
Keep searches simple. Use keywords, e.g. "leaking", "pump", "broken" or "fit".
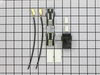
Terminal block was bad.
-
Chuck from EVANSVILLE, IN
-
Difficulty Level:Very Easy
-
Total Repair Time:Less than 15 mins
-
Tools:Screw drivers
1 person
found this instruction helpful.
Was this instruction helpful to you?
Thank you for voting!
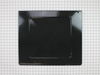
Bottom oven pan was warped and discolored
Unscrew the 2 screws at the back of the oven bottom pan in the range. Place new oven pan in and rescrew the 2 screws. I could not get the two screws screwed back in. Since the bottom pan cannot move from its position, I felt like the two screws were not necessary.
Parts Used:
-
Kathryn from LAKELAND, FL
-
Difficulty Level:Very Easy
-
Total Repair Time:Less than 15 mins
-
Tools:Screw drivers
2 of 4 people
found this instruction helpful.
Was this instruction helpful to you?
Thank you for voting!
replaced terminal block for element
-
Donna from UNION, OR
-
Difficulty Level:Really Easy
-
Total Repair Time:30 - 60 mins
-
Tools:Screw drivers
1 person
found this instruction helpful.
Was this instruction helpful to you?
Thank you for voting!
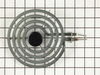
Burner element failed
Plugged the new one in and it worked.
I did search out Frigidaire parts and there are other types tha may or may not work. Calrod burners are not all that unusual. I went with the real thing.
I did search out Frigidaire parts and there are other types tha may or may not work. Calrod burners are not all that unusual. I went with the real thing.
Parts Used:
-
Robert from New Castle, PA
-
Difficulty Level:Very Easy
-
Total Repair Time:15 - 30 mins
1 person
found this instruction helpful.
Was this instruction helpful to you?
Thank you for voting!
wrong part received and returned
I wanted the bracket for the oven heating element and received the bracket for the broiler.... part returned and now I am stumped about what my next move will be
Parts Used:
-
Rhonda from PACHECO, CA
-
Difficulty Level:Very Difficult
-
Total Repair Time:More than 2 hours
1 person
found this instruction helpful.
Was this instruction helpful to you?
Thank you for voting!
Heating coils stop heating
Remove heating coils raise stove top unsrew terminal blocks cut wires assemble terminals strip wires twist wires together install wire nuts apply heat shrink lower stove top plug in stove repair complete.Thanks.
Parts Used:
-
Sharon from TEMPLE, GA
-
Difficulty Level:Very Easy
-
Total Repair Time:15 - 30 mins
-
Tools:Screw drivers
1 of 2 people
found this instruction helpful.
Was this instruction helpful to you?
Thank you for voting!
2 burner elements not heating
Simple: Snip old terminal block off. Strip wires. Connect new Terminal block using twist-on wire caps (provided in kit). Mount to stove top with existing screw. TIP: Make sure you insert the wire lead into the terminal block the right way (not upside down). Otherwise burner element will not insert into terminal block properly.
Parts Used:
-
Brian from MENASHA, WI
-
Difficulty Level:Really Easy
-
Total Repair Time:15 - 30 mins
-
Tools:Screw drivers
1 of 2 people
found this instruction helpful.
Was this instruction helpful to you?
Thank you for voting!
plastic spatula melted onto the unit
-
Thomas from Port Allen, LA
-
Difficulty Level:Really Easy
-
Total Repair Time:Less than 15 mins
1 of 2 people
found this instruction helpful.
Was this instruction helpful to you?
Thank you for voting!
An aluminum saucepan had overheated and melted onto the element.
Unplugged the element and the melted on pot. Plugged in the new element. I thought I might need a whole new cooktop but a new element was very easy to find online.
Parts Used:
-
Alice from Batesville, AR
-
Difficulty Level:Really Easy
-
Total Repair Time:Less than 15 mins
1 of 2 people
found this instruction helpful.
Was this instruction helpful to you?
Thank you for voting!
Burner cooked things very SLOWLY.
Pulled old burner out, pushed new one in. WHAT A DIFFERENCE!! Heats very quickly, now.
Parts Used:
-
Kathy from Fremont, OH
-
Difficulty Level:Really Easy
-
Total Repair Time:Less than 15 mins
1 of 2 people
found this instruction helpful.
Was this instruction helpful to you?
Thank you for voting!
Old cooktop burner element died.
First I unplugged the element that wasn't working and switched it with one that was to confirm that it was the burner element, and not the cooktop wiring, that was the problem. Once that was confirmed, I ordered a new element from partselect.com. Upon arrival of the new element several days later, I plugged it into the empty plug on the cooktop and voila, we're cooking on all 4 again.
Parts Used:
-
Lawrence from Plainview, NY
-
Difficulty Level:Really Easy
-
Total Repair Time:Less than 15 mins
1 of 3 people
found this instruction helpful.
Was this instruction helpful to you?
Thank you for voting!
Broken Handle
1. Order part
2. Remove 2 top screws holding vent cover and carefully remove
cover
3. Open door all the way and lift, door will come of the microwave
4. Set door on a flat surface facing down
5. You will need a flat screwdriver,carefully set the screwdriver
between the door and the black plastic and pry out completely
6. Remove screws holding handle. (This will be a good time to clean
the inside of this door)
7. Attach new handle tighten screws
8. Put black plastic back in door and press on all around make sure
that is set in place
9. Re-install door and vent.
2. Remove 2 top screws holding vent cover and carefully remove
cover
3. Open door all the way and lift, door will come of the microwave
4. Set door on a flat surface facing down
5. You will need a flat screwdriver,carefully set the screwdriver
between the door and the black plastic and pry out completely
6. Remove screws holding handle. (This will be a good time to clean
the inside of this door)
7. Attach new handle tighten screws
8. Put black plastic back in door and press on all around make sure
that is set in place
9. Re-install door and vent.
Parts Used:

-
Robert from WATERTOWN, MA
-
Difficulty Level:Easy
-
Total Repair Time:15 - 30 mins
-
Tools:Screw drivers
1 of 3 people
found this instruction helpful.
Was this instruction helpful to you?
Thank you for voting!
Burner burnt out & 1 plug in bad
I started to work on it & in came a friend & saw a helpless female & took to the job & finished it real fast & efficently.Great repair. Gearldine
Parts Used:
-
Geraldine from Hoxie, AR
-
Difficulty Level:Easy
-
Total Repair Time:15 - 30 mins
-
Tools:Pliers, Screw drivers
0 of 1 people
found this instruction helpful.
Was this instruction helpful to you?
Thank you for voting!
surface would not get hot
had to replace a piece of the wire harness and als o the surface element prongs were melted so i replaed them and now the stove is working perfect..thanks parts select you saved me hundreds of dollars,
Parts Used:
-
michael from gurdon, AR
-
Difficulty Level:Really Easy
-
Total Repair Time:15 - 30 mins
-
Tools:Screw drivers
0 of 1 people
found this instruction helpful.
Was this instruction helpful to you?
Thank you for voting!
burnurplate broke
ordered a new one and I put it inn.Pluged inn and I was ready to cook!
Parts Used:
-
helen m from eureka, MT
-
Difficulty Level:Really Easy
-
Total Repair Time:Less than 15 mins
0 of 1 people
found this instruction helpful.
Was this instruction helpful to you?
Thank you for voting!