




















79030552800 Kenmore Wall Oven - Instructions
Keep searches simple. Use keywords, e.g. "leaking", "pump", "broken" or "fit".
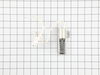
oven would not light
I just sent in a generic description of my problem and a couple of ideas on what it might be. Within 2 days an online repair person answered me back with the solution. I ordered the part and 2 days later I was back in business and baking cookies.
Parts Used:
-
Patrick E. from Washington, PA
-
Difficulty Level:Easy
-
Total Repair Time:Less than 15 mins
-
Tools:Nutdriver, Pliers
0 of 1 people
found this instruction helpful.
Was this instruction helpful to you?
Thank you for voting!
igniter would heat up but burner for oven wouldn't
Took the two nuts off that hold the igniter and cut the wires as per directions and used the wire nuts to put them together after I installed the igniter.was a piece of cake and didn't take 15 minutes to do.Oven works great.
Parts Used:
-
Robert from Inlet, NY
-
Difficulty Level:Really Easy
-
Total Repair Time:Less than 15 mins
-
Tools:Nutdriver
0 of 1 people
found this instruction helpful.
Was this instruction helpful to you?
Thank you for voting!
Oven would not light
It was pretty much a plug in. My husband had it done in a few minutes. I want to thank you for your great service with receiving the part.
The oven is working great and now I am back to baking.
Thanks for everything
Christy
The oven is working great and now I am back to baking.
Thanks for everything
Christy
Parts Used:
-
Christy from North East, PA
-
Difficulty Level:Really Easy
-
Total Repair Time:Less than 15 mins
0 of 1 people
found this instruction helpful.
Was this instruction helpful to you?
Thank you for voting!
Oven igniter failure
Unplug electicity, Take out all inside pans, unscrew the burner arm, disconnect white power wires to the igniter. remover gas buner, detach the igniter and attach the new igniter to the burner arm. re assemble the burner arm, connenct the white wires to the white wires from the oven just below the igniter. Put all pans and guards back in oven, plug in and test.
Parts Used:
-
Brett from Morgantown, IN
-
Difficulty Level:Really Easy
-
Total Repair Time:15 - 30 mins
-
Tools:Socket set
0 of 1 people
found this instruction helpful.
Was this instruction helpful to you?
Thank you for voting!
oven stopped lighting!!
-
crystal from philadelphia, PA
-
Difficulty Level:Really Easy
-
Total Repair Time:15 - 30 mins
-
Tools:Screw drivers, Wrench set
0 of 1 people
found this instruction helpful.
Was this instruction helpful to you?
Thank you for voting!
glo plug wouldn/t ignite
took out the old (2 screws) put clip on wires and put the new part in. Simple
Parts Used:
-
William from Smyrna, DE
-
Difficulty Level:Really Easy
-
Total Repair Time:15 - 30 mins
-
Tools:Nutdriver, Screw drivers
0 of 1 people
found this instruction helpful.
Was this instruction helpful to you?
Thank you for voting!
oven was slow on lite up
removed bottom plate in oven removed three screws and cut two wires.
Parts Used:
-
BILLY from DUCKHILL, MS
-
Difficulty Level:Really Easy
-
Total Repair Time:15 - 30 mins
-
Tools:Nutdriver, Pliers, Screw drivers
0 of 1 people
found this instruction helpful.
Was this instruction helpful to you?
Thank you for voting!
Would turn oven on, gas smell and would not light .
After removing heat shield, removed heating element (make sure you have the right bit, I stripped one of the screws). Cut wires , making sure to mark them. Reconnected and it worked like new! Saved a bunch of money,thank you!
Parts Used:
-
Michael from Forest City, PA
-
Difficulty Level:Really Easy
-
Total Repair Time:15 - 30 mins
-
Tools:Screw drivers, Wrench (Adjustable)
0 of 1 people
found this instruction helpful.
Was this instruction helpful to you?
Thank you for voting!
Oven was slow to light, strong gas smell, long time to reach set temperature
Unplugged stove, removed floor of oven, removed two screws holding igniter, cut wires to igniter, installed new igniter, cut and stripped wires on new igniter and leads, connected new ingiter with supplied ceramic wire nuts, tested (worked perfectly!), then replaced oven floor.
It was a snap!
It was a snap!
Parts Used:
-
Gary Warren from Alexandria, VA
-
Difficulty Level:Really Easy
-
Total Repair Time:15 - 30 mins
-
Tools:Nutdriver
0 of 1 people
found this instruction helpful.
Was this instruction helpful to you?
Thank you for voting!
My oven would glow, but wouldn't heat.
I first removed the 2 screws that held the oven floor in place. Once removed, I remove the cover plate that covered the ignitor.
In order to get to the ignitor wires, I had to remove the drawer. Once the drawer was removed, I marked which wire went to which spot on the ignitor, then cut the wires. I then removed the old ignitor by removing 2 screws. I then attached the new ignitor with the 2 screws and attached the wires using the enclose wire nuts.
The complete process was very easy, taking less than half an hour. The part with shipping was just over $50. If I paid someone to fix my problem it would have cost at least $200. I'm sure galad I found this web site.
In order to get to the ignitor wires, I had to remove the drawer. Once the drawer was removed, I marked which wire went to which spot on the ignitor, then cut the wires. I then removed the old ignitor by removing 2 screws. I then attached the new ignitor with the 2 screws and attached the wires using the enclose wire nuts.
The complete process was very easy, taking less than half an hour. The part with shipping was just over $50. If I paid someone to fix my problem it would have cost at least $200. I'm sure galad I found this web site.
Parts Used:
-
Steve from Macomb, MI
-
Difficulty Level:Really Easy
-
Total Repair Time:15 - 30 mins
-
Tools:Nutdriver, Screw drivers, Socket set
0 of 1 people
found this instruction helpful.
Was this instruction helpful to you?
Thank you for voting!
oven would not heat up.
could not determine what part failed.Found Part Select on line useing Bing search.Using virtual repairman and typing in the problem it told me what I needed.Orderd that part on line and reieved it in TWO DAYS,can you believe that! Inatalled that igniter in 15 mins. and now it works like new. Thank You Part Select!!!!!!
Parts Used:
-
Paul from Warwick, RI
-
Difficulty Level:Really Easy
-
Total Repair Time:15 - 30 mins
-
Tools:Nutdriver
0 of 1 people
found this instruction helpful.
Was this instruction helpful to you?
Thank you for voting!
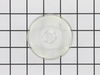
Lens cover for oven light broke.
Really a no brainer, but I do have to say that PartSelect customer service is excellent. My part was located and on it's way within a day and arrived a couple of days later.
Parts Used:
-
Amy from Corona, CA
-
Difficulty Level:Really Easy
-
Total Repair Time:Less than 15 mins
0 of 1 people
found this instruction helpful.
Was this instruction helpful to you?
Thank you for voting!
The oven igniter would glow but the oven wouldn`t lite
After finding your page and using your trouble shooting guide, it was easy getting the right part and the video helped a lot. Removed the over rack- removed two screws to remove the bottom- two screws to remove the burner. Clipped the two wires to the old igniter and removed the burner from the oven,removed the two screws holding the igniter and installed new one. clipped the wires to length and renistalled the burner. Using the two wire nuts supplied put the wires togather and reinstalled the bottom. Everything went well lite first try with no poof sound. Just in time for Thanksgiving cooking. Got fast delivery of parts. Will uas again. Thanks Partselect.
Parts Used:
-
James from Circleville, OH
-
Difficulty Level:Easy
-
Total Repair Time:15 - 30 mins
-
Tools:Nutdriver, Screw drivers
0 of 1 people
found this instruction helpful.
Was this instruction helpful to you?
Thank you for voting!
Oven not heating and theres a smell of gas.
1. Unplugged unit and shut gas off.
2. Removed the oven door(2screws).
3. Removed the oven floor(3screws).
4. Removed heat dispersion plate(1bolt).
5. Removed faulty igniter(2screws).
6. Labeled and spliced wires.
7. Connected new igniter.
8. Installed all previously removed parts.
9. Restored power and gas to unit and oven
fired up in a matter of seconds.....Thanks
2. Removed the oven door(2screws).
3. Removed the oven floor(3screws).
4. Removed heat dispersion plate(1bolt).
5. Removed faulty igniter(2screws).
6. Labeled and spliced wires.
7. Connected new igniter.
8. Installed all previously removed parts.
9. Restored power and gas to unit and oven
fired up in a matter of seconds.....Thanks
Parts Used:
-
Ken from Fresno, TX
-
Difficulty Level:Easy
-
Total Repair Time:15 - 30 mins
-
Tools:Screw drivers, Socket set
0 of 1 people
found this instruction helpful.
Was this instruction helpful to you?
Thank you for voting!
oven would not light
suspected oven ignitor,went to partselect website and saw
others had same concern and ignitor was the failed part.ignitor was not getting white hot just orange-not enough
voltage going to the gas valve to open it.ordered and replaced
ignitor.repair took about 20 minuets-oven repaired.
others had same concern and ignitor was the failed part.ignitor was not getting white hot just orange-not enough
voltage going to the gas valve to open it.ordered and replaced
ignitor.repair took about 20 minuets-oven repaired.
Parts Used:
-
Gerald from Scotia, NY
-
Difficulty Level:Easy
-
Total Repair Time:15 - 30 mins
-
Tools:Nutdriver, Pliers, Screw drivers
0 of 1 people
found this instruction helpful.
Was this instruction helpful to you?
Thank you for voting!