




















59652674202 Kenmore Refrigerator - Instructions
Keep searches simple. Use keywords, e.g. "leaking", "pump", "broken" or "fit".
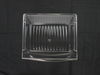
Crisper pan was broken
-
Bettye from Florissant, CO
-
Difficulty Level:Really Easy
-
Total Repair Time:Less than 15 mins
2 of 3 people
found this instruction helpful.
Was this instruction helpful to you?
Thank you for voting!
Broken drawer
Took the old one out. Washed the new one and put it in. The best part was: This company had the part in stock and we received it the next day. Amazingly fast service. Thank you very much.
Parts Used:
-
Jon from La Mesa, CA
-
Difficulty Level:Really Easy
-
Total Repair Time:Less than 15 mins
2 of 3 people
found this instruction helpful.
Was this instruction helpful to you?
Thank you for voting!
Light switch broke
Popped out the old light switch with a butter knife from the bottom first, disconnected the plug in. Install was just the reverse. Super easy fix
Parts Used:

-
Matthew from Pensacola, FL
-
Difficulty Level:Easy
-
Total Repair Time:Less than 15 mins
-
Tools:Screw drivers
2 of 3 people
found this instruction helpful.
Was this instruction helpful to you?
Thank you for voting!
The door switch was broken so the interior light would not come on.
The instructions in the package were not helpful. They wanted me to cut the wiring harness and described where to cut based on the wire colors. My wires were not the same color! I removed the light mechanism using a combination of a screwdriver, putty knife, and plain old muscle with my fingers! The wiring harness unplugged easily and the new one inserted. It was easy to push the whole assembly back into the door. I spent more time looking for something to cut the wiring harness with (and never did find it) than the whole job actually took without needing to cut anything!
Parts Used:

-
Catherine from BROOMALL, PA
-
Difficulty Level:Easy
-
Total Repair Time:Less than 15 mins
-
Tools:Screw drivers
2 of 3 people
found this instruction helpful.
Was this instruction helpful to you?
Thank you for voting!
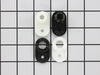
The fridge lower hinge mechanism which assists door closing broke
Removed the top hinge cover with Philips screwdriver. Removed the three bolts holding the top hinge in place. Removed the top hinge, and lifted the door off the remains of the lower hinge. Unbolted the remnants of the lower hinge closure mechanism and replaced it with the new set. Reassembled the door on the lower hinge, and then replaced and bolted back on the top hinge. Door back to full working order in less than fifteen minutes.
Parts Used:
-
James from Minneola, FL
-
Difficulty Level:Easy
-
Total Repair Time:Less than 15 mins
-
Tools:Screw drivers, Socket set
2 of 3 people
found this instruction helpful.
Was this instruction helpful to you?
Thank you for voting!
Pan broke when door was shut while it was open.
-
James from Swoope, VA
-
Difficulty Level:Easy
-
Total Repair Time:Less than 15 mins
2 of 3 people
found this instruction helpful.
Was this instruction helpful to you?
Thank you for voting!
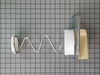
Ice would not come through door, troubleshot and determined bale mechanism wasn't turning properly.
Removed old agitator unit - 4 nut-head screws removed, and installed new agitator and screws aligned easily.
Parts Used:
-
Howard from Montoursville, PA
-
Difficulty Level:Really Easy
-
Total Repair Time:Less than 15 mins
-
Tools:Nutdriver
2 of 3 people
found this instruction helpful.
Was this instruction helpful to you?
Thank you for voting!
Ice Carrier End Cap
Removed Ice carrier and diassembled the Ice carrier with a socket set. Four screws, cap came right off. Placed the new one on and finished.
Parts Used:

-
Oswald from Miami, FL
-
Difficulty Level:Really Easy
-
Total Repair Time:Less than 15 mins
-
Tools:Screw drivers, Socket set
2 of 3 people
found this instruction helpful.
Was this instruction helpful to you?
Thank you for voting!
Freezer drawer light switch failure.
Disconnect plug from wall. Insert putty knife between light switch.and trim panel , apply pressure to depress plastic spring holding switch in place. Apply a slight twist too putty knife releasing switch from trim piece. This wil expose plug connected to switch. Disconnect plug from switch. Connect new switch to plug. Insert switch into trim. Plug refrigerator into wall socket.
Parts Used:
-
HARRY from FSTRVL TRVOSE, PA
-
Difficulty Level:Really Easy
-
Total Repair Time:Less than 15 mins
2 of 3 people
found this instruction helpful.
Was this instruction helpful to you?
Thank you for voting!
Light switch on door broke
Popped out broken switch with blunt flat edged instrument. Disconnected switch from unit . Plugged new piece in and reinserted into side panel of refrigerator. Very easy.
Parts Used:
-
Donna from Oro Valley, AZ
-
Difficulty Level:Really Easy
-
Total Repair Time:Less than 15 mins
3 of 6 people
found this instruction helpful.
Was this instruction helpful to you?
Thank you for voting!
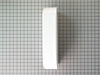
Needed more shelf space in the refrigerator
This was not a repair but rather a decision to make use of the dead space in the refrigerator door by adding another bucket to the door and relocating the other buckets accordingly. This project worked out very well and increased the shelf space by 20%. . .
Parts Used:
-
John from Sun City, AZ
-
Difficulty Level:Really Easy
-
Total Repair Time:Less than 15 mins
3 of 6 people
found this instruction helpful.
Was this instruction helpful to you?
Thank you for voting!
Light switch broke.
Couldn't figure out how to get the old one out till I saw the new one.Pop the old one out slide the 2 wires on the new one pop it back in place,good to go.
Parts Used:
-
Mike from New Johnsonville, TN
-
Difficulty Level:Really Easy
-
Total Repair Time:Less than 15 mins
2 of 3 people
found this instruction helpful.
Was this instruction helpful to you?
Thank you for voting!
crank on Ice feed bent and can lose from back .
-
Eva from YUCAIPA, CA
-
Difficulty Level:Really Easy
-
Total Repair Time:30 - 60 mins
-
Tools:Screw drivers, Socket set
2 of 3 people
found this instruction helpful.
Was this instruction helpful to you?
Thank you for voting!
Ice from icemaker taste metallic; new ice maker directly from box
I did not do the repair yet, there is no schematic on how to route the hose; also no description of how to do the routing/connections.
Parts Used:

-
Samuel from ALEXANDRIA, VA
-
Difficulty Level:Difficult
-
Total Repair Time:More than 2 hours
2 of 3 people
found this instruction helpful.
Was this instruction helpful to you?
Thank you for voting!
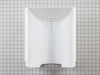
ice bucket And crusher repared
-
WESLEY from INDIO, CA
-
Difficulty Level:Really Easy
-
Total Repair Time:30 - 60 mins
1 person
found this instruction helpful.
Was this instruction helpful to you?
Thank you for voting!