




















59652674202 Kenmore Refrigerator - Instructions
Keep searches simple. Use keywords, e.g. "leaking", "pump", "broken" or "fit".
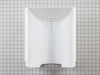
original ice bucket plastic slides onto rack broke and wouldn't support full ice load
On several occasions the ice bucket had fallen inches onto other frozen foods and the auger wouldn't work. After dealing with this several times over a period of several years, I decided to see if I could locate a replacement which I did through your company; We took the old one out, unsnapped parts and then snapped the new bucket to the gate and shazzam, we were able to slide the new bucket into place and it works like new. Hopefully a repair won't be necessary again!
Parts Used:
-
Albert from LEWISBURG, PA
-
Difficulty Level:Really Easy
-
Total Repair Time:30 - 60 mins
2 of 2 people
found this instruction helpful.
Was this instruction helpful to you?
Thank you for voting!
Tried to level rear wheel without unloading bottom freezer and broke the long leveling bolt.
Unloaded refrigerator. Pulled refrigerator from wall. Removed bottom panel on back and replaced bolt. Reversed steps but leveled rear wheel before reloading.
Parts Used:
-
Robert from BRANCHBURG, NJ
-
Difficulty Level:Easy
-
Total Repair Time:30 - 60 mins
-
Tools:Socket set
2 of 2 people
found this instruction helpful.
Was this instruction helpful to you?
Thank you for voting!
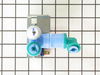
water leaking from secondary water valve that feeds the filtered water
Removed electric supply, removed old filter and cut back ends of tubing one inch with sharp razor knife. Simply push in the tubing to the new valve until seats and your done. Reintall valv to plate and good to go. Instructions that came with part were great and saved 15 bucks with parts select...
Parts Used:
-
john from glen mills, PA
-
Difficulty Level:Easy
-
Total Repair Time:30 - 60 mins
-
Tools:Socket set
3 of 5 people
found this instruction helpful.
Was this instruction helpful to you?
Thank you for voting!
Refrigerator was warm,freezer was cold
Unplugged refrigerator,cleaned out freezer.Removed shelves in freezer compartment(that took some figuring to unlock sliding sheves)Our freezer is on the bottom.Removed four screws from back cover to expose fan,removed screws and attached wires.Carefully opened plastic clips after pulling fan off shaft.Replaced old motor after reattaching rubber seals.Closed clips to hold motor and placed fan back on shaft.Reattach wires and screws. Put cover back and replaced shelves.Plugged in refrigerator and wallah refrigerator part was cold again!
Parts Used:

-
Henning from RHINELANDER, WI
-
Difficulty Level:A Bit Difficult
-
Total Repair Time:30 - 60 mins
-
Tools:Screw drivers, Wrench (Adjustable)
2 of 2 people
found this instruction helpful.
Was this instruction helpful to you?
Thank you for voting!
auger would jam/broke helix end cap
dismanteled ice bucket end and removed auger slid helix off and reinstalled auger in bucket. real good instructions.
Parts Used:

-
Kenneth from Huxley, IA
-
Difficulty Level:Easy
-
Total Repair Time:15 - 30 mins
-
Tools:Nutdriver
3 of 6 people
found this instruction helpful.
Was this instruction helpful to you?
Thank you for voting!
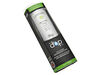
needed to replace water filter
-
Barbara from ST CLR SHORES, MI
-
Difficulty Level:Really Easy
-
Total Repair Time:30 - 60 mins
4 of 9 people
found this instruction helpful.
Was this instruction helpful to you?
Thank you for voting!
The ice bucket had a cracked track
I had to pull the old ice bucket out, remove the front cover and the ice churner from the old bucket. The churner had to be installed onto the new ice bucket, then the front cover had to be snapped back on to the front of the ice bucket. Finally, the new bucket was slid into place. The whole process was relatively easy for a non-mechanical person like me, with the help of detailed instructions that came with the unit. The on-line video was also helpful. I would recommend this company to friends.
Parts Used:
-
Andrew from Bay City, MI
-
Difficulty Level:Easy
-
Total Repair Time:15 - 30 mins
-
Tools:Nutdriver, Screw drivers
2 of 3 people
found this instruction helpful.
Was this instruction helpful to you?
Thank you for voting!
Plastic wheel in icemaker broke
I removed the ice tray from the freeze. Turn over and remove screws holding the face plate on. Remove the 4 screws holding the crushing mechanism in place. Pull the entire mechanism out and remove the nut holding the blades together. Remember the alignment of the blades. Remove blades and then the pastic crush wheel. Replace in reverse order. Very easy.
Parts Used:

-
Bryan from Lancaster, SC
-
Difficulty Level:Easy
-
Total Repair Time:15 - 30 mins
-
Tools:Nutdriver, Pliers
2 of 3 people
found this instruction helpful.
Was this instruction helpful to you?
Thank you for voting!
Ice machine was not making ice
-
William from Grafton, MA
-
Difficulty Level:Really Easy
-
Total Repair Time:Less than 15 mins
2 of 3 people
found this instruction helpful.
Was this instruction helpful to you?
Thank you for voting!
Would not feed ice out of bucket
I removed the bucket and then took the feed screw out and replaced the end cap and reinstalled the feeder in the new bucket and put it back in place and it worked fine. This is not a hard job, you just have to pay attention to the dismantle so you can get every thing back together properly.
the breakdown and parts list was a big help.
the breakdown and parts list was a big help.
Parts Used:
-
David from Boise, ID
-
Difficulty Level:Really Easy
-
Total Repair Time:15 - 30 mins
-
Tools:Nutdriver
2 of 3 people
found this instruction helpful.
Was this instruction helpful to you?
Thank you for voting!
Cracked on the bottom
-
Eduardo from Natalia, TX
-
Difficulty Level:Really Easy
-
Total Repair Time:15 - 30 mins
-
Tools:Socket set
2 of 3 people
found this instruction helpful.
Was this instruction helpful to you?
Thank you for voting!
Icemaker chute door seal was deteriorated
-
David from DUNNELLON, FL
-
Difficulty Level:Really Easy
-
Total Repair Time:15 - 30 mins
-
Tools:Nutdriver, Screw drivers
2 of 3 people
found this instruction helpful.
Was this instruction helpful to you?
Thank you for voting!
Drawer broke
1. Unwrapped the drawer.
2. Washed the drawer.
3. Placed drawer in refrigerator.
:)
2. Washed the drawer.
3. Placed drawer in refrigerator.
:)
Parts Used:
-
Josh from Porter Ranch, CA
-
Difficulty Level:Really Easy
-
Total Repair Time:Less than 15 mins
2 of 3 people
found this instruction helpful.
Was this instruction helpful to you?
Thank you for voting!
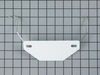
My Original Armwire Had Fallen Off In The Ice Bin And Got Bent. That Is Why I Ordered The New Armwire Assy.
I removed ice bin and cover that sits ontop of the icemaker. I inserted the longer end of armwire assy first in the front part of the icemaker arm until it clicked in place then inserted the shorter end in the back side of icemaker arm and pressed until it went into the hole all the way through. This was very easy to install.
Parts Used:
-
ROSE MARY from MARYSVILLE, WA
-
Difficulty Level:Really Easy
-
Total Repair Time:Less than 15 mins
3 of 6 people
found this instruction helpful.
Was this instruction helpful to you?
Thank you for voting!
Replacing filter
Really easy, simple instructions, and it was on my doorstep 3 days after I ordered. Much simpler than dealing with the appliance store, where I'd have to drive to the store, order the filter, wait 7-10 days, and return to pick it up. Ughh! Internet is the way to go!
Parts Used:
-
Eric from Noank, CT
-
Difficulty Level:Really Easy
-
Total Repair Time:Less than 15 mins
4 of 9 people
found this instruction helpful.
Was this instruction helpful to you?
Thank you for voting!