




















58714439202 Kenmore Dishwasher - Instructions
Keep searches simple. Use keywords, e.g. "leaking", "pump", "broken" or "fit".
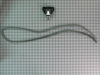
Door latch broke
First I removed the control panel and then removed the screw holding the handle. I then pulled the connector wires off and onto the new handle. I then screwed the new panel into place. Easy job, no mess.
Parts Used:
-
Jack from Houston, TX
-
Difficulty Level:Really Easy
-
Total Repair Time:15 - 30 mins
-
Tools:Nutdriver, Screw drivers
1 person
found this instruction helpful.
Was this instruction helpful to you?
Thank you for voting!
Handle was cracked and missing half of it
First, I located the dishwasher switch in the circuit breaker and turned it off, so as to kill power to the dishwasher - DO NOT PROCEED WITHOUT DOING THIS FIRST. Unscrewed front panel by removing 6 screws on the inside of the door frame. Then pulled 2 white wires on left and 2 black wires on right off of bottom of latch. Then used hex wrench to remove 2 hex screws holding handle and latch to frame. Then reassembled in reverse order as I disassembled. Note that there was a video on the site when I ordered the part, and it demonstrated all the steps; however, when I received the part and went back to the site to review the video again, it was gone. I'm glad I paid close attention the first time I watched it as it was extremely helpful and showed me exactly how to complete the installation.
Parts Used:
-
Joe from BRANDON, FL
-
Difficulty Level:Really Easy
-
Total Repair Time:15 - 30 mins
-
Tools:Pliers, Screw drivers
1 person
found this instruction helpful.
Was this instruction helpful to you?
Thank you for voting!
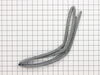
Old gasket melted.
Watched installation video and followed directions. All went smoothly.
Parts Used:
-
Al from WOODBURY, MN
-
Difficulty Level:Very Easy
-
Total Repair Time:15 - 30 mins
-
Tools:Pliers, Screw drivers
1 person
found this instruction helpful.
Was this instruction helpful to you?
Thank you for voting!
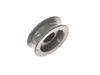
Replaced the side rollers in the dishwasher
Removed the old rollers with with screw driver. Used the original screws and washers, and reinstalled the new rollers. Had been having trouble with top dish rack metal slides popping out of the old rollers. I not that the replacement rollers are slightly larger and have slightly deeper groves for the slides. Have not had the new rollers installed long enough to see if they remedied the problem. Will know in a few weeks time. So far, so good.
Parts Used:
-
John from NORTH BEND, OR
-
Difficulty Level:Really Easy
-
Total Repair Time:15 - 30 mins
-
Tools:Screw drivers
1 person
found this instruction helpful.
Was this instruction helpful to you?
Thank you for voting!
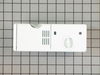
My soap dispenser had worn out and wouldn't stay closed anymore
Received the part quickly and installed it with no problem whatsoever. Have order parts from PartSelect before and have been very happy
Parts Used:
-
linda from pittsburgh, PA
-
Difficulty Level:Really Easy
-
Total Repair Time:15 - 30 mins
2 of 4 people
found this instruction helpful.
Was this instruction helpful to you?
Thank you for voting!
detergent door/dispenser would not close,
removed screws holding door panel, turned off electricity,removed old part and installed new dispenser, the dishwasher is back in business. Be sure to use the proper screws when putting back the door panel.The instructions for installation were in the new part assembly.
Thank You for all your help
Pat Johnson
Thank You for all your help
Pat Johnson
Parts Used:
-
Patricia from Whitman, MA
-
Difficulty Level:Really Easy
-
Total Repair Time:15 - 30 mins
-
Tools:Pliers, Screw drivers
2 of 4 people
found this instruction helpful.
Was this instruction helpful to you?
Thank you for voting!
latch broke had to open door with a screwdriver
removed screws to loosen front door panel then removed the wire connection, then removed the broken latch with screwdriver, installed new latch in same manner, fastened front panel back with the removed screws and I was back in business, easy as pie.
Parts Used:
-
erika from deerfield beach, FL
-
Difficulty Level:Really Easy
-
Total Repair Time:15 - 30 mins
-
Tools:Screw drivers
1 person
found this instruction helpful.
Was this instruction helpful to you?
Thank you for voting!
plastic door latch handle broke
First I removed the 5 screws holding the dishwasher door control panel. Then removed the 2 screws holding the broken latch. Then removed an electrical contact from the broken latch and installed to the new latch one contact at a time. Reassembled all in reverse order to completion.
Parts Used:
-
Bruce from Pleasant Hill, CA
-
Difficulty Level:Easy
-
Total Repair Time:15 - 30 mins
-
Tools:Pliers, Screw drivers
1 person
found this instruction helpful.
Was this instruction helpful to you?
Thank you for voting!
door latch broke off
After watching the repair video, it was 'easy as pie'. I would have thought the gasket was too long and cut it off if not for the video. Thank you. Saved a great deal of money not having to have a repair person do the work. I strongly recommend watching the video.
Parts Used:
-
Sally from Manhattan, KS
-
Difficulty Level:Really Easy
-
Total Repair Time:15 - 30 mins
-
Tools:Nutdriver, Screw drivers
2 of 4 people
found this instruction helpful.
Was this instruction helpful to you?
Thank you for voting!
Latch handle broke
Removed the screws holding the door panel and as the sheet said was the way the it went. Two screws holding the handle latch and replaced it and put the door back on. There was 4 wires to replace on the latch. Replaced the gasket and the job was done. All in all it was a very good experience with good instructions and very good same day shipping. A VERY GOOD EXPERIENCE.
Parts Used:
-
Mike from Camby, IN
-
Difficulty Level:Really Easy
-
Total Repair Time:15 - 30 mins
-
Tools:Screw drivers
1 person
found this instruction helpful.
Was this instruction helpful to you?
Thank you for voting!
Broken latch
I replaced this latch,but noticed that the electric terminal configuration was not identical to the old original part. There were no installation instructions furnished for installing this new part, so I had to guess that the wire terminals attached to the new part in a similar position as detached from the old part. So far the renter has not called that the dishwasher is not operating correctly.
Parts Used:
-
James from Salida, CO
-
Difficulty Level:Easy
-
Total Repair Time:15 - 30 mins
-
Tools:Nutdriver, Screw drivers, Socket set
1 person
found this instruction helpful.
Was this instruction helpful to you?
Thank you for voting!
Broken access handle on dishwasher
Removed six philip head screws to remove upper half of the dishwasher door unit to access handle, then remove handle by remove two star screws and for wires connectors. Installed in reverse.
Note:
I was very impressed on how quick I received the part after it was ordered.
Note:
I was very impressed on how quick I received the part after it was ordered.
Parts Used:
-
Paul from Fruitport, MI
-
Difficulty Level:Really Easy
-
Total Repair Time:15 - 30 mins
-
Tools:Screw drivers
1 person
found this instruction helpful.
Was this instruction helpful to you?
Thank you for voting!
Dispenser latch worn out
The actual installation of the dispenser was a breeze. Just unscrew the 6 screws unplug the 2 electrical wires and put the new one in. The problem I had was removing and replacing the front panel of the machine. The metal facing had corroded onto the frame of the door and was difficult to get off. Replacing the door was just as much a pain as it had to be lined up correctly with 4 holes in the frame. Did it in the end everything works great. Cheaper than a whole new machine.
Parts Used:
-
Christine from Indian Shores, FL
-
Difficulty Level:Easy
-
Total Repair Time:30 - 60 mins
-
Tools:Screw drivers
2 of 4 people
found this instruction helpful.
Was this instruction helpful to you?
Thank you for voting!
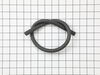
Dishwasher Sprang a Huge Leak
I pulled out the dishwasher and found the inlet tubing had a tear in the accordion part of the tube. I searched online for the model number and was directed to PartSelect. I ordered the inlet tubing, and it only took a few days to get to me. I then watched the video and was able to install the new tubing.
PartSelect is a life saver and I saved lots of money by not having to call a repairman.
PartSelect is a life saver and I saved lots of money by not having to call a repairman.
Parts Used:
-
Rita from MEDANALES, NM
-
Difficulty Level:Very Easy
-
Total Repair Time:30 - 60 mins
-
Tools:Pliers, Screw drivers
1 person
found this instruction helpful.
Was this instruction helpful to you?
Thank you for voting!
The latch was not broken
The repair was pretty straightforward. If somebody is attempting, they should make sure that screws close the bottom part of the door should be opened. You only need to open the top 4 screws.
Parts Used:
-
Rishi from San Jose, CA
-
Difficulty Level:Easy
-
Total Repair Time:30 - 60 mins
-
Tools:Screw drivers
2 of 4 people
found this instruction helpful.
Was this instruction helpful to you?
Thank you for voting!