




















57731H6WW General Electric Washer - Instructions
Keep searches simple. Use keywords, e.g. "leaking", "pump", "broken" or "fit".
Noisy while spinning
I dissasembled the machine and it took about 30 minutes. Orderd the parts recommended for noisy spinning. Reinstalled the new parts / changed all drum straps. Cleaned the drain drum and spin drum and after complete reassembly the washer is still noisy in agitation and spin cycle. The motor,transmission,counter weight,and drum look ok but there is still a reason why the machine is still noisy. Spent 120.00 dollars on parts so far but the drum and motor,transmission and counterweight are very expensive to replace. I am just going to keep using the machine until the washer fails to work anymore. I'm not going to put any more money in the washer. I will just buy a new one. It's not hard to dissasembled and reassemble the washer. I purchased the parts that was recommended to fix the washer but they were not the ones.The new parts did help like the tub seal but the bottom line is that the washer is still noisy. I watched your videos to work on the washer and there were no special instructions on disassembly and reassembly. Like always there must be more than i know to repair this washer. Thanks
Parts Used:





-
Thomas from SELAH, WA
-
Difficulty Level:A Bit Difficult
-
Total Repair Time:More than 2 hours
-
Tools:Nutdriver, Pliers, Screw drivers, Socket set, Wrench (Adjustable), Wrench set
6 of 8 people
found this instruction helpful.
Was this instruction helpful to you?
Thank you for voting!
Water leaking in the floor occasionally with no obvious leaks anywhere
ORDER Spanner wrench for GE tub nut. Impossible to remove hub nut on a washer with age without it. Purchase 1 11/16 in spanner wrench, tub seal, hub nut , split nut
and washer under
agitator all at one time or you will struggle with this repair. The few cents you save is not worth it, the video they provide does a good job but theirs washer
is new hope this helps
and washer under
agitator all at one time or you will struggle with this repair. The few cents you save is not worth it, the video they provide does a good job but theirs washer
is new hope this helps
Parts Used:
-
Greg from Shannon, GA
-
Difficulty Level:Difficult
-
Total Repair Time:1- 2 hours
-
Tools:Nutdriver, Pliers, Screw drivers, Wrench (Adjustable)
5 of 5 people
found this instruction helpful.
Was this instruction helpful to you?
Thank you for voting!
No Agitation Spins OK
Followed your video instructions and removed agitator.Used 7/16 3/8 in socket wrench to remove bolt in the agitator coupling and replaced coupling. Put new bolt in and tightened. Installed Agitator.Works Great.
Parts Used:
-
Raymond from TRAVELERS RST, SC
-
Difficulty Level:Very Easy
-
Total Repair Time:Less than 15 mins
-
Tools:Socket set
6 of 8 people
found this instruction helpful.
Was this instruction helpful to you?
Thank you for voting!
Broken knob on my Mom's washing machine
Folks,
Thanks to your great web site and help video I got this fixed in less than a minute. Literally less time than it took me to watch your helpful video. Don't know how to thank you - keep up the good work!
Thanks to your great web site and help video I got this fixed in less than a minute. Literally less time than it took me to watch your helpful video. Don't know how to thank you - keep up the good work!
Parts Used:
-
Edward from New York, NY
-
Difficulty Level:Really Easy
-
Total Repair Time:Less than 15 mins
-
Tools:Pliers
5 of 5 people
found this instruction helpful.
Was this instruction helpful to you?
Thank you for voting!
My washer would not drain the water out.
IT was so easy to replace the pump. I think the hardest part was trying to get the pliers to work right. All I had to do was unscrew two bolts, take off two pipes, get the new pump and replace the pipes and bolts. It was that easy.
Parts Used:
-
jayme from drummonds, TN
-
Difficulty Level:Really Easy
-
Total Repair Time:Less than 15 mins
-
Tools:Pliers, Socket set
6 of 8 people
found this instruction helpful.
Was this instruction helpful to you?
Thank you for voting!
Wash basin wobbled excessively
Use paint scraper to release spring tabs holding front cover on.
Removed 2 screws holding lid down, and lifted up but did not remove top cover and control panel.
R/R 2 hex screws holding strap in place. If you are lucky and the broken strap is up front this is a super fast repair. Those of you with a rear strap will want to disconnect the wiring harness to the lid switch and likely remove the top panel (+ <5 mins).
Super easy and super cheap!
Removed 2 screws holding lid down, and lifted up but did not remove top cover and control panel.
R/R 2 hex screws holding strap in place. If you are lucky and the broken strap is up front this is a super fast repair. Those of you with a rear strap will want to disconnect the wiring harness to the lid switch and likely remove the top panel (+ <5 mins).
Super easy and super cheap!
Parts Used:
-
David from Rochester Hills, MI
-
Difficulty Level:Really Easy
-
Total Repair Time:Less than 15 mins
-
Tools:Nutdriver
6 of 8 people
found this instruction helpful.
Was this instruction helpful to you?
Thank you for voting!
Water wouldn's stop running
First removed the screws on the contraol panel. Then I pulled the tubing from the part. Snapped teh switch preesure out. Put the new one in. Attached the tubing. Put control panel back together.
Parts Used:
-
Amy from Newport, NC
-
Difficulty Level:Really Easy
-
Total Repair Time:Less than 15 mins
-
Tools:Screw drivers
6 of 8 people
found this instruction helpful.
Was this instruction helpful to you?
Thank you for voting!
Drain hose had a hole in it
used a socket to unscrew the clip. pulled out the old hose, slid the new hose into the clip and screwed the clip back on. all fixes should be this easy.
Parts Used:

-
kartik from radnor, PA
-
Difficulty Level:Really Easy
-
Total Repair Time:Less than 15 mins
-
Tools:Socket set
5 of 6 people
found this instruction helpful.
Was this instruction helpful to you?
Thank you for voting!
drain hose cracked, leaking water, when in use
It was easy, I just removed the old drain hose clip with a screwdriver. Next, removed the old, cracked hose, inserted the new one, and screwed the new clip in.
The best part about this story is the incredible service I was given, by this company. I bought the machine at Sears, so I assumed I could find the hose their. No, they instructed me to go to Orchard Supply(their sister store), I purchased a drain hose, the clerk told me to buy, but the water was still leaking. So, I went on-line and found the right hose, and now I will continue to purchase what I ned for my machine from your company. REALLY Fast Service. Thanks
The best part about this story is the incredible service I was given, by this company. I bought the machine at Sears, so I assumed I could find the hose their. No, they instructed me to go to Orchard Supply(their sister store), I purchased a drain hose, the clerk told me to buy, but the water was still leaking. So, I went on-line and found the right hose, and now I will continue to purchase what I ned for my machine from your company. REALLY Fast Service. Thanks
Parts Used:

-
patricia from Merced, CA
-
Difficulty Level:Really Easy
-
Total Repair Time:Less than 15 mins
-
Tools:Screw drivers, Wrench (Adjustable)
5 of 6 people
found this instruction helpful.
Was this instruction helpful to you?
Thank you for voting!
Control knob was striped / cannot rotate dial
Remove control knob and replace it with new part.
One retaining clip to remove and replace part.
One retaining clip to remove and replace part.
Parts Used:

-
Osvaldo from Madison, AL
-
Difficulty Level:Really Easy
-
Total Repair Time:Less than 15 mins
-
Tools:Pliers
5 of 6 people
found this instruction helpful.
Was this instruction helpful to you?
Thank you for voting!
Broken Turn On Knob

-
Sherri Ann from Rockwall, TX
-
Difficulty Level:Really Easy
-
Total Repair Time:Less than 15 mins
5 of 6 people
found this instruction helpful.
Was this instruction helpful to you?
Thank you for voting!
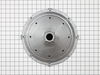
the hub disntegrated . I had to destroy the hub nut to get the old hub off.
I looked at the instructions for removing the tub that are on the back of the circuit diagram included in the panel behind the controls. I followed the directions. As one of your commenters had noted, the aluminum Hub Nut is practically impossible to get a hold on without a special wrench so I chiseled it off. That was the most difficult and time comsuming part . I found some pieces of the old hub in the drain line and blocking the drain pump. Be sure to check for this before reassembling and using the washer.
Parts Used:

-
Roger from Lenoir City, TN
-
Difficulty Level:A Bit Difficult
-
Total Repair Time:1- 2 hours
-
Tools:Nutdriver, Screw drivers, Socket set, Wrench set
5 of 6 people
found this instruction helpful.
Was this instruction helpful to you?
Thank you for voting!
Very noisy in spin mode
a) remove front panel by depressing the 2 clips at the top in line with the lid b) remove the lid switch and 2 screws holding top on and remove top by tilting up SLIGHTLY and sliding to left. c) Remove agitator and by pulling straight up on it and remove adapter underneath d)remove 4 bolts holding 4 rubber straps to top of tub assembly, readily visible when top is removed. e) unplug motor wiring and disconnect pump and bleach hoses from tub f)while lifting up on tub, push down on each of the 4 suspension rods and disconnect them at bottom of tub ( this is the most difficult part, and to make it easier disconnect the rear rods first) g) tilt tub forward and remove tub assembly h) NOW, for the big nut that holds the spin basket in-- #1, it is LEFT HAND THREAD, so you will turn it to the right to remove it. #2, it is VERY TIGHT and requires a 1&11/16" spanner wrench (which I did not have) for removal. Instead, I used a 1&11/16 socket, an extension and an air impact wrench to remove and replace the nut. Assembly is reverse of removal and remember, that nut is ALUMINUM so be careful with that impact wrench when tightening it back up!I replaced the nut and split ring and cleaned the whole area thoroughly, and it greatly reduced the noise in spin mode. I did not replace the metal housing on the bottom of the spin basket, because it was $50 bucks. this probably would have eliminated all the noise, but my repair only cost $19 in parts, including shipping ,and the parts arrived in 1 day.
Parts Used:
-
James from Colora, MD
-
Difficulty Level:Really Easy
-
Total Repair Time:More than 2 hours
-
Tools:Screw drivers, Socket set, Wrench set
6 of 9 people
found this instruction helpful.
Was this instruction helpful to you?
Thank you for voting!
Leak
-
Tom from VERMILLION, SD
-
Difficulty Level:Really Easy
-
Total Repair Time:More than 2 hours
-
Tools:Nutdriver, Socket set
4 of 4 people
found this instruction helpful.
Was this instruction helpful to you?
Thank you for voting!
Hub broke around center
Removed the front panel and lid.
Removed the ring on top of tub and holder.
Had to use a rope and pry board to get the agitator off the shaft. Removed the 7/16 cap screw and removed the plastic agitator block.
Couldn't get the hub nut off and had to use a chisel to break it off (corroded and a left hand thread).
Had to use chisel to free the hub from the center pieces so I could lift out the tub. Then I had to hammer and twist the center piece of the hub to get it off form the transmission shaft.
replace in reverse order without any problem once I realize I had a left hand hub nut.
Removed the ring on top of tub and holder.
Had to use a rope and pry board to get the agitator off the shaft. Removed the 7/16 cap screw and removed the plastic agitator block.
Couldn't get the hub nut off and had to use a chisel to break it off (corroded and a left hand thread).
Had to use chisel to free the hub from the center pieces so I could lift out the tub. Then I had to hammer and twist the center piece of the hub to get it off form the transmission shaft.
replace in reverse order without any problem once I realize I had a left hand hub nut.
Parts Used:
-
Thomasq from Rixford, PA
-
Difficulty Level:A Bit Difficult
-
Total Repair Time:1- 2 hours
-
Tools:Nutdriver, Pliers, Screw drivers, Socket set, Wrench (Adjustable)
5 of 7 people
found this instruction helpful.
Was this instruction helpful to you?
Thank you for voting!