




















41797912704 Kenmore Washer Dryer Combo - Instructions
Keep searches simple. Use keywords, e.g. "leaking", "pump", "broken" or "fit".
broken belt
I took off the front panel of the washer and placed the belt on the large tub wheel and then the smaller wheel. I placed the belt over the adjustable third wheel and turned the tub in order to get the belt all the way in the grooves. Thirty minutes max to replace. Thanks, my order was 100% satisfactory
Parts Used:

-
odell from Elizabethtown, KY
-
Difficulty Level:Really Easy
-
Total Repair Time:15 - 30 mins
-
Tools:Screw drivers
5 of 6 people
found this instruction helpful.
Was this instruction helpful to you?
Thank you for voting!
Zipper was cought between brum and cabnet
Disconect power, Removed top and front of dryer.
The broken zipper was easly removed at this point. The plastic glides easly snap out and in. The felt took some more time to scrape off and clean the old glue. Glue the new felt into place and replace front and top. The parts were shiped promptly and the dryer was out of service for only three days.
The broken zipper was easly removed at this point. The plastic glides easly snap out and in. The felt took some more time to scrape off and clean the old glue. Glue the new felt into place and replace front and top. The parts were shiped promptly and the dryer was out of service for only three days.
Parts Used:

-
John from Swansboro, NC
-
Difficulty Level:Really Easy
-
Total Repair Time:15 - 30 mins
-
Tools:Pliers, Screw drivers
5 of 6 people
found this instruction helpful.
Was this instruction helpful to you?
Thank you for voting!
Drum guides came out into dryer
Removed old guides ( some of the snap in fastners were broken off). REplaced guides by rolling drum, easy to snap in @ drum bottom each time.
Parts Used:
-
lloyd from celina, OH
-
Difficulty Level:Easy
-
Total Repair Time:Less than 15 mins
-
Tools:Screw drivers
5 of 6 people
found this instruction helpful.
Was this instruction helpful to you?
Thank you for voting!
dryer door wouldnt close
the catch on the door was worn and cracked.... so I noticed it could be easily popped out with a screw driver and when the new part came in the mail 2 days later, it was just as easy to pop back in with no tools required. Now the door stays shut really good!!!
Parts Used:

-
karen from aurora, IL
-
Difficulty Level:Really Easy
-
Total Repair Time:Less than 15 mins
-
Tools:Screw drivers
5 of 6 people
found this instruction helpful.
Was this instruction helpful to you?
Thank you for voting!
broken dryer belt
removing was easy just open lower rear LH panel . Ordering was easy ,shipping seemed like alot? to install the new belt pop top of dryer I used a screw driver to help. remove front panel 2 screws then it also has about six clips may have to have gloves on so you do not skin your hands like I did.... lots of sharp edges. pay attention to the clips, so if they come off they will not be lost. panel will tilt slightly fwd then raise up and set aside. now you can slip the belt over the drum. I kept all the slack at the top till it was in position. the groved rubber side goes against the drum and the motor pully. then extend the spring tensioner into position . I rotated the drum a few times by hand to make sure everything was in position. replace front. check it is lined up well before forceing clips in. check felt material is properly in place, as you rotate it into position. push down top . good to go. I ran it for awhile watching everything work before placing it back in service. you may want to clean it out some while it is apart I used an air compressor and shop vac simultaniously as that seemed to work best. Wanted my son to do it as I think he had it over loaded as to why it broke? It maybe the bearings are going but it felt solid ?? I should find out in a month or so shich was which! I did not see any easy way to get to grease it. The belt was easy though pretty sure my son could have handled it!
Parts Used:

-
Lee from Sunbury, PA
-
Difficulty Level:Easy
-
Total Repair Time:15 - 30 mins
-
Tools:Screw drivers
5 of 6 people
found this instruction helpful.
Was this instruction helpful to you?
Thank you for voting!
dryer stopped in middle of cycle and would not restart
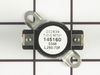
followed the repair video and replaced thermal fuse and thermostat(recommend replacing both due to the problem could of resulted in either part being the cause),Repair went relatively easy.I also recommend to clean and vacuum the dryer while you have it all apart due to a lot of lint buildup and don't forget to unplug before servicing!Stay Safe!!!
Parts Used:
-
MICHAEL from HUDSON, NY
-
Difficulty Level:Easy
-
Total Repair Time:30 - 60 mins
-
Tools:Pliers, Screw drivers
5 of 7 people
found this instruction helpful.
Was this instruction helpful to you?
Thank you for voting!
female part of door clasp broke
-
Tammy from St. Peters, MO
-
Difficulty Level:Really Easy
-
Total Repair Time:Less than 15 mins
5 of 7 people
found this instruction helpful.
Was this instruction helpful to you?
Thank you for voting!
Leaking water from machine

-
Martinus from Fort Lauderdale, FL
-
Difficulty Level:Really Easy
-
Total Repair Time:15 - 30 mins
-
Tools:Screw drivers, Socket set, Wrench set
10 of 22 people
found this instruction helpful.
Was this instruction helpful to you?
Thank you for voting!
belt broke
i left my washer on its back till my belt came in and when it did all i had to do is slip the front off and go at it. it was really fast. then i put the front back on screwed in two screws and hooked up hoses and started washing everything went smooth till i was about to wash wash-n-wear and was like where is my other houseshoe and i remember my dog was bugging me while fixing my washer and dropped my house shoe and i already closed up front soi had to unhook everything and get that out, did not want it to catch on that belt i just bought and fixed lol thanks kristal cumpton
Parts Used:
-
kristal from caruthersville, MO
-
Difficulty Level:Really Easy
-
Total Repair Time:15 - 30 mins
-
Tools:Screw drivers
4 of 4 people
found this instruction helpful.
Was this instruction helpful to you?
Thank you for voting!
Dryer was getting very hot
I watched videos so I would know what I was doing. Well No, My thermostat was in the front of the dryer. But after a little blood and sweat, and I am not kidding, I got the front off. I ordered my new part. Finally got it in Spent $40.00 and it still doesn't work. I know it was the right part. I checked all the trouble shooting web site. That was the only thing they said it would be. Friends advice tell me it is the brains of the thing and I need a new one. Well not 2 weeks before Christmas. Thanks for asking. Single hard working mom.
Parts Used:

-
marjorie from Cary, NC
-
Difficulty Level:Difficult
-
Total Repair Time:More than 2 hours
-
Tools:Screw drivers, Wrench set
9 of 19 people
found this instruction helpful.
Was this instruction helpful to you?
Thank you for voting!
Dryer heater broken
Removed top cover.
Lowered control assembly.
Removed front door assembly.
Removed drum.
Removed heater assembly.
Removed support bearing and bracket using existing bonding ball.
Re-assembled in reverse order.
Lowered control assembly.
Removed front door assembly.
Removed drum.
Removed heater assembly.
Removed support bearing and bracket using existing bonding ball.
Re-assembled in reverse order.
Parts Used:
-
Johnny from PINEBLUFF, NC
-
Difficulty Level:Really Easy
-
Total Repair Time:30 - 60 mins
-
Tools:Screw drivers
4 of 4 people
found this instruction helpful.
Was this instruction helpful to you?
Thank you for voting!
Agitation weak
Got the washer used. Agitation was okay, but the screw part of the agitator was very weak and kept slipping, so bought a replacement agitator. This DID NOT fix the problem, it remained the same. Watched a video on this site about the part under the agitator, whereupon we saw there was supposed to be a washer on top of the spike-thing where you screw the agitator down. THAT was the problem. That washer was missing, and when we replaced it, the agitation was fixed! Very much appreciate this site.
Parts Used:

-
Linda from WEST POINT, GA
-
Difficulty Level:Really Easy
-
Total Repair Time:30 - 60 mins
4 of 4 people
found this instruction helpful.
Was this instruction helpful to you?
Thank you for voting!
Screeching noise under load
I basically followed the video instructions on your website. Pretty simple but ran into an issue pre-threading the 3 self taping screws into the spindle bearing. The screws provided were blunt on the end and did not tap easily at all. I used the existing screws that were much more "sharp" and worked much better. Also, the new screws were Philips drive and due to the amount of torque trying to self tap nearly stripped them out. The old sharper screws were square drive which had a better bite. So basically, I used the old screws to self tap and then used the new screws for the final installation.
It took a long time to clean all the lint out from the inside of the dryer. The motor was completely embedded with lint and animal hair. You may want to suggest that a good cleaning may be needed so bring a shop vac...and also something to carefully pick the lint balls out from around the motor armature and bearing area. Overall the video instructions were really a big help!
It took a long time to clean all the lint out from the inside of the dryer. The motor was completely embedded with lint and animal hair. You may want to suggest that a good cleaning may be needed so bring a shop vac...and also something to carefully pick the lint balls out from around the motor armature and bearing area. Overall the video instructions were really a big help!
Parts Used:

-
John from WESTLAKE, OH
-
Difficulty Level:Easy
-
Total Repair Time:1- 2 hours
-
Tools:Nutdriver, Screw drivers
4 of 4 people
found this instruction helpful.
Was this instruction helpful to you?
Thank you for voting!
door catch wasn't working and screws in door were loose.

-
NICOLE from WEST JORDAN, UT
-
Difficulty Level:Really Easy
-
Total Repair Time:Less than 15 mins
-
Tools:Screw drivers
12 of 29 people
found this instruction helpful.
Was this instruction helpful to you?
Thank you for voting!
Broken Belt
Very easy to install. Unscrew 2 screws and I was done in minutes. Thanks for the fast part delivery!
Parts Used:
-
Stephen from Honesdale, PA
-
Difficulty Level:Really Easy
-
Total Repair Time:Less than 15 mins
-
Tools:Screw drivers
4 of 5 people
found this instruction helpful.
Was this instruction helpful to you?
Thank you for voting!