




















41797912704 Kenmore Washer Dryer Combo - Instructions
Keep searches simple. Use keywords, e.g. "leaking", "pump", "broken" or "fit".
drum glides worn out making thumping noise.
watched video on replacing rear bearing.although rear bearing was not the part(s) i needed to replace, video instructed disassembly procedures to get to the drum glides. this was a very simple and easy to follow video. repair was a breezeand took roughly 25 minutes. the most time consuming segement of repair was vaccuuming out lint,that was 15 minutes. In future, as a preventative, i plan to remove front of machine to clean annually.
Thank you.
Thank you.
Parts Used:

-
david from edinboro, PA
-
Difficulty Level:Really Easy
-
Total Repair Time:15 - 30 mins
-
Tools:Screw drivers
7 of 8 people
found this instruction helpful.
Was this instruction helpful to you?
Thank you for voting!
Thumping Noise, Clothes Getting Stuck
Unplug, lift top, unplug 5 wires, remove 2 screws, pull dryer front away while supporting drum. Remove old glides, snap in new. Reverse disassembly procedure
Parts Used:
-
LT Frank from Wacissa, FL
-
Difficulty Level:Easy
-
Total Repair Time:30 - 60 mins
-
Tools:Screw drivers
6 of 6 people
found this instruction helpful.
Was this instruction helpful to you?
Thank you for voting!
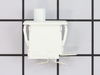
drum light stayed on and the dryer would not run, "dr" was was displayed in read out
spoke with repair person he indicated problem was not door switch but control board, prior to repair person arriving I receive the switch in the mail, I unplugged drier used a small edged screw driver to remove door light switch, removed three wire clips from the old switch, re connected the wires to new switch pushed the new switch into its location, closed the door light went out and the drier started and has ran just fine ever since, saved myself several hundred dollars or a new drier
Parts Used:
-
THOMAS from CROSS LANES, WV
-
Difficulty Level:Very Easy
-
Total Repair Time:Less than 15 mins
-
Tools:Screw drivers
7 of 9 people
found this instruction helpful.
Was this instruction helpful to you?
Thank you for voting!
Washer wouldn't spin
I used a screwdriver to remove the front of the washing machine, fit the belt around the main pulley, held in the spring loaded tension pulley, and threaded the belt aound. It works great! I really need this inexpensive repair, since my job was downsized, and I can't afford to pay anyone.
Parts Used:

-
Phillip from Huntersville, NC
-
Difficulty Level:Easy
-
Total Repair Time:Less than 15 mins
-
Tools:Screw drivers
6 of 6 people
found this instruction helpful.
Was this instruction helpful to you?
Thank you for voting!
dryer door part broke
Dryer door would not close, part had broke and fallen in. Once part was received it took less than an minute to put the new one in and I was back in business.
thanks for making it easy to find the part needed. and the delivery was fast!
bonnie J.
thanks for making it easy to find the part needed. and the delivery was fast!
bonnie J.
Parts Used:

-
Bonnie from Saint Augustine, FL
-
Difficulty Level:Really Easy
-
Total Repair Time:Less than 15 mins
7 of 9 people
found this instruction helpful.
Was this instruction helpful to you?
Thank you for voting!
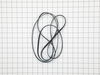
dryer squeeking while in use
unplug dryer. lift the top of the dryer up and back. Take the screws out holding the front panel on. One on each side. Disconnect wires from door open stop switch and take front panel off. Remove drive belt from around pulleys and lift drum up and forward out the front of the dryer. I had to replace the plastic and metal holder and the grounding ball also. Remove the shaft from the drum and put he new one on. Put the drum back in, wrap the belt around the drum and set drum in plastic holder. Then just reverse your steps. Fairly easy.
Parts Used:

-
Paul from Fort Edward, NY
-
Difficulty Level:A Bit Difficult
-
Total Repair Time:1- 2 hours
-
Tools:Screw drivers, Socket set
6 of 6 people
found this instruction helpful.
Was this instruction helpful to you?
Thank you for voting!
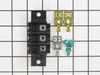
Terminal block, and wires were dammaged/melted
Used nut driver to remove screw and cover from dryer cord terminal block, used screw driver to remove two screws securing old terminal block, cut dammaged wire and stripped wire back and crimped on new terminal connecter, replaced old terminal block with new one, replaced two screws, installed new cord, and replaced cover plate and screw.
Parts Used:
-
Edwin from Eagar, AZ
-
Difficulty Level:Really Easy
-
Total Repair Time:30 - 60 mins
-
Tools:Nutdriver, Pliers, Screw drivers
7 of 9 people
found this instruction helpful.
Was this instruction helpful to you?
Thank you for voting!
Filter Needed Replacing

-
Joe from Reston, VA
-
Difficulty Level:Really Easy
-
Total Repair Time:Less than 15 mins
7 of 10 people
found this instruction helpful.
Was this instruction helpful to you?
Thank you for voting!
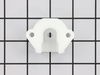
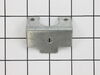
Screeching noise when drying
Rear plastic drum support bearing got worn making the shaft come in contact with the metal bearing bracket. That contact created a groove overtime and eventually snapped the shaft tip off.
Cut power off. Remove all the screws from the front panel. (where the controls are) working from the bottom to the top. Insert putty knife between the dryer and the control panel and push down to release. Carefully disconnect the wire harness.
You will find 2 screws at the bottom and 4 on top holding the dryer door. Remove and expose the drum.
Remove the drive belt
Remove the drum.
You need a 5/16 nut drive to remove the bearing bracket and an extra set of hands to hold the support from the back.
Re-install the parts. I used bearing grease to make it run smoother
Attach the new shaft to the drum and reinstall the drum (its best done with help)
Re install everything back again. And you are done
Cut power off. Remove all the screws from the front panel. (where the controls are) working from the bottom to the top. Insert putty knife between the dryer and the control panel and push down to release. Carefully disconnect the wire harness.
You will find 2 screws at the bottom and 4 on top holding the dryer door. Remove and expose the drum.
Remove the drive belt
Remove the drum.
You need a 5/16 nut drive to remove the bearing bracket and an extra set of hands to hold the support from the back.
Re-install the parts. I used bearing grease to make it run smoother
Attach the new shaft to the drum and reinstall the drum (its best done with help)
Re install everything back again. And you are done
Parts Used:
-
David from Rockville, MD
-
Difficulty Level:Easy
-
Total Repair Time:15 - 30 mins
-
Tools:Screw drivers
6 of 7 people
found this instruction helpful.
Was this instruction helpful to you?
Thank you for voting!
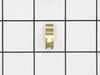
Broken Door Strike
After the part arrived, I located a pair of needle nose pliers. Then removed the broken one and inserted the new one. It was very easy.
I also noted that the new part was of a better design than the original. It should not need further attention.
I also noted that the new part was of a better design than the original. It should not need further attention.
Parts Used:
-
William from Martinsville, IN
-
Difficulty Level:Really Easy
-
Total Repair Time:Less than 15 mins
-
Tools:Pliers
9 of 17 people
found this instruction helpful.
Was this instruction helpful to you?
Thank you for voting!
The Belt had broken
The repair went very smoothly. I'm a woman in my mid 20's and was prepared to buy a new dryer but I saw the part online for a very reasonable price and the video instructions were extremely helpful. I was able to fix the dryer quickly and cost effectively AND the part arrived in only 2 days! It all worked out very well.
Parts Used:
-
Sheena from Ames, IA
-
Difficulty Level:Really Easy
-
Total Repair Time:Less than 15 mins
5 of 5 people
found this instruction helpful.
Was this instruction helpful to you?
Thank you for voting!
The rear drum hitch was sheared off
I noticed for sometime that my dryer had been sqeeking...but I had thought nothing of it. It got alot louder as time went on and then one day the drum stopped spinning. Not to mention I had my son's 5th birthday party in 3 days. So I went online and found parts select. They sent me the whole assembly and I got it the day before the birthday, and it only took me 30 mins to replace it. Thank you, Parts Select for the prompt response and saving me for the embarrasment of having clothes all over the floor.
Parts Used:
-
Nathan from Clarence, IA
-
Difficulty Level:Really Easy
-
Total Repair Time:15 - 30 mins
-
Tools:Nutdriver, Screw drivers, Wrench set
5 of 5 people
found this instruction helpful.
Was this instruction helpful to you?
Thank you for voting!
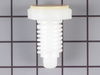
The front level screw legs are made of plastic and each time I move they break
-
Bobby from Asheboro, NC
-
Difficulty Level:Really Easy
-
Total Repair Time:15 - 30 mins
-
Tools:Wrench (Adjustable)
5 of 5 people
found this instruction helpful.
Was this instruction helpful to you?
Thank you for voting!
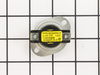
My wife said the dryer started burning and stopped heating.
While my wife was using the dryer, she noticed a loud sound and sparks coming from the bottom of the dryer (and an elctrical smell). The dryer stopped heating. When I started taking off the top and front of the dryer, I noticed what looked like a thermostat had melted and burned. I called a local part store and they said they would have to order it and it would take two weeks. But the guy was kind enough to give me the part number and told me to call anothe store. Instead I went online, found this site and the next day I had the part. It took me less than an hour to install it and reassemble the dryer. Me and my wife were very pleased.
Parts Used:
-
dino from gonzales, LA
-
Difficulty Level:Really Easy
-
Total Repair Time:1- 2 hours
-
Tools:Screw drivers
8 of 14 people
found this instruction helpful.
Was this instruction helpful to you?
Thank you for voting!
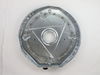
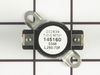
Replaced burned out heating element
Not having the repair manual made the repair more difficult. Prior experience made the job somewhat easy. Had to study every move to make sure no parts were not broken but overall the repair went without any problems. I found out that the bearing plate was removable to facilitate removal and replacement of the heating element. Advise if you are doing a repair of an appliance you don't know much about, take your time and everything should go well for you.
Parts Used:
-
George from ALLENTOWN, PA
-
Difficulty Level:Really Easy
-
Total Repair Time:30 - 60 mins
-
Tools:Screw drivers
5 of 6 people
found this instruction helpful.
Was this instruction helpful to you?
Thank you for voting!