




















41797804791 Kenmore Washer Dryer Combo - Instructions
Keep searches simple. Use keywords, e.g. "leaking", "pump", "broken" or "fit".
The drum was squeaking and running slow
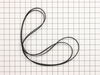
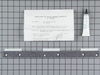
Removed drum replaced bearing with kit, replaced both front drum seals and drive belt. The only problem was when replacing the rear drum ball the three screw holes were poorly tapped and took several tries to get them in. The manufacturers could easily fix this problem. They could provide self tapping hex head screws instead of the Phillips head screws. Everything else went very smoothly.
Parts Used:

-
Terry from TENINO, WA
-
Difficulty Level:Really Easy
-
Total Repair Time:1- 2 hours
-
Tools:Nutdriver, Screw drivers
3 of 3 people
found this instruction helpful.
Was this instruction helpful to you?
Thank you for voting!
My heating element had gone out
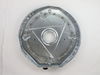
Don’t do like I did and undo the drummer from the back of that thing pulled off the bearing
Parts Used:
-
Van from BLUFFDALE, UT
-
Difficulty Level:Easy
-
Total Repair Time:1- 2 hours
-
Tools:Nutdriver, Screw drivers
3 of 3 people
found this instruction helpful.
Was this instruction helpful to you?
Thank you for voting!
Worn front drum slides
The disassembly was very easy and it appeared that this would be a very quick repair. But the removal of the old felt was difficult and once it was removed it took a lot of effort to remove the bits still stuck on. The tool of choice to remove the stuck on felt was a small torch. After that use a coarse sand paper to remove the remnants. Glue on the new felt and reinstall the front panel.
Parts Used:
-
David from Plymouth, ME
-
Difficulty Level:Easy
-
Total Repair Time:1- 2 hours
-
Tools:Screw drivers
3 of 3 people
found this instruction helpful.
Was this instruction helpful to you?
Thank you for voting!
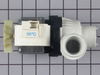
Remote drain pump leaking
First, I unplugged the washer then removed the front panel to the washing machine, then the pump cover, then the two hoses connected to the pump, draining them into a small bowl. I removed the ground wire and electrical connections.
Then I removed the two bolts holding down the pump and removed it. I had to pivot the hose connections on the pump to match the old one. Once I did this, I removed the hold-down bracket from the old pump and installed it on the replacement pump.
Getting the hoses clamped back on the new pump was a challenge, and I finally used an automotive clamp on the rear hose. Once the hoses were connected, I bolted the pump back in, reconnected the power and ground connections and replaced the cover.
Overall, it was a fairly straightforward installation and the only challenging part was the hose clamps.
Then I removed the two bolts holding down the pump and removed it. I had to pivot the hose connections on the pump to match the old one. Once I did this, I removed the hold-down bracket from the old pump and installed it on the replacement pump.
Getting the hoses clamped back on the new pump was a challenge, and I finally used an automotive clamp on the rear hose. Once the hoses were connected, I bolted the pump back in, reconnected the power and ground connections and replaced the cover.
Overall, it was a fairly straightforward installation and the only challenging part was the hose clamps.
Parts Used:
-
Steven from Gilbert, AZ
-
Difficulty Level:Easy
-
Total Repair Time:30 - 60 mins
-
Tools:Screw drivers, Socket set, Wrench (Adjustable)
3 of 3 people
found this instruction helpful.
Was this instruction helpful to you?
Thank you for voting!
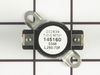
lack of heat
Remove top lid by pushing tab on either side with a putty knife. Disconnect the 2 wire carriages on right. Remove one
phillips head screw on each side that holds front panel to dryer body. Remove front panel by using flat head screwdriver to pry panel from body. Remove thermostat located on bottom right attached to front of motor on a plastic body by removing two phillips head screws. Disconnect wires and place on new part.
phillips head screw on each side that holds front panel to dryer body. Remove front panel by using flat head screwdriver to pry panel from body. Remove thermostat located on bottom right attached to front of motor on a plastic body by removing two phillips head screws. Disconnect wires and place on new part.
Parts Used:
-
Ann from WALLA WALLA, WA
-
Difficulty Level:Really Easy
-
Total Repair Time:30 - 60 mins
3 of 4 people
found this instruction helpful.
Was this instruction helpful to you?
Thank you for voting!
The thermostat had deteriorated and no heat
Had to loosen drum and move it forward to get at switch. Didn’t have to remove belt.
Parts Used:
-
David from ROUND TOP, NY
-
Difficulty Level:Easy
-
Total Repair Time:30 - 60 mins
3 of 4 people
found this instruction helpful.
Was this instruction helpful to you?
Thank you for voting!
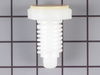
Leveling Leg Broken
The leveling legs on my Frigidaire stackable washer & dryer were broken. They are made of plastic and while moving the unit one of the legs had broke off. I ordered two replacements from PartSelect and received them within a few days. The old legs were removed by screwing them out and then the new ones were installed. Pretty easy installation for DIY. The new legs work great.
Parts Used:
-
Brian from Rochester, NH
-
Difficulty Level:Really Easy
-
Total Repair Time:15 - 30 mins
-
Tools:Pliers, Wrench (Adjustable)
3 of 4 people
found this instruction helpful.
Was this instruction helpful to you?
Thank you for voting!
no filter

-
Luis from La Jolla, CA
-
Difficulty Level:Really Easy
-
Total Repair Time:Less than 15 mins
4 of 7 people
found this instruction helpful.
Was this instruction helpful to you?
Thank you for voting!
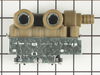
over filling
no problemO top loader. open top, disco two electrical plugs and a small hose, then remove two screws that hold valve in place and remove. Re install in reverse order. Thanks for your support Eliot in Alaska!
Parts Used:
-
eliot from fairbanks, AK
-
Difficulty Level:Really Easy
-
Total Repair Time:15 - 30 mins
-
Tools:Pliers, Screw drivers
3 of 4 people
found this instruction helpful.
Was this instruction helpful to you?
Thank you for voting!
Leveling leg sheared off
Put machine on dolly. Tilted it on its back. Put screw driver into sheared leg and unscrewed broken leveling leg. Then screwed new leg in and tilted machine back up.
Parts Used:
-
Joseph W from WEST PALM BCH, FL
-
Difficulty Level:Very Easy
-
Total Repair Time:Less than 15 mins
-
Tools:Screw drivers
2 of 2 people
found this instruction helpful.
Was this instruction helpful to you?
Thank you for voting!
Door catch broken
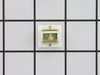
Popped in the new door catch! Tightened the hinge screws( which work loose and allow the door to droop. The reason the catch broke!) Also put red Loctite on the screws in an attempt to keep them from backing out again! Working great so far!!!
Parts Used:
-
TJ from SCOTT DEPOT, WV
-
Difficulty Level:Very Easy
-
Total Repair Time:Less than 15 mins
2 of 2 people
found this instruction helpful.
Was this instruction helpful to you?
Thank you for voting!
Dryer would not turn on, no power. Since i already have replaced thermal limiter switch, i knew exactly what to do and also how to shorten installation
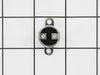
Remove 2 screws from back of unit, remove top by lifting and pulling up, set aside. Using pliers,needle-nose, remove the 2 wires from switch, then using a magitized philips screw driver, remove 2 screws holding switch to back of unit, replace switch, reassemble everything. 20 minutes, boom, ur done, dry some clothes now
Parts Used:
-
Daniel from SAN ANTONIO, TX
-
Difficulty Level:Very Easy
-
Total Repair Time:15 - 30 mins
-
Tools:Pliers, Screw drivers
2 of 2 people
found this instruction helpful.
Was this instruction helpful to you?
Thank you for voting!
Smell of rubber under dryer. Inspection proved belt cracked and shinny worn spot.
Installation was easy, however watch repair instructions video for your model number to easily remove front access panel.
Parts Used:

-
Fred from WOLVERINE, MI
-
Difficulty Level:Very Easy
-
Total Repair Time:15 - 30 mins
-
Tools:Screw drivers
2 of 2 people
found this instruction helpful.
Was this instruction helpful to you?
Thank you for voting!
Worn out dryer lint screen
-
Barbara from WASHOUGAL, WA
-
Difficulty Level:Really Easy
-
Total Repair Time:Less than 15 mins
2 of 2 people
found this instruction helpful.
Was this instruction helpful to you?
Thank you for voting!
Washer tub was not spinning
Smelled burning rubber, checked belt. Belt was cracked and worn out. Easy repair. Removed front of the machine held together with two screws at the bottom of the unit. Removed top cover of machine (the part with the lid). It just pops off. Pushed tensioner wheel in and took off old belt. Putting new belt on was super easy. Working like a champ now. $20 total with shipping. Not too bad to save a washing machine.
Parts Used:
-
josef from Nashville, TN
-
Difficulty Level:Easy
-
Total Repair Time:Less than 15 mins
-
Tools:Screw drivers
3 of 5 people
found this instruction helpful.
Was this instruction helpful to you?
Thank you for voting!