




















41761733810 Kenmore Washer Dryer Combo - Instructions
Keep searches simple. Use keywords, e.g. "leaking", "pump", "broken" or "fit".
Machine failed to complete cycles correctly. Clothes still wet.
Blocked machine up 4” for better access.
Already bought new drain hose with 3 possible outlet diameters.
Cut and try before
Install.
Take note or picture of old pump orientation.
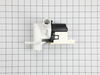
Install new pump frompartselect .
Tighten well, like lugs on car tire.
Put radiator clamp over new drain hose securely.
Tighten well.
Test run on short cycle, leaving machine finish panel off for more
loads of laundry.
Congratulations!
You’re an American!
Already bought new drain hose with 3 possible outlet diameters.
Cut and try before
Install.
Take note or picture of old pump orientation.
Install new pump frompartselect .
Tighten well, like lugs on car tire.
Put radiator clamp over new drain hose securely.
Tighten well.
Test run on short cycle, leaving machine finish panel off for more
loads of laundry.
Congratulations!
You’re an American!
Parts Used:
-
Keith from FAIRFAX, CA
-
Difficulty Level:A Bit Difficult
-
Total Repair Time:1- 2 hours
-
Tools:Pliers, Screw drivers, Socket set
3 of 5 people
found this instruction helpful.
Was this instruction helpful to you?
Thank you for voting!
Dryer squeal
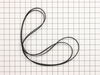
Order the Bearing Kit and Belt. All the necessary parts are included. I used them all and everything fit perfect. For the stack unit have a step stool to reach the screws on top. Remove the top screws. Remove the front panel and door assembly. Be sure to disconnect the electrical connector behind the control panel before you pull out the door assembly. Remove the belt. Pop up the dryer drum and remove. Replace all the bearing parts with new in the kit. Hang the new belt around the drum and reinstall the drum. Connect the belt using the access panel on rear of unit. Reinstall the front panel, door assembly and top panel. A helper to install the new drum bearing bracket is handy.
Parts Used:

-
Michael from MONROEVILLE, IN
-
Difficulty Level:A Bit Difficult
-
Total Repair Time:1- 2 hours
-
Tools:Screw drivers, Socket set
2 of 2 people
found this instruction helpful.
Was this instruction helpful to you?
Thank you for voting!
High pitched squeal from dryer during use...
Followed directions of another website...had to replace ball and socket joint that attached the drum to the back frame of the dryer...removed top outside metal cover of dryer to facilitate attaching ball/socket kit to the drum...this allowed us to secure the ball/socket kit to the drum without cross threading the screws...with the top of dryer removed this allows you to lift the drum to fit into the plastic bracket...dryer had been in use for over ten years before repair...extreme amount of lint debris throughout internal area of dryer...lint was everywhere...spent a large amount of time vacuuming lint...duct connection from lint trap to lint fan/impeller was very loose and over the years lint seeped out from connection...suggest using duct tape or wood/composite shims to hold the lint duct to the fan/impeller...make sure you remove lint from the back of drum crevice and around the area of the heating element for electric dryers...for sanity's sake this should be a two person job...for this repair we replaced the upper and lower drum felt strip, installed a complete and new ball/socket kit, replaced drum belt, and vacuumed and damp wiped the entire interior of the dryer...
Parts Used:

-
Robert from OCEAN SPRINGS, MS
-
Difficulty Level:A Bit Difficult
-
Total Repair Time:More than 2 hours
-
Tools:Screw drivers, Socket set
2 of 3 people
found this instruction helpful.
Was this instruction helpful to you?
Thank you for voting!
Dryer making horrible squeaking sound when running
I am a "do-it-yourselfer" despite my husbands opposition. I followed instructions from one of the posts on the site and took apart the dryer. I found the location of the rear bearing and took it out and replaced it with the new one. Easy as that. Made sure the parts looked the same. Made sure I saw how everything went together. I used a magnet to hold the ball bearing in place on the rear mount and taped the metal bracket on the outside of the dryer. Screwed it right in. Reassembled in reverse and works like a charm. To all the women out there who don't think they can do this. It's easy. Give it a try.
Parts Used:
-
SHARON from SUMMERVILLE, SC
-
Difficulty Level:Easy
-
Total Repair Time:1- 2 hours
-
Tools:Screw drivers, Socket set, Wrench set
2 of 3 people
found this instruction helpful.
Was this instruction helpful to you?
Thank you for voting!
Making a squiking noise and letting lint into the cavity of the dryer
pulled appliance away from wall and unplugged the electrical cord and then used putty knife to pop up the top. Then removed the screws that held the front in place. Disconnected the wire to the switch on the door and then front on a rug and used acetone and scraper to remove the old glue and felt. Cleaned the area thoroughly and apply the glue that come with the kit an give it a couple of seconds to get tacky and then applied the felt and used clothes pins to hold in place for about an hour and then put back together and let it set over night before using. Had good success and it solved my problem.
Parts Used:
-
Robert from Rice Lake, WI
-
Difficulty Level:Really Easy
-
Total Repair Time:1- 2 hours
-
Tools:Screw drivers
2 of 3 people
found this instruction helpful.
Was this instruction helpful to you?
Thank you for voting!
Noisy dryer
Followed instructions for removal and installation.
Parts Used:
-
Timothy from OWINGS MILLS, MD
-
Difficulty Level:Easy
-
Total Repair Time:30 - 60 mins
2 of 3 people
found this instruction helpful.
Was this instruction helpful to you?
Thank you for voting!
Dryer drum not spinning
This link provides clear simple instructions which I was able to use successfully.
Parts Used:
-
JAY from WESTON, FL
-
Difficulty Level:Easy
-
Total Repair Time:30 - 60 mins
-
Tools:Screw drivers
2 of 3 people
found this instruction helpful.
Was this instruction helpful to you?
Thank you for voting!
dryer would turn for about 1min then stop
I replaced the rear bearing assy. Thanks to all that sent in there stories. very helpful. But my problem was the breaker in breaker box. needless to say "check your outlet for proper voltage.First,before anything else." i had a bad breaker, had it replaced,with proper 30amp fuses.Dryer works fantastic..Thanks to all again for your input. Great Website...
Parts Used:
-
James from Fort Worth, TX
-
Difficulty Level:Easy
-
Total Repair Time:30 - 60 mins
-
Tools:Nutdriver, Screw drivers
2 of 3 people
found this instruction helpful.
Was this instruction helpful to you?
Thank you for voting!
Latch on dryer no longer worked
So easy! I ordered the part on the website. Received it 24 hours later. And popped it in place. Good as new.
Parts Used:

-
chris from dallas, TX
-
Difficulty Level:Really Easy
-
Total Repair Time:Less than 15 mins
2 of 3 people
found this instruction helpful.
Was this instruction helpful to you?
Thank you for voting!
Lint was going everywhere. The new one fits perfectly, but lint is still going alll over

-
Christine from DEER PARK, NY
-
Difficulty Level:Very Easy
-
Total Repair Time:Less than 15 mins
2 of 3 people
found this instruction helpful.
Was this instruction helpful to you?
Thank you for voting!
Our door catch got lost inside the dryer after the door was slammed to hard
I took the new door catch out of the packaging and just snapped it in place it was easy peasy and took less time than opening the package
Parts Used:
-
Joyce from PORTAL, GA
-
Difficulty Level:Very Easy
-
Total Repair Time:Less than 15 mins
2 of 3 people
found this instruction helpful.
Was this instruction helpful to you?
Thank you for voting!
loud squeeling noise
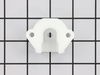
After changing the drum support bearing, and the front felt ring, the noise continued. It turned out to be the tensioner pully. The harmonic vibration travels throughout the dryer box like an instrument so you can't tell where the sound is comming from. Before you do anything, spray a little wd40 between the bushing and the shaft on the belt tenioner pully. If the squeel goes away, you have found your smoking gun.
Parts Used:
-
Lewis from Thornton, CO
-
Difficulty Level:Really Easy
-
Total Repair Time:Less than 15 mins
-
Tools:Nutdriver, Pliers, Screw drivers
2 of 3 people
found this instruction helpful.
Was this instruction helpful to you?
Thank you for voting!
bearing bad and shaft broken
replaced bearing and shaft new belt and everything works just fine
Parts Used:
-
Randall from New Roads, LA
-
Difficulty Level:Easy
-
Total Repair Time:30 - 60 mins
-
Tools:Screw drivers
3 of 6 people
found this instruction helpful.
Was this instruction helpful to you?
Thank you for voting!
Very loud squeaking
Opened top, removed front cover, removed belt, took out drum, replaced bearing on drum and bearing guide on back of dryer. Reinstalled drum and belt, then replaced drum glides and upper felt,let glue set with clamps over night.
Parts Used:

-
william from hackettstown, NJ
-
Difficulty Level:Easy
-
Total Repair Time:15 - 30 mins
-
Tools:Nutdriver, Screw drivers
2 of 3 people
found this instruction helpful.
Was this instruction helpful to you?
Thank you for voting!
E66 Error code, Door Open. Dryer shuts off on high temperature
Unplugged dryer. Removed top panel (2 screws top back of dryer). Removed control panel ( Unplugged from control board and 2 screws) Removed front panel with door ( Unplugged light from control board, door switch at connector, and 4 screws) Removed Control Thermister from dryer exhaust blower housing located bottom front of dryer ( Unplugged 2 wires and removed 2 screws ) Installed new Control Thermister and replaced all screws and panels in reverse order. Note: Noticed connector for door switch seemed a little loose when connected correctly. Used electrical tape to reinforce connection. Plugged dryer back in and checked operation. Dryer has been used approximately 10 times since repair with no issues.
Parts Used:
-
Michael from Baltimore, MD
-
Difficulty Level:Easy
-
Total Repair Time:15 - 30 mins
-
Tools:Screw drivers
2 of 3 people
found this instruction helpful.
Was this instruction helpful to you?
Thank you for voting!