




















3LTE5243BW0 Whirlpool Washer Dryer Combo - Instructions
Keep searches simple. Use keywords, e.g. "leaking", "pump", "broken" or "fit".
Dryer would not heat
I removed back panel. With the circuit tester I tested the heating coil and the thermostats and the one-time fuse. I found the fuse did not test a circuit. So I ordered the fuse and replaced it. The dryer works fine.
Parts Used:

-
John from Fort Lauderdale, FL
-
Difficulty Level:Really Easy
-
Total Repair Time:15 - 30 mins
-
Tools:Nutdriver
6 of 8 people
found this instruction helpful.
Was this instruction helpful to you?
Thank you for voting!
Loud Screeching noise when draining water
On this model, no need to tip washer on back. Tilt console back and disconnect lid switch. Remove two clips holding back to top of washer (under console). Then remove top and front as directed in the video. The pump is accessible from the front of the unit, just below the tub. Hose clamps are easy to remove/replace. Took more time to wipe inside of washer clean than to remove/replace the water pump. Total time was just over 30 minutes.
Parts Used:

-
Steven from Port Saint Lucie, FL
-
Difficulty Level:Easy
-
Total Repair Time:15 - 30 mins
-
Tools:Pliers, Screw drivers
5 of 5 people
found this instruction helpful.
Was this instruction helpful to you?
Thank you for voting!
incessantly annoyingly squeaky dryer
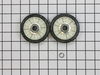
Take out 2 philips screws in lint trap holder on top. Use flat screwdriver to pry up front left and right of dryer top near outside edges and tilt up out of the way. Remove 2 push-on AC connectors on door switch and remove plastic clip holding wires to dryer's front top metal edge. Remove (2) 5/16" sheet metal screw on inside top left and right edges to free up front panel. Lift front panel about an inch and it'll then pull off. It helps to have a second person to help hold or remove the drum at this point. It took 3 times for me to guess right on the squeak. First time I replaced the belt, second time I replaced these rollers, third and final time I replaced the idler pulley, the shaft of which had worn completely off so clearly i can't figure out how we didn't see (or hear) it the first two times! Dri-Slide lube helped stop the squeaking the first two times, but it always returned until this time, now I have a thoroughly rebuilt dryer for the next generation! (PS vacuum out the bottom of the dryer while it's open to remove both lint and greasy roller shavings - do this FIRST and you'll have cleaner hands & clothes!)
Parts Used:
-
Douglas from Tiburon, CA
-
Difficulty Level:A Bit Difficult
-
Total Repair Time:30 - 60 mins
-
Tools:Screw drivers, Socket set
5 of 6 people
found this instruction helpful.
Was this instruction helpful to you?
Thank you for voting!
The dryer was squeaking and would not heat at all.
The first thing I did was call my friend Donnie who manages some apartment buildings and who is always complaining about fixing things and getting the right parts to fix things. He told me what to order from PartsSelect and when the parts got here I called him up and he did the repair work.
He was reluctant to do the work at first but after he found out I had ordered the parts from PartsSelect he was happy to do the work. "Their parts are always right and they always work," was what he said after he had my dryer working just like new. So if you know nothing about fixing things and buying parts just call PartsSelect and you will be fine. Just ask my friend Donnie!!!
He was reluctant to do the work at first but after he found out I had ordered the parts from PartsSelect he was happy to do the work. "Their parts are always right and they always work," was what he said after he had my dryer working just like new. So if you know nothing about fixing things and buying parts just call PartsSelect and you will be fine. Just ask my friend Donnie!!!
Parts Used:



-
Steven from Oxnard, CA
-
Difficulty Level:Difficult
-
Total Repair Time:1- 2 hours
-
Tools:Nutdriver, Pliers, Screw drivers, Socket set, Wrench (Adjustable)
7 of 12 people
found this instruction helpful.
Was this instruction helpful to you?
Thank you for voting!
slow or no spin
First read up on what others did and tried to find free repair manual with little luck. Called repairman, they thought whole transmission was shot- would have been $70 just to have them look- forget it. Getting it apart: popped off the two console cosmetic panels to get to a screw on each side from the top. Lifted off console, levered and squeezed retaining clips. Unhooked two connectors and overflow tubing? Shell pulled off easily, getting back on after I was all done made me wonder if it was a good choice. In the end yes- allowed me to clean inside surfaces of both tubs to remove grime and rust. There are many stories on the actual clutch replacement, so won't go into too much detail but some lessons learned. Keep track of the way all the plastic aggitator pieces go in, plus the washers and clips along the way. Deep well 1/2" I think socket for the tub, it's litely spring loaded so look before you set it down. Punching off the nut on the tub worried me, but it was no big deal. Loosens and tightens the normal directions, no positive tight stop, just compression so pay attention to how tight and hard you pounded to get it off. Drain the water from the inner tub before getting too far. I took the four springs off and removed both tubs to clean. No more complaining about brown spots on clothes. Get the whole clutch kit, not just the band, even though it's probably just the band worn out. The plastic clutch engaging piece will probably be fatigued. The motor etc is heavy, and buffered it's drop with rags. tip on side when putting it back, because its a bear to try to lift up. I lightly greased some moving parts, just not much as to not cause band grip problems. The wire retaining clip is tricky- I put the hook end in first, used pliers to try and compress, and screwdriver to push down and in. The whole things wants to spin while you do this, but when it finally goes, it stays. I was concerned about the location of the band spring in relation to it's actuator when putting it together, but it turned out if you put it anywhere where the clutch is free to spin, it will engage normally. The top lid has two rubber bumpers, one fell off and landed on the front bottom corner of the cover which didn't help reinstallaion until my 8year old noticed it! Took a number of tries but finally got the four guides from the frame into the cover. I tried bringing it in level, front tipped sligthly up, front tipped slightly down; in the end I won't be much help, it just finally went. It wasn't as easy as most people said it would be, but my back hurt and I had kids "help", and it took just under two hours. Works amazingly well now. Parts arrived Two days after ordering, with no expiditing!
Parts Used:

-
Steven from Wausau, WI
-
Difficulty Level:A Bit Difficult
-
Total Repair Time:1- 2 hours
-
Tools:Pliers, Screw drivers, Socket set
6 of 9 people
found this instruction helpful.
Was this instruction helpful to you?
Thank you for voting!
Drum would not spin to drain water
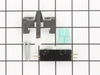
Removed two screws and lifted the control console then tilted forward the shell. Removed two screws holding the latch cover and assembly then disconnected two wires. I played with the assembly until I discoved the element was toast. Ordered the part but when I got it I was confused because it had three prongs (two on one side and one on the other) when the burnt one had only one and one and I only had 2 disconnect wires. I thought I had gotten the wrong part but figured it out. Actually putting the assembly together was the easy part, trying to get the outer shell back together was a little tough. Between taking it a part, figuring out what was wrong and ordering and receiving the part was about three weeks. So when putting it all together took awhile but I did it and it works great.
Parts Used:
-
Gay from Apple Valley, CA
-
Difficulty Level:Easy
-
Total Repair Time:15 - 30 mins
-
Tools:Screw drivers
9 of 18 people
found this instruction helpful.
Was this instruction helpful to you?
Thank you for voting!
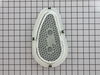
lod and heat caused cracks
-
Lawrence from Hull, MA
-
Difficulty Level:Really Easy
-
Total Repair Time:Less than 15 mins
5 of 6 people
found this instruction helpful.
Was this instruction helpful to you?
Thank you for voting!
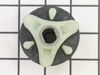
Washing machine making a grinding noise
Purchased and installed PS1485646 COUPLING, MOTOR (Direct Drive Coupling). We googled "Washing Machine making a grinding noise. Several people suggested coupling probably broken. We located some instructions online regarding dis-assembly, sure enough,the coupling was broken. We ordered the part from Partselect.com. It arrived in three days, replaced the broken coupler. Washing machine back in business for around $20. Hooray! Thanks, Partselect!
Parts Used:
-
Tracy from Yuba City, CA
-
Difficulty Level:Easy
-
Total Repair Time:30 - 60 mins
-
Tools:Nutdriver, Pliers, Screw drivers, Wrench (Adjustable)
4 of 4 people
found this instruction helpful.
Was this instruction helpful to you?
Thank you for voting!
Drain hose leaking
Followed instructions other customers provided for hose installation. Haven't installed agitator dogs yet. Need to watch the video on your web site.
Parts Used:

-
Maryanne from BEND, OR
-
Difficulty Level:Really Easy
-
Total Repair Time:30 - 60 mins
-
Tools:Pliers
4 of 4 people
found this instruction helpful.
Was this instruction helpful to you?
Thank you for voting!
slow spin
-
eugene from abbott, TX
-
Difficulty Level:Really Easy
-
Total Repair Time:30 - 60 mins
4 of 4 people
found this instruction helpful.
Was this instruction helpful to you?
Thank you for voting!
The washing machine would not spin. The lid would be down, the dials would all be OK, but no spin and no drain.
I called a repairman, who diagnosed the problem as a faulty leaf switch in the lid assembly -- the little rod on the lid that normally would depress the switch was working fine, but the switch was not closing. At my direction, he bridged the wires from the switch as a test, and it worked fine. So I ordered a new switch from you guys and swapped the new one out with the old one. Two flat screws to remove the slanted top panel, and at the rear of the panel are two hex-top screws holding the lid assembly on. Undo the hex-top screws, lift off the lid assembly, unplug the interlock between the washing machine power and the lid, and find a clean place to lay the lid assembly. Replacing the switch is a snap -- the part you sold came with its own wiring, and all it takes is take the old part out and put the new part in. Easy peasy. Getting the lid assembly back takes a little work because the fasteners are a little tricky to position correctly -- they will fall off the lid assembly and repositioning them may involve a bit of trial and error -- but once it is properly positioned, it takes a total of six screws and you're done. Two for the switch (Philips), two hex heads to fasten the lid assembly to the washer chassis, two to button up the front access panel.. A caution -- make sure the machine is unplugged when you do the repair, or else the washing machine may cycle into a spin cycle when you plug the interface back in and surprise you.
Parts Used:

-
Robert from CORAL GABLES, FL
-
Difficulty Level:Really Easy
-
Total Repair Time:30 - 60 mins
-
Tools:Nutdriver, Screw drivers
4 of 4 people
found this instruction helpful.
Was this instruction helpful to you?
Thank you for voting!
The air heater would not heat air to dry on the heat cycle
I misdiagnosed the problem as heater element because I did not have my voltage meter with me. The problem was the heat thermostat that senses temperature in the drum and burns out if it's too high. There are two other safety cut off thermostats that when triggered will reset themselves when the temp cools. All three should be tested before looking for something else, like the cycle selector switch; that one is not only more complex but very difficult to access. One is on the heater element itself, the other senses the temperature of air flowing out of the heater element. I believe this array of thermostats is similar on every drier. Each one should be tested with an electrical multifunction tester before guessing what's wrong. The drum thermostat, a $13 part, was the easiest to replace, once I got the back of the drier completely open, a not too difficult task. And, as I found out talking to a repairman, is the thermostat that most commonly fails. I will add that Partselect was most accommodating in providing advice and in authorizing me to return the heater element and refunding the overnight shipping fee. And their web site is terrific--the only drawback being you have to read it over thoroughly before concluding you are an "expert". I would work with them before any other vendors. Good luck!
Parts Used:

-
Roger from WEVERTOWN, NY
-
Difficulty Level:Really Easy
-
Total Repair Time:30 - 60 mins
4 of 4 people
found this instruction helpful.
Was this instruction helpful to you?
Thank you for voting!
Clutch Replacement
I decided to order the part and attempt to install it. Actually was easy. Took my time and maybe took 90 minutes. Works great.
Parts Used:
-
Mark from CHARLOTTE, NC
-
Difficulty Level:Easy
-
Total Repair Time:1- 2 hours
-
Tools:Nutdriver, Pliers, Screw drivers, Socket set, Wrench (Adjustable)
4 of 4 people
found this instruction helpful.
Was this instruction helpful to you?
Thank you for voting!
The washer would drain, but was screaming while doing nothing else.
The tough part was replacing the front cabinet.
I did consult the video for help on replacing the clutch spring.
Thank you for that bit.
I admit to taking too much apart, most of the cabinet back can be left alone.
Some of the plastic wire keepers/routers suffered, as well as the console hinges.
The newly reassembled washer works without a hitch, and truely it took me about 4 hours over several days to dissamble and reassemble.
It is louder in the audible range than before, but very serviceale for another 20 years, saints willing.
I did consult the video for help on replacing the clutch spring.
Thank you for that bit.
I admit to taking too much apart, most of the cabinet back can be left alone.
Some of the plastic wire keepers/routers suffered, as well as the console hinges.
The newly reassembled washer works without a hitch, and truely it took me about 4 hours over several days to dissamble and reassemble.
It is louder in the audible range than before, but very serviceale for another 20 years, saints willing.
Parts Used:
-
Richard from JAMESTOWN, PA
-
Difficulty Level:Really Easy
-
Total Repair Time:More than 2 hours
4 of 4 people
found this instruction helpful.
Was this instruction helpful to you?
Thank you for voting!
Old filter and cover had rusted retaining clips and rusted out sections
Removed old assemblies manually and replaced with new. Very easy and the parts fit perfectly!
Parts Used:
-
david from HAYWARD, CA
-
Difficulty Level:Very Easy
-
Total Repair Time:Less than 15 mins
4 of 4 people
found this instruction helpful.
Was this instruction helpful to you?
Thank you for voting!