




















3LTE5243BW0 Whirlpool Washer Dryer Combo - Instructions
Keep searches simple. Use keywords, e.g. "leaking", "pump", "broken" or "fit".
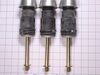
Warn suspension springs
Replaced warn springs with new ones in the kit followed the instructions that were included was quick and easy now the washer works like new
Parts Used:

-
Tyson from Albuquerque, NM
-
Difficulty Level:Easy
-
Total Repair Time:30 - 60 mins
-
Tools:Nutdriver, Wrench (Adjustable)
10 of 17 people
found this instruction helpful.
Was this instruction helpful to you?
Thank you for voting!
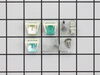
My Kenmore dryer door catch was worn out, so the dryer door wouldn't stay closed, and I was unable to dry my laundry.
I identified the correct catch of the three that were included in the package by matching its number to that on the old catch that I had pried out of the door using a flat screwdriver. I centered the new catch over the square hole in the door and pressed it into place. Then I used some needle-nose pliers to twist and remove the metal pin that fits into the catch from the main dryer housing. I replaced that with the new piece included in the kit, gently tapping it into place with a hammer. The repair complete, the door worked perfectly. Thanks for your help and for the speedy delivery of the kit.
Parts Used:
-
Carol from Golden Valley, MN
-
Difficulty Level:Really Easy
-
Total Repair Time:Less than 15 mins
-
Tools:Pliers, Screw drivers
8 of 11 people
found this instruction helpful.
Was this instruction helpful to you?
Thank you for voting!
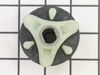
Washer would not work in agitate or spin cycle
Coupler is design to break when washer is overloaded or out of balance. Saves the motor from being burned out. Very easy repair. Unhook washer hoses and electrical plug...tip washer on side if there is no bottom to washer instead of removing side panels. Unhook clamps to water pump using flathead screwdriver. Water pump comes off without unhooking either of the two hoses. Remove 2 electrical connections and two clamps from motor using socket and screwdriver. Motor pulls out very easy...make sure you are holding motor so it does not drop onto floor. Remove motor mounting plate with socket. Remove old coupling using stubby flat screwdriver from both motor and transmission shafts. Install new coupling on transmission by placing a large socket onto plastic piece of new coupling and tapping lightly with hammer until flush with shaft. Install rubber piece of coupling...tap new plastic piece onto motor shaft using socket and hammer. Reinstall motor mount. Turn motor shaft so coupling pieces are aligned. Reverse order to reinstall motor and pump. I tilted the tub slightly when reinstalling the motor and pump as it is a tight fit...just be patient during this step.
The last step in this process is to go tell your wife that she in fact is NOT getting the new $2000 front loading washer and dryer set she saw at Lowes because you just fixed her washer for $20 including shipping.
It really is an easy fix...takes longer to unhook and move the washer than to replace part. Thank You Partselect for your excellent website and speedy shipping of product.
The last step in this process is to go tell your wife that she in fact is NOT getting the new $2000 front loading washer and dryer set she saw at Lowes because you just fixed her washer for $20 including shipping.
It really is an easy fix...takes longer to unhook and move the washer than to replace part. Thank You Partselect for your excellent website and speedy shipping of product.
Parts Used:
-
yesenia from apopka, FL
-
Difficulty Level:Really Easy
-
Total Repair Time:30 - 60 mins
-
Tools:Nutdriver, Screw drivers
6 of 6 people
found this instruction helpful.
Was this instruction helpful to you?
Thank you for voting!
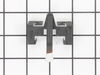
Dryer wouldn't run
Extremely easy repair! Unplug the dryer. Remove the lint trap screen. Take the two screws out of the lint trap chute, pry up the top of the dryer, insert wood or have someone hold top up, remove two screws holding the switch in place while holding the switch so the old spring doesn't fall. Remove old spring and replace with new one. Re-attach switch to dryer with two screws. Plug in and test run. Lower top and push firmly to engages clips. Re-install two scres in lint trap chute followed by the lint trap screen and you are finished!
Repair took about five minutes and saved approximately $70!
Repair took about five minutes and saved approximately $70!
Parts Used:
-
Edward from Richlands, NC
-
Difficulty Level:Really Easy
-
Total Repair Time:Less than 15 mins
-
Tools:Screw drivers
6 of 6 people
found this instruction helpful.
Was this instruction helpful to you?
Thank you for voting!
Dryer made a terrible squealing noise
Took a bit to first figure out how to get the front of the dryer off in order to access the motor, wheels, and belt, but found a "how-to" online. Once I had that, the rest was easy.
Lubricated motor and guide wheels but squealing still there. Then noticed the "idler pulley assembly" (the part that keeps the belt tight against the drum) looked a bit old and worn. Ordered a replacement part on this site because it was much much cheaper than a service call, installed it.... and NO SQUEAL!!!
Lubricated motor and guide wheels but squealing still there. Then noticed the "idler pulley assembly" (the part that keeps the belt tight against the drum) looked a bit old and worn. Ordered a replacement part on this site because it was much much cheaper than a service call, installed it.... and NO SQUEAL!!!
Parts Used:

-
Will from Charlotte, NC
-
Difficulty Level:A Bit Difficult
-
Total Repair Time:15 - 30 mins
-
Tools:Screw drivers, Socket set
7 of 9 people
found this instruction helpful.
Was this instruction helpful to you?
Thank you for voting!
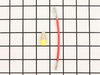
couldn't get the wire connection anywhere after we bought the heating element.
we received the two heating element wires in 3 days and connected the heating element with no problem works great.
Parts Used:
-
Betty from Erie, PA
-
Difficulty Level:Really Easy
-
Total Repair Time:15 - 30 mins
-
Tools:Socket set
6 of 6 people
found this instruction helpful.
Was this instruction helpful to you?
Thank you for voting!
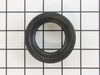
The middle tub would not come out
Sprayed wd40 - limescale - boiling water , NOTHING WORKED after half an hour reapeted spraying and pulling the tub and shaking it back and forth - still nothing
Finally I replaced the center nut loosely than putting a piece of wood on top of it and with me holding the tub slightly high - my wife than whacked it hard several times , I also was turning the tub every whack
When it came out it was full of rust and grime - it would have never come out without what we did
Replacing the the rubber washer was easy - machine works and no more leaking- thank you for your video which really helped to start the job
Finally I replaced the center nut loosely than putting a piece of wood on top of it and with me holding the tub slightly high - my wife than whacked it hard several times , I also was turning the tub every whack
When it came out it was full of rust and grime - it would have never come out without what we did
Replacing the the rubber washer was easy - machine works and no more leaking- thank you for your video which really helped to start the job
Parts Used:
-
Jayanti from SNELLVILLE, GA
-
Difficulty Level:Very Difficult
-
Total Repair Time:More than 2 hours
-
Tools:Nutdriver, Pliers, Screw drivers, Socket set, Wrench (Adjustable), Wrench set
7 of 9 people
found this instruction helpful.
Was this instruction helpful to you?
Thank you for voting!
washer wouldn't spin with load, then not at all with rapid clicking sound
Clutch was noticibly worn compared to new part. Direct drive flange had broken, this part should be steel. found a you tube video that was simple to follow. no problems
Parts Used:

-
Lou from ATLANTIC HLDS, NJ
-
Difficulty Level:Easy
-
Total Repair Time:1- 2 hours
-
Tools:Pliers, Screw drivers, Socket set
6 of 6 people
found this instruction helpful.
Was this instruction helpful to you?
Thank you for voting!
washer wouldn't go into spin cycle
After reading other repair stories I did it like they said. I disconnected all the hoses and drained as much water as I could. The top came apart easily with a regular screwdriver, a 1/2 in drive with extension, and a 14 or 15mm deep socket. The spanner nut came off easiest with several short, quick blows (punch and hammer, counterclockwise). In my case a good wack seemed to be soaked up by the wash tub springs. Be careful not to chip the tub.
I laid the washer, front down, onto a couple a 2x6's. I supported between the tub and body with small 2x4 scraps. The motor/trans/pump came off easily after disconnection the 2 hoses (towels handy) and wiring. After the 3 screws, and some wiggling, the assembly slid out nicely. The coupler came out after snapping the springs off to remove the pump and motor. A 1/4 nut driver and regular screwdriver assisted. Watch how the pump comes off. You might want to mark its orientation with a marker or something. Make sure you get the new coupler on all the way with some taps on the CENTER where the shaft is. Reassemble in the reverse order. You'll know why I suggested marking the water pump.
Watch the order/orientation of the springs, clips, and washer. The clips came off with a screwdriver and pliers. It's always nice to have a rag on them when removing, they like to shoot off and land in the spot that's hardest to find, like under the dryer. My clutch was assembled with the right spring and slid right on. Don't forget about the plastic washer, snap it in good. The plastic piece still on the washer was simple. I opened up a nose pliers and put it on each side of the clip then gave it a hit. It came off with minimal effort and didn't spin on the shaft like pushing on one side with a screwdriver.
During reassembly I put a very light film of grease on the shaft. That washer with the tabs gave me trouble at first. I put a good film of grease on the side with the tabs to hold it in place, with the tabs down, in the clip. Otherwise when sliding the assembly back together it comes loose and you won't get the motor/trans all the way in. Then it all has to come back out and you'll wonder what the heck is keeping the transmission from seating in all the way. You might even get it all together, figuring the motor or tub has to turn to get it to seat right. You may even try running a no clothes load and get stuck with a tub full of water. Ask me how I know.
Reverse everything to reassemble. Make sure you get the springs tight that hold the hoses on. I was worried about over tightening the plastic nut with a 1/2 drive. Run no-clothes load, large, hot with soap. I think tipping it over loosened some stuff that was stuck in between the tub and basket. No, it wasn't grease from the shaft, light film. Anyway, I'll waste a washer full of hot soapy water to avoid the, "Um..what's this on my new shirt".
I didn't mean for this to be so long winded, but I was leary about tackling this job at first. I know my way around the garage/cars, but never tried appliances before. I pictured it'd be apart for weeks and I'd have to call a repair man. Then the "I told you so" look would come. You all know what I mean. I just want to cover as much as possible and encourage others while having them avoid any troubles.
I laid the washer, front down, onto a couple a 2x6's. I supported between the tub and body with small 2x4 scraps. The motor/trans/pump came off easily after disconnection the 2 hoses (towels handy) and wiring. After the 3 screws, and some wiggling, the assembly slid out nicely. The coupler came out after snapping the springs off to remove the pump and motor. A 1/4 nut driver and regular screwdriver assisted. Watch how the pump comes off. You might want to mark its orientation with a marker or something. Make sure you get the new coupler on all the way with some taps on the CENTER where the shaft is. Reassemble in the reverse order. You'll know why I suggested marking the water pump.
Watch the order/orientation of the springs, clips, and washer. The clips came off with a screwdriver and pliers. It's always nice to have a rag on them when removing, they like to shoot off and land in the spot that's hardest to find, like under the dryer. My clutch was assembled with the right spring and slid right on. Don't forget about the plastic washer, snap it in good. The plastic piece still on the washer was simple. I opened up a nose pliers and put it on each side of the clip then gave it a hit. It came off with minimal effort and didn't spin on the shaft like pushing on one side with a screwdriver.
During reassembly I put a very light film of grease on the shaft. That washer with the tabs gave me trouble at first. I put a good film of grease on the side with the tabs to hold it in place, with the tabs down, in the clip. Otherwise when sliding the assembly back together it comes loose and you won't get the motor/trans all the way in. Then it all has to come back out and you'll wonder what the heck is keeping the transmission from seating in all the way. You might even get it all together, figuring the motor or tub has to turn to get it to seat right. You may even try running a no clothes load and get stuck with a tub full of water. Ask me how I know.
Reverse everything to reassemble. Make sure you get the springs tight that hold the hoses on. I was worried about over tightening the plastic nut with a 1/2 drive. Run no-clothes load, large, hot with soap. I think tipping it over loosened some stuff that was stuck in between the tub and basket. No, it wasn't grease from the shaft, light film. Anyway, I'll waste a washer full of hot soapy water to avoid the, "Um..what's this on my new shirt".
I didn't mean for this to be so long winded, but I was leary about tackling this job at first. I know my way around the garage/cars, but never tried appliances before. I pictured it'd be apart for weeks and I'd have to call a repair man. Then the "I told you so" look would come. You all know what I mean. I just want to cover as much as possible and encourage others while having them avoid any troubles.
Parts Used:
-
Jesse from Lester Prairie, MN
-
Difficulty Level:Easy
-
Total Repair Time:30 - 60 mins
-
Tools:Pliers, Screw drivers, Socket set, Wrench set
8 of 13 people
found this instruction helpful.
Was this instruction helpful to you?
Thank you for voting!
Dryer stopped heating
(Always unplug dryer before making any repairs) I opened the dryer and checked the heating element. Making sure that the connection was good and nothing was damaged, I determined the problem was overheated wires. They melted and lots connection. I replaced them with the heating element wire connection kit. Easy to install and simple to get right. I cleaned the dryer again with a vaccum cleaner, removing all the lint, and checked the vents, making sure they were clear...I turned the breaker on (it was tripped when the dryer overheated)and everything worked great.
Parts Used:
-
Joseph from Austin, TX
-
Difficulty Level:Really Easy
-
Total Repair Time:15 - 30 mins
-
Tools:Screw drivers, Socket set
6 of 7 people
found this instruction helpful.
Was this instruction helpful to you?
Thank you for voting!
The dryer start but it did not stay on.
I replaced the push start buttom,but it still had the same problem,so I went to the motor and found the burnt wire and bingo,we are happy again thanks to your website.
Parts Used:
-
Luis from VALDOSTA, GA
-
Difficulty Level:Really Easy
-
Total Repair Time:Less than 15 mins
-
Tools:Nutdriver
7 of 10 people
found this instruction helpful.
Was this instruction helpful to you?
Thank you for voting!
washer would not spin to extract vwater
will not go over step by step here as there are already a multitude of stories on site with exact situation as mine who have already done so.. What I will say is that PartSelect is easily the absolutely best site on the net for a complete problem diagnosis to finished repair experience. Just input your model # and describe the problem and you get instant diagnosis probabilities along with access to a long list of customer Q & A and reviews, along with step by step videos on diagnosing, dis- assembling, and re-assembling along with links to all parts needed and also some secondary tips along the way. The prices are fabulous (example: I got a clutch assembly kit with several parts and 2 additional parts as a just in case for $55 shpg incl, while my local appliance parts place wanted $59 plus tax for just the main part in my assembly kit with a no return policy and no part guarantee, plus it was only 1 day more to have PartSelect pkg arrive than I would have gotten part from local store). This site is FABULOUS !!!
Parts Used:
-
Richard from WEEKI WACHEE, FL
-
Difficulty Level:Very Easy
-
Total Repair Time:30 - 60 mins
-
Tools:Pliers, Screw drivers, Socket set
5 of 5 people
found this instruction helpful.
Was this instruction helpful to you?
Thank you for voting!
tub would not spin....burning smell
Unplugged washer. Pulled the washer away from the wall & leaned it back against the wall to access the underneath side of the washer. Disconnected water hoses to the pump with water pump pliers. Have drain pan handy to catch the water, approximately 1 qt. Remember which hose goes to the proper place. Removed two retaining screws/straps allowing the motor to be seperated from the transmission. There is enough slack in the wiring to allow you to drop the motor without disconnecting. You do not need to remove the water pump. Removed old coupling & replaced with the new one. Make sure you use the "new style" replacement coupler or you will be doing this repair again very soon! Schematics are available online.
Parts Used:
-
John from Elm Mott, AL
-
Difficulty Level:Easy
-
Total Repair Time:Less than 15 mins
-
Tools:Nutdriver, Pliers
6 of 8 people
found this instruction helpful.
Was this instruction helpful to you?
Thank you for voting!
Broken Timer Knob
Removed remaining plastic piece of old broken knob by turning counter clockwise. Screwed on replacement knob by turning clockwise. Replacement knob is made of metal and I do not expect it to ever break. Soooo easy! Fast service and shipping!
Parts Used:

-
Carolyn from Albuquerque, NM
-
Difficulty Level:Really Easy
-
Total Repair Time:Less than 15 mins
5 of 5 people
found this instruction helpful.
Was this instruction helpful to you?
Thank you for voting!
Dryer would not heat
I removed back panel. With the circuit tester I tested the heating coil and the thermostats and the one-time fuse. I found the fuse did not test a circuit. So I ordered the fuse and replaced it. The dryer works fine.
Parts Used:

-
John from Fort Lauderdale, FL
-
Difficulty Level:Really Easy
-
Total Repair Time:15 - 30 mins
-
Tools:Nutdriver
6 of 8 people
found this instruction helpful.
Was this instruction helpful to you?
Thank you for voting!