




















3962VVA Magic Chef Microwave Oven Combo - Instructions
Keep searches simple. Use keywords, e.g. "leaking", "pump", "broken" or "fit".
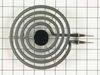
2 of the small burners just fell apart
I just installed the new burners into the proper place and they fit This was very easy to order. Just had to find the model number which the web site told me where to find this. I am very satisfied with the service Thank You
Parts Used:
-
Janice M from Ocala, FL
-
Difficulty Level:Really Easy
-
Total Repair Time:Less than 15 mins
1 of 5 people
found this instruction helpful.
Was this instruction helpful to you?
Thank you for voting!
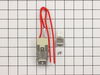
one pole of the socket corroded to nothing
Starting by me making a substitute prong to keep the stove working while the part this coming by mail. was a piece of cake.
Parts Used:
-
martien from williamstown, MA
-
Difficulty Level:Easy
-
Total Repair Time:Less than 15 mins
Was this instruction helpful to you?
Thank you for voting!
Had code F1 and F3 on my oven. Oven wouldn't heat.
Watched the video and it was as easy as described. Not many things go as easily as this.
Parts Used:

-
Cindy from Polson, MT
-
Difficulty Level:Really Easy
-
Total Repair Time:Less than 15 mins
-
Tools:Screw drivers
Was this instruction helpful to you?
Thank you for voting!
change oven sensor
-
Lloyd from Eau Claire, WI
-
Difficulty Level:Really Easy
-
Total Repair Time:Less than 15 mins
-
Tools:Screw drivers
Was this instruction helpful to you?
Thank you for voting!
Broken plastic knob
-
Judy from McKinney, TX
-
Difficulty Level:Really Easy
-
Total Repair Time:Less than 15 mins
Was this instruction helpful to you?
Thank you for voting!
Fan runs continually ,door locked,error code f2,f3,f7
Turned off breaker,opened door with bent coat hanger by sliding right to left the coat hanger to open the door, remover 2 screws holding in the sensor in upper left corner of the oven. Remove the sensor (gently) with the wire connection from back of oven pulling sensor out a out 8 inches . Disconnect plug. Install new sensor with matched harness /.connection, installed 2 screws ,turned on breaker.
Parts Used:
-
John from Dacula, GA
-
Difficulty Level:Really Easy
-
Total Repair Time:Less than 15 mins
-
Tools:Screw drivers
Was this instruction helpful to you?
Thank you for voting!
surface burner stopped working. Was not heating up.
The repair only took me 10 minutes to do. I purchased the surface replacement kit from partselect.com. The part arrived in two days. The instructions were very simple. I read the instructions on line during my purchase. When I received the new part, I simply did the repair. Including shipping, the cost was less than $20.00. A service call would have been at least 5x the cost. Thank you for being there Partselect. (Tim from south bend indiana)
Parts Used:
-
timothy from south bend, IN
-
Difficulty Level:Really Easy
-
Total Repair Time:Less than 15 mins
-
Tools:Nutdriver
Was this instruction helpful to you?
Thank you for voting!
burner not operating or intermittently
Shut off power at breaker box. Removed top burner unit. Removed old receptacle (Mounting screw was rusty so I drilld out the old one.) Cut wires from old unit. Stripped wires back on old unit. Attached old and new wire with ceramic wire nut. Attached new unit. Reinserted top unit. Reconnected power and "voila". Wife was smiling again.
Parts Used:
-
Elroy from Atwater, MN
-
Difficulty Level:Easy
-
Total Repair Time:15 - 30 mins
-
Tools:Nutdriver
Was this instruction helpful to you?
Thank you for voting!
unable to remove screw with screwdriver
-
Emmett from Rayville, LA
-
Difficulty Level:A Bit Difficult
-
Total Repair Time:30 - 60 mins
-
Tools:Pliers, Screw drivers
Was this instruction helpful to you?
Thank you for voting!
oven temperature was of & then taking along time to heat
-
Barbara from Newark, DE
-
Difficulty Level:Really Easy
-
Total Repair Time:15 - 30 mins
-
Tools:Screw drivers
Was this instruction helpful to you?
Thank you for voting!
Not heating
Was easy cut the wires of as told to do wire nut the ends together and put back together and tested and worked great. Done
Parts Used:
-
Darwin from wisconsin rapids, WI
-
Difficulty Level:Really Easy
-
Total Repair Time:15 - 30 mins
-
Tools:Pliers, Screw drivers
Was this instruction helpful to you?
Thank you for voting!
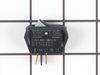
Oven light Switch
Compressed the springs and removed the damaged switch, then changed the wiring over to the new switch and press into place, worked fine.
Parts Used:
-
William from APACHE JUNCTION, AZ
-
Difficulty Level:Really Easy
-
Total Repair Time:Less than 15 mins
-
Tools:Pliers
Was this instruction helpful to you?
Thank you for voting!
Oven randomly turned off and locked
-
Robert from homilton, MT
-
Difficulty Level:Really Easy
-
Total Repair Time:15 - 30 mins
-
Tools:Screw drivers
Was this instruction helpful to you?
Thank you for voting!
F-4 Code, oven wouldn't heat
Watching the video of how to replace the sensor was great help and much appreciated, the only difference was that my wires were much shorter and I had to pull the oven out of the cabinet to get to the back of the oven to release the clip holding the wires together, unlike the video where the man jiggled the wires until the clip holding the wires together came through the little slot where the probe is attached, otherwise it was pretty simple, just a few extra steps to pull the oven forward to get to the rear to release the clip holding the wires together. Once I was able to release the clip I used one of the 2 adapters that was sent with the sensor probe and attached them after putting the wires through the hole where the probe was attached first then replaced the 2 screws that holds the sensor in place, slid the oven back in and turned the circuit breaker back on and it works perfectly. The video gave me the confidence to do this job though and I thank PartSelect very much for being a great company to help with videos and sending the parts so quickly.
Parts Used:
-
Gary from San Jose, CA
-
Difficulty Level:Easy
-
Total Repair Time:15 - 30 mins
-
Tools:Screw drivers
Was this instruction helpful to you?
Thank you for voting!
The oven was not heating up to temperature
I replaced the oven sensor which was easy to replace. A pigtail wire was provided with the sensor which is intended to be installed first so you don't have to reach around the front and back of the oven at the same time. The replacement was easy. However, that turned out not to be the problem. The real problem was the maytag electronic clock control timer, temperature control unit. The part number is 7601P177-60. This device has been discontinued and I was fortunate enough to find the part at a local supplier. Once I replaced this, the problem went away. The oven heats up normally. My original symptom was that when setting the oven temperature to something like 350 degrees, the display would rapidly report heating up the oven to that temperature, and the oven was only mildly warm. If you have that symptom, it is probably not the oven sensor. It is the electronic clock unit. Hope you can find one. If you can't, I think you need to by a new oven. Regards
Parts Used:
-
Max from Bothell, WA
-
Difficulty Level:Really Easy
-
Total Repair Time:15 - 30 mins
-
Tools:Screw drivers
Was this instruction helpful to you?
Thank you for voting!