




















36275695892 Kenmore Range - Instructions
Keep searches simple. Use keywords, e.g. "leaking", "pump", "broken" or "fit".
Symtoms: a fluttering noise was heard for a few weeks in the oven prior to it not working at all.
When turning on the oven, I could see the ignitor red hot but it would not ignite the burner. I ordered the pair of new ignitor and burner tube. Upon removal of the burner tube, I saw a large hole in the tube where the center of the ignitor is located, clearly in need of replacement. Unlike some other ovens, the connector on the new ignitor was the exact fit for my oven (Hotpoint RGB745BEA7WH). After access to the tube, the replacement took less than 10 minutes not including watching about 3 youtube videos on how to actually do the replacement prior. You should turn the gas and electric off but ooops, I forgot. I was shocked at how easy this was!
Parts Used:
-
James from WEBSTER, NY
-
Difficulty Level:Easy
-
Total Repair Time:15 - 30 mins
-
Tools:Nutdriver
3 of 3 people
found this instruction helpful.
Was this instruction helpful to you?
Thank you for voting!
GAS OVEN WOULDN'T LIGHT
With the model number I wnet on Parts select site and located the part through the problem finder selection,(GREATFEATURE!) (74% the problem is the Flat Style Oven Igniter) (watched the video on installation and compared my unit with the one in the video). The video explained installation completely and made it very simple. The only critic is that the oven door can be removed completely to make it easier to get in the the oven, opening part way and lifting up the oven door will come completely off. Also the broiler pan drawer can be taken completely out if you would need to get in this way for some reason. Final note: I called the local GE dealer Parts dept- they would have had to order the part anyway and it would have cost three times what Parts Select charged me.Save $$$ great! .
Parts Used:
-
Harold from BUCKLEY, MI
-
Difficulty Level:Really Easy
-
Total Repair Time:15 - 30 mins
-
Tools:Nutdriver, Screw drivers
3 of 3 people
found this instruction helpful.
Was this instruction helpful to you?
Thank you for voting!
oven would glow but the burner would not come on
My son took out the old burner bar and there was a hole burnt right through it. I ordered the part on Weds night and was surprised when we received it so quickly on Fri morning. He had no trouble at all - just removed the old igniter and bar and replaced it with the new one. Nothing needed cut or spliced - perfect match. Now I can bake again!!!
Parts Used:
-
Charlotte from Rochester, PA
-
Difficulty Level:Really Easy
-
Total Repair Time:30 - 60 mins
-
Tools:Screw drivers
7 of 15 people
found this instruction helpful.
Was this instruction helpful to you?
Thank you for voting!
Oven will not preheat. Pulses on an off.
Turned off the gas. Disconnected gas inlet, burner supply line and oven supply line from regulator. Unscrewed regulator from its bracket. Replaced with new regulator in reverse order and added teflon tape suitable for gas lines to all threads.
Unfortunately, the regulator was not the cause of the problem and the oven still does not prehead - acts exactly the same.
Unfortunately, the regulator was not the cause of the problem and the oven still does not prehead - acts exactly the same.
Parts Used:
-
Paul from San Francisco, CA
-
Difficulty Level:A Bit Difficult
-
Total Repair Time:30 - 60 mins
-
Tools:Screw drivers, Socket set, Wrench (Adjustable), Wrench set
7 of 15 people
found this instruction helpful.
Was this instruction helpful to you?
Thank you for voting!
Replace glowbar igniter
Removed the old glowbar's two screws. Didn't take a mental photo of its proper placcement (or a real one, which would've been smart). Removed screws holding 1) a heat protection plate, and 2) wire harness plate. Installed the new glowbar, hopefully, the right way - with its heat-plate facing the gasline of the over/broiler. Reinstalled the heat protection plate and wire harness plate. Hasn't blown up yet!
Parts Used:
-
Daniel from Espanola, NM
-
Difficulty Level:Easy
-
Total Repair Time:30 - 60 mins
-
Tools:Wrench set
3 of 4 people
found this instruction helpful.
Was this instruction helpful to you?
Thank you for voting!
bottom trim had rusted, so we needed new piece
Removed oven door (made sure hinges were locked open and stayed open). Remove part on top of trim, removed rusted trim and replaced with new trim. Replaced part on top of trim and screwed all back together. Put oven door back on and unlocked hinges. It was easier than the trial run (when I hadn't realized that the hinges weren't locked open!)
Parts Used:
-
Robin from Apple Valley, MN
-
Difficulty Level:Really Easy
-
Total Repair Time:Less than 15 mins
-
Tools:Socket set
3 of 4 people
found this instruction helpful.
Was this instruction helpful to you?
Thank you for voting!
we had damaged the burner cap

-
Gary from Indio, CA
-
Difficulty Level:Really Easy
-
Total Repair Time:Less than 15 mins
4 of 7 people
found this instruction helpful.
Was this instruction helpful to you?
Thank you for voting!
Over not heating
1. Removed oven door..
2. Slide out floor plate of over.
3. Removed four screws securing the flame shield.
4. removed the two screws attaching the heating element to the burner.
5. Pulled heating element wires out of rear hole in oven and detached plug.
6. Attached new element and reassembled in reverse order.
2. Slide out floor plate of over.
3. Removed four screws securing the flame shield.
4. removed the two screws attaching the heating element to the burner.
5. Pulled heating element wires out of rear hole in oven and detached plug.
6. Attached new element and reassembled in reverse order.
Parts Used:
-
Chris from Inglewood, CA
-
Difficulty Level:Easy
-
Total Repair Time:Less than 15 mins
-
Tools:Wrench set
3 of 4 people
found this instruction helpful.
Was this instruction helpful to you?
Thank you for voting!
Part will wear out after a couple of years
In my case it was the lower burner so I unplugged oven and turned gas off.
Then I removed the bottom drawer, and the lower burner cover.
Next unplug Oven Igniter, found where drawer existed.
Removed 2 screws attaching Igniter using nutdriver
Placed new Igniter on
Plug Igniter in and tested oven
Replace burner cover and drawer
This was much easier then what I went through with a repair man the first time around. These Igniter are designed for certain model stoves and are not interchangable with other model stoves!!!
Then I removed the bottom drawer, and the lower burner cover.
Next unplug Oven Igniter, found where drawer existed.
Removed 2 screws attaching Igniter using nutdriver
Placed new Igniter on
Plug Igniter in and tested oven
Replace burner cover and drawer
This was much easier then what I went through with a repair man the first time around. These Igniter are designed for certain model stoves and are not interchangable with other model stoves!!!
Parts Used:
-
Richard from Mt Solon, VA
-
Difficulty Level:Easy
-
Total Repair Time:Less than 15 mins
-
Tools:Nutdriver
2 of 2 people
found this instruction helpful.
Was this instruction helpful to you?
Thank you for voting!
Oven would not heat to the degree you set it for
I first took out the screw which held the bottom plate for the oven. then took the screws off the igniter unhooked the wires , took the new igniter hooked up the wires then put the screws back in put the bottom plate back in and turned the oven on to test it and it worked great.
Parts Used:
-
MARY from BIG LAKE, MN
-
Difficulty Level:Really Easy
-
Total Repair Time:Less than 15 mins
-
Tools:Nutdriver
3 of 5 people
found this instruction helpful.
Was this instruction helpful to you?
Thank you for voting!
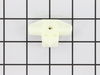
Drawer support broke
Remove drawer by pulling out and lifting up so drawer will slide out of range. Use 1/4 inch Nutdriver or socket - remove the screw that holds the drawer support to the body of the range. Remove support and install new one with screw Pay attention to the way the support fits. There are two holes one for the screw and the other for the plastic prong on the bottom of the support. The prong fits in the bottom hole and the screw in the above hole.
Parts Used:
-
Charles from BOULDER, WY
-
Difficulty Level:Really Easy
-
Total Repair Time:Less than 15 mins
-
Tools:Nutdriver
2 of 2 people
found this instruction helpful.
Was this instruction helpful to you?
Thank you for voting!
Part rusted over time...22 years.
Unscrewed eight screws. Removed rusted part. Cleaned area with Windex. Replaced new part.
Parts Used:
-
Jeannene from HUNTINGTON, TX
-
Difficulty Level:Very Easy
-
Total Repair Time:Less than 15 mins
-
Tools:Screw drivers
2 of 2 people
found this instruction helpful.
Was this instruction helpful to you?
Thank you for voting!
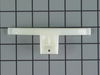
Bottom part of the Drawer Glider broke off on both sides of the drawer.
Remove the draw from the stove. Then unscrew two Phillips Head screws ( one on each side). Remove the old gliders. Slip in the new gliders. Screw the two phillis head screws back in. Make sure when you put the drawer back in the stove that you lift the front of the drawer up enough that the lower portion of the new glider is engaged on the side rail of the oven drawer space.
Parts Used:
-
William from SPOKANE, WA
-
Difficulty Level:Really Easy
-
Total Repair Time:Less than 15 mins
-
Tools:Screw drivers
2 of 2 people
found this instruction helpful.
Was this instruction helpful to you?
Thank you for voting!
lights blown out

-
Gerald from WINTERVILLE, GA
-
Difficulty Level:Very Easy
-
Total Repair Time:Less than 15 mins
6 of 14 people
found this instruction helpful.
Was this instruction helpful to you?
Thank you for voting!
Drawer sticking and not operating smoothly
I was so sick of this drawer and I over heard a buddy telling a story about a website that you can get ANY piece for appliances. I take the drawer out, look up the website (partselect.com) look at the appliance diagram and find the missing piece. Order it, get it, install it. My wife thinks I'm a hero and I think I'm pretty cool too.
Parts Used:
-
Bill from Philadelphia, PA
-
Difficulty Level:Easy
-
Total Repair Time:Less than 15 mins
-
Tools:Screw drivers
3 of 5 people
found this instruction helpful.
Was this instruction helpful to you?
Thank you for voting!