




















36275695892 Kenmore Range - Instructions
Keep searches simple. Use keywords, e.g. "leaking", "pump", "broken" or "fit".
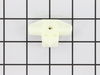
The drawer support broke.
Removed the screw from the broken piece and put the new piece on and put the screw on.
Parts Used:
-
Cindy from Golden Valley, ND
-
Difficulty Level:Really Easy
-
Total Repair Time:Less than 15 mins
-
Tools:Screw drivers
8 of 14 people
found this instruction helpful.
Was this instruction helpful to you?
Thank you for voting!
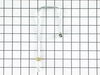
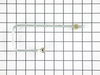
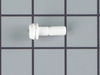
burner tubes both had pin holes in them and the ignighter didnt work
This was a real easy job and a success,of course any repair i do on a gas appliance and when finished It doesnt blow up i consider a success.
Thank you,David Williams
Thank you,David Williams
Parts Used:
-
David from easton, MD
-
Difficulty Level:Really Easy
-
Total Repair Time:15 - 30 mins
-
Tools:Socket set, Wrench (Adjustable), Wrench set
10 of 20 people
found this instruction helpful.
Was this instruction helpful to you?
Thank you for voting!
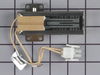
Ignter would glow but gas valve wouldn't open
I removed the door and the racks, and the flame spreader. I removed the 4"X6" shield loosen the circular flap to plug the new igniter to the recepticle. Turn the oven on to check the operation and if it comes on, button it back up. remember open the oven door approx 3" and pull upwords to remove the door. I would say 90% of the time the igniter is the problem.
Parts Used:
-
Peter R. from Riverside, CA
-
Difficulty Level:Really Easy
-
Total Repair Time:15 - 30 mins
-
Tools:Nutdriver, Screw drivers
5 of 6 people
found this instruction helpful.
Was this instruction helpful to you?
Thank you for voting!
Igniter went bad
1. Unplug from electrical outlet. 2. Turn off gas valve. 3. Remove oven door. 4. Remove bottom drawer. 5. Remove oven shelves. 6. Remove oven floor, take out the two screws at the rear. 7. Unplug the igniter from the wire harness, you can reach it from where you removed the drawer. 8. Remove the igniter, by unscrewing the two bolts using your nut driver. 9. Replace with new igniter. 10. Put everything back together, starting with # 9 and work your way to #1.
Parts Used:
-
Willie from Shreveport, LA
-
Difficulty Level:Really Easy
-
Total Repair Time:15 - 30 mins
-
Tools:Nutdriver, Screw drivers
5 of 6 people
found this instruction helpful.
Was this instruction helpful to you?
Thank you for voting!
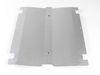
Hole burned through deflector oven and metal dropped onto igniter and burned it out
Removed bottom shelf from inside oven, turned it obj and replaced the oven deflector with only a screwdriver
Parts Used:
-
Scott from ARDMORE, PA
-
Difficulty Level:Very Easy
-
Total Repair Time:15 - 30 mins
-
Tools:Screw drivers
5 of 6 people
found this instruction helpful.
Was this instruction helpful to you?
Thank you for voting!
Gas oven igniter for a GE Profile XL44
Once we knew which part was needed, we went on to your site and orded the part. It was delivered the next day! Partselect.com is bookmarked on every computer in our household, including mobiles. It's great to know there is such a fantastic resource for do-it-youselfers. It took 5 minutes to remove the old igniter and plug in the new. A screwdriver is the only tool required.
Parts Used:
-
Carolyn from Oakdale, AL
-
Difficulty Level:Really Easy
-
Total Repair Time:Less than 15 mins
-
Tools:Screw drivers
8 of 15 people
found this instruction helpful.
Was this instruction helpful to you?
Thank you for voting!
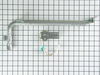
igniter was bad and tube wasblown
repair was easy enough, but the kit came with female ends and needed mail ends. I had to splice old connecters to new igniter
Parts Used:
-
James from Hayden, ID
-
Difficulty Level:A Bit Difficult
-
Total Repair Time:1- 2 hours
-
Tools:Pliers, Screw drivers, Socket set
5 of 6 people
found this instruction helpful.
Was this instruction helpful to you?
Thank you for voting!
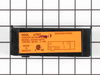
stove top burner ignition spark progressively got weaker and then stopped on all but one burner.
I located the igniter module by following the wires to the top/rear of the stove. Removed two sheet metal guards and marked and numbered each electrical wire before removing them. Reasembled in reverse order. Wife thinks I'm a genius!
Parts Used:
-
George from Villa Park, IL
-
Difficulty Level:Easy
-
Total Repair Time:30 - 60 mins
-
Tools:Nutdriver, Pliers
6 of 9 people
found this instruction helpful.
Was this instruction helpful to you?
Thank you for voting!
2 burners wouldnt spark
Took top off, removed wires from old spark module and put them on new one. Very easy and quick, works very well now.
Parts Used:
-
chadd from philadelphia, PA
-
Difficulty Level:Really Easy
-
Total Repair Time:15 - 30 mins
-
Tools:Nutdriver
5 of 8 people
found this instruction helpful.
Was this instruction helpful to you?
Thank you for voting!
The igniter would glow but the gas would not come on.
I followed the video instructions on the site. I unplugged the power supply and turned off the gas supply. I then removed the plate out of the bottom of the oven to get to the igniter. Then I removed the screws and unplugged the igniter to remove the old part. I had to purchase two porcelain wire nuts because the new part connection did not match up with the old connection. The repairs were quite simple and I had my oven back and working in no time. I am glad I read the comments from others because I thought it was my gas control valve, but they were right it was my igniter. This saved me time and money.
Parts Used:
-
Joyce from SALEM, WV
-
Difficulty Level:Really Easy
-
Total Repair Time:15 - 30 mins
-
Tools:Pliers, Screw drivers, Socket set
4 of 5 people
found this instruction helpful.
Was this instruction helpful to you?
Thank you for voting!
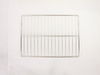
old blackened oven racks
-
Roger from Falls Church, VA
-
Difficulty Level:Really Easy
-
Total Repair Time:Less than 15 mins
8 of 17 people
found this instruction helpful.
Was this instruction helpful to you?
Thank you for voting!
Only one burner sparking on range.
Removed spark module only two small nuts. Inside was six wires on terminal. Removed one by one and connected right to the new module. Easy job 10 minutes and finished.
Parts Used:
-
Ronald from Freehold, NJ
-
Difficulty Level:Really Easy
-
Total Repair Time:Less than 15 mins
-
Tools:Nutdriver, Pliers
6 of 12 people
found this instruction helpful.
Was this instruction helpful to you?
Thank you for voting!
Oven would not ignite
First I removed the broiler from the bottom of the oven, then pulled the oven way from the wall to unplug it. I then removed the two screws that hold the igniter element in place. Ironically, the plug GE manufactures is reversed so i had to strip the plug and go end and reverse the wires to attach them to the oven. I used ceramic wire attachments as plastic would surely have melted. Replaced the screws, replaced the broilers, plugged it in, replaced against the wall and it fired up.
Parts Used:
-
Todd from Falcon, CO
-
Difficulty Level:A Bit Difficult
-
Total Repair Time:Less than 15 mins
-
Tools:Screw drivers
3 of 3 people
found this instruction helpful.
Was this instruction helpful to you?
Thank you for voting!
Wife broke gas lines when trying to clean under hood
Removed old line with wrench and attached new line to gas valve first. Then lowered hood to the stop and attached gas line to burners.........very easy and works fine now.
Parts Used:
-
Scott from Corinth, MS
-
Difficulty Level:Easy
-
Total Repair Time:Less than 15 mins
-
Tools:Wrench set
4 of 6 people
found this instruction helpful.
Was this instruction helpful to you?
Thank you for voting!
none
-
Michael from Laughlin, NV
-
Difficulty Level:Very Easy
-
Total Repair Time:Less than 15 mins
3 of 3 people
found this instruction helpful.
Was this instruction helpful to you?
Thank you for voting!