




















2DWTW4845EW0 Whirlpool Washer - Instructions
Keep searches simple. Use keywords, e.g. "leaking", "pump", "broken" or "fit".
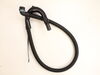
replaced drain hose that was missing
slipped the new drain hose on and with locking plyers slipped the wire clap in place after three trys
Parts Used:
-
Delmar from EAST TROY, WI
-
Difficulty Level:Really Easy
-
Total Repair Time:30 - 60 mins
-
Tools:Pliers
12 of 20 people
found this instruction helpful.
Was this instruction helpful to you?
Thank you for voting!
Upper Agitator Ratchet Broken
1. Remove Top Cap.
2. Remove Seal Cap.
3. Remove 7/16 Bolt
4. Lift out Old Agitator
5. Put in NEW Agitator
6. Replace 7/16 Bolt
7. Replace Seal Cap
8. Replace Top Cap.
9. Sit back and enjoy your clean clothes
2. Remove Seal Cap.
3. Remove 7/16 Bolt
4. Lift out Old Agitator
5. Put in NEW Agitator
6. Replace 7/16 Bolt
7. Replace Seal Cap
8. Replace Top Cap.
9. Sit back and enjoy your clean clothes
Parts Used:

-
Mathieu from Palmetto Bay, FL
-
Difficulty Level:Really Easy
-
Total Repair Time:Less than 15 mins
-
Tools:Socket set
8 of 9 people
found this instruction helpful.
Was this instruction helpful to you?
Thank you for voting!
washer was off balance all the time
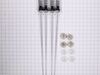
Watched video from partselect and it was on the money. Removed a few screws and tilted the lid. (after unplugging). Pulled it out from wall and tilted machine to have access to bottom. Had grandson reach from underneath and pull the rods out and inserted the new ones. Work great now. My wife is happy and I saved about $600 because I didn't have to buy a new one.
Parts Used:
-
Michael from MAGNOLIA, TX
-
Difficulty Level:Easy
-
Total Repair Time:15 - 30 mins
-
Tools:Pliers
7 of 7 people
found this instruction helpful.
Was this instruction helpful to you?
Thank you for voting!
need to have a fabric softner dispenser
the first order was ordered wrong for me and the part was to big so I had to send it back and order another. The second dispenser was the right one and went on well to the machine. Just had to put it on the machine by hand.
Parts Used:

-
Hazel from Bemidji, MN
-
Difficulty Level:A Bit Difficult
-
Total Repair Time:Less than 15 mins
10 of 16 people
found this instruction helpful.
Was this instruction helpful to you?
Thank you for voting!
Washer was rumbling at the spin cycle
Unplugged, removed cold and hot lines, moved out to garage, unscrewed 3 screws on the back, lifted up the top, removed and replaced 1 suspension rod at a time with washer leaning against wall sideways, easy peasy didn’t take no time at all, moved it back in 3 screws back in place hot and cold screwed back in and walla! It worked and has been working flawlesssly..
Parts Used:
-
Teamos from Frisco, TX
-
Difficulty Level:Very Easy
-
Total Repair Time:Less than 15 mins
-
Tools:Pliers
7 of 7 people
found this instruction helpful.
Was this instruction helpful to you?
Thank you for voting!
Washer would not complete cycle, as I forced the top open when locked
I did the repair just as the video showed, and had no problems at all.
the hardest thing I had to do was to move the washer out to where I could get to the back of the machine.
Due to the help of the sales rep and the video the repair was very easy
Thanks
Louis
the hardest thing I had to do was to move the washer out to where I could get to the back of the machine.
Due to the help of the sales rep and the video the repair was very easy
Thanks
Louis
Parts Used:
-
Louis from MANDEVILLE, LA
-
Difficulty Level:Really Easy
-
Total Repair Time:30 - 60 mins
-
Tools:Screw drivers
7 of 8 people
found this instruction helpful.
Was this instruction helpful to you?
Thank you for voting!
top agitator would not operate
unscrewed a bolt, pulled top agitator out and replaced parts and reinstalled.
Parts Used:

-
Larry from Edgewood, TX
-
Difficulty Level:Really Easy
-
Total Repair Time:Less than 15 mins
-
Tools:Socket set
8 of 11 people
found this instruction helpful.
Was this instruction helpful to you?
Thank you for voting!
Would not agitate
Exactly as shown in your video
Parts Used:


-
john from RAY CITY, GA
-
Difficulty Level:Really Easy
-
Total Repair Time:30 - 60 mins
6 of 6 people
found this instruction helpful.
Was this instruction helpful to you?
Thank you for voting!
The washer would not only shake, but sound like a mule was kicking the side of unit!
I watched the PartsSelect video. I was hoping for the tub with the slots in the tub mounts, but mine didn't have them, so I had to lay it down on its back. The only thing I did that was not in the video was I placed a 2" thick closed cell foam knee pad I had on hand between the tub and the back of the housing. When I laid it down, the tub was elevated by 2". This made reaching the two rear rods a little easy. It seems that there would be a more robust way to achieve the dampening affect, but I guess this is cost effective.
It's strange that I searched for my issue several times and only saw recommendations to level the washer. It was level. Then one day I ran across the suspension rod resolution. It didn't do it on every load, but after a year of my wife nagging me and threatening to get a new washer, I finally fixed it. The biggest issue is just logistics in a condo hallway and a little leaking water. I also replaced my hoses. Should be in good shape until the next thing.....
It's strange that I searched for my issue several times and only saw recommendations to level the washer. It was level. Then one day I ran across the suspension rod resolution. It didn't do it on every load, but after a year of my wife nagging me and threatening to get a new washer, I finally fixed it. The biggest issue is just logistics in a condo hallway and a little leaking water. I also replaced my hoses. Should be in good shape until the next thing.....
Parts Used:
-
Eric from HENDERSONVLLE, NC
-
Difficulty Level:Easy
-
Total Repair Time:30 - 60 mins
-
Tools:Nutdriver, Pliers, Screw drivers
6 of 6 people
found this instruction helpful.
Was this instruction helpful to you?
Thank you for voting!
Washer would not agitate
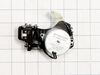
When to PartSelect Web site, used their trouble shooting guide, Used their advice, which was to replace the actuator. bought and installed the actuator which took around 20 minutes or so. washer started working fine after replacing. Thanks to the website I save a lot of money. Thanks PartSelect
Parts Used:
-
Lee from FORT WORTH, TX
-
Difficulty Level:Really Easy
-
Total Repair Time:15 - 30 mins
-
Tools:Nutdriver, Screw drivers
6 of 6 people
found this instruction helpful.
Was this instruction helpful to you?
Thank you for voting!
The plastic teeth on the inside of the large agitator stripped out.
I needed an air impact wrench to remove the single nut. It was stuck on there. Once the Nut. Was removed it was an easy repair. Perfect fit! Just pop it on the shaft and replace the bolt. Since I had my air tools out already I gave it a couple of dugga duggas.
Parts Used:
-
David from NICHOLASVILLE, KY
-
Difficulty Level:Really Easy
-
Total Repair Time:30 - 60 mins
-
Tools:Wrench set
6 of 7 people
found this instruction helpful.
Was this instruction helpful to you?
Thank you for voting!
The Washing would stop working mid cycle
I unscrewed the top panel of the washer. I lifted up the top and used the pint scrapper to loosen up the lid switch and slid it out. I pulled the switch wiring harness out of the rear top of the washer. I slid the new lid switch and wiring harness back through the opening and secured the switch in place. Screwed it back in place. Took less than 15 minutes. I followed the instructions on the video, easy peasy lemon squeezy.
Parts Used:
-
Adam from LUMBERTON, MS
-
Difficulty Level:Really Easy
-
Total Repair Time:Less than 15 mins
-
Tools:Nutdriver
7 of 10 people
found this instruction helpful.
Was this instruction helpful to you?
Thank you for voting!
Top section of agitator would not spin.
Used your exploded view of the area to determine the problem-found the broken part and reassembled following the drawing. I felt like a pro after a test and kept my wife happy. [only lost a few days waiting for the parts which arrived as expected]
Parts Used:
-
Russell from Hyannis, MA
-
Difficulty Level:Really Easy
-
Total Repair Time:15 - 30 mins
-
Tools:Socket set
6 of 7 people
found this instruction helpful.
Was this instruction helpful to you?
Thank you for voting!
wanting to see this new energy efficient washer work, with the lid open
There are a lot of complaints, with these new energy efficient washers, no matter the brand, on the amount of water that is being used, and not properly washing your cloths, while in the wash cycle.
I got this new MayTag washer, and wanted to see it work, for myself, so I can try to correct the problem. But in order to see it work, and fill, the lid has to be open, to observe it working.
To do so, there is a part connected to the lid, called a "STRIKE", that when the lid is down, it activates the electronics, making the washer run.
So, I purchased this strike, to insert it in the washer, so I can observe the washer running, while the lid is open. Very easy, no tools required, just stick it in the slot, where the strike, on the lid goes, when the lid is closed.
I got this new MayTag washer, and wanted to see it work, for myself, so I can try to correct the problem. But in order to see it work, and fill, the lid has to be open, to observe it working.
To do so, there is a part connected to the lid, called a "STRIKE", that when the lid is down, it activates the electronics, making the washer run.
So, I purchased this strike, to insert it in the washer, so I can observe the washer running, while the lid is open. Very easy, no tools required, just stick it in the slot, where the strike, on the lid goes, when the lid is closed.
Parts Used:

-
Terry from KEYSTONE, IN
-
Difficulty Level:Really Easy
-
Total Repair Time:Less than 15 mins
5 of 5 people
found this instruction helpful.
Was this instruction helpful to you?
Thank you for voting!
Top part of agitator was not agitating clothes.
Took off water softener from top of agitator. Pulled up and removed cap with O-ring that covered bolt that held agitator in place.then pulled briskly up on entire agitator from the bottom to remove agitator from machine.After that I put my feet on bottom of agitator and then pulled up on top part to separate the two pieces. After that just follow instruction sheets for parts replacement and then reverse steps to reassemble.
Parts Used:

-
Dan from BLOOMINGTON, IL
-
Difficulty Level:Very Easy
-
Total Repair Time:Less than 15 mins
-
Tools:Socket set
5 of 5 people
found this instruction helpful.
Was this instruction helpful to you?
Thank you for voting!