




















25370603413 Kenmore Refrigerator - Instructions
Keep searches simple. Use keywords, e.g. "leaking", "pump", "broken" or "fit".
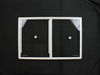
Broken Plastic Frame On Glass Refrig Shelf
Removed shelf from packing, washed it, slid it onto the refrigerator shelf rails and done. Took longer to unpack the shelf than install it! Very easy, perfect fit, and very happy with the exact replacement. Super careful packing, quick shipping. Very good experience. Hope I don't need anymore parts, but if I do, I will definitely get them here.
Parts Used:
-
Linda from Rural Hall, NC
-
Difficulty Level:Really Easy
-
Total Repair Time:Less than 15 mins
17 of 20 people
found this instruction helpful.
Was this instruction helpful to you?
Thank you for voting!
plastic hook broke
-
Christina from Tacoma, WA
-
Difficulty Level:Really Easy
-
Total Repair Time:Less than 15 mins
16 of 19 people
found this instruction helpful.
Was this instruction helpful to you?
Thank you for voting!
Plastic support rim on glass shelf broken
Removed replacement shelf from delivery box. Took items off of existing, broken shelf. Removed broken shelf. Slid new shelf into place. Placed items onto new shelf. Took the rest of the day off.
Parts Used:
-
Patrick from Arlington, WA
-
Difficulty Level:Really Easy
-
Total Repair Time:Less than 15 mins
15 of 17 people
found this instruction helpful.
Was this instruction helpful to you?
Thank you for voting!
Ice maker quit working
Followed the steps in the video on your site, really easy to do.
Parts Used:
-
Steve from ORANGE, TX
-
Difficulty Level:Really Easy
-
Total Repair Time:15 - 30 mins
-
Tools:Nutdriver
16 of 20 people
found this instruction helpful.
Was this instruction helpful to you?
Thank you for voting!
FREEZER WAS COLD FRIDGE WARM
YOU TUBE VIDEO POINTED ME IN THE RIGHT DIRECTION. USED MULTI METER TO CHECK FOR VOLTAGE. NONE, REPLACED DEFROST HEATER. WORKS LIKE A CHARM, PART DELIVERED TO MY DOOR FOR LESS THAN $60.00, IN TWO DAYS FROM PARTSELECT. FIXED IT MYSELF FOR LESS THAN THE COST OF A SERVICE CALL.
Parts Used:
-
JEFF from OLIVET, MI
-
Difficulty Level:Really Easy
-
Total Repair Time:15 - 30 mins
-
Tools:Pliers
15 of 18 people
found this instruction helpful.
Was this instruction helpful to you?
Thank you for voting!
Plastic retainer on end had broken
Just popped it onto retainer nubs on door. Had been a little concerned, as it was replacing part # 240337900, but it fit just fine.
Parts Used:
-
Jonathan from Portland, OR
-
Difficulty Level:Really Easy
-
Total Repair Time:Less than 15 mins
14 of 16 people
found this instruction helpful.
Was this instruction helpful to you?
Thank you for voting!
Tha part was broken
-
yadira from mcallen, TX
-
Difficulty Level:Really Easy
-
Total Repair Time:Less than 15 mins
16 of 22 people
found this instruction helpful.
Was this instruction helpful to you?
Thank you for voting!
The water valve for the ice maker was bad
Pulled the refrigerator out from the wall. Then unplugged it took my nutdriver with a1/4" socket on it and took out the screws from the cardboard back on the bottom of the refrigerator. Then I removed the two screws holding the water valve on. Then I unscrewed the supply water line from the main water inlet valve. Then I removed the outlet waterline going to the ice maker from the water valve. Then I reversed the procedure to put it back together. Hooked up the main water line and turned the water valve on for the water to flow to the valve at first nothing happened had to wait for a couple of hours for everything else to get to the right temperature before the ice maker would start making ice.
Parts Used:
-
frank from GRAND ISLAND, FL
-
Difficulty Level:Really Easy
-
Total Repair Time:30 - 60 mins
-
Tools:Nutdriver
12 of 12 people
found this instruction helpful.
Was this instruction helpful to you?
Thank you for voting!
Plastic Shelf Broke
-
Jim from Carlsbad, CA
-
Difficulty Level:Really Easy
-
Total Repair Time:Less than 15 mins
11 of 11 people
found this instruction helpful.
Was this instruction helpful to you?
Thank you for voting!
Bottom shelf on door cracked and broke
I ordered the Door Shelf Bin from PartSelect.com on Friday and received it on Saturday!! I was shocked, but thrilled. The easy to use diagram helped me to pick the right part and I easily replaced the broken one. I have already started to recommend PartSelect.com I was so thrilled with their service!
Parts Used:
-
Jamie from Greensburg, PA
-
Difficulty Level:Really Easy
-
Total Repair Time:Less than 15 mins
12 of 14 people
found this instruction helpful.
Was this instruction helpful to you?
Thank you for voting!
Ice maker failed
Watched YouTube video. Very easy. Used my cell phone camera in ‘selfie’ mode propped up in the upper right hand corner of freezer to see the 2 hidden screws.
Parts Used:
-
Mary from SOUTH LYON, MI
-
Difficulty Level:Easy
-
Total Repair Time:Less than 15 mins
-
Tools:Nutdriver, Screw drivers
11 of 13 people
found this instruction helpful.
Was this instruction helpful to you?
Thank you for voting!
Replacing Icemaker
Pull refrigerator from wall and disconnect the water line and unplug the power.
On top of the icemaker, two machine screws hold the icemaker to the side of the refrigerator. You will have to feel around to find the machine screws, but once you do, it is simple to slip the appropriate size socket over the hex heads. I found it helpful to have an extension on the socket wrench. Disconnect the power cable inside the refrigerator (there are little pressure clips on the side that help release the cable) and move it out of the way for the time-being.
Back out both machine screws several turns, but do not remove them completely. The icemaker slips over the screws, so leaving them in the side of the refrigerator makes that process a lot easier. Hand tighten the machine screws once you have positioned the new icemaker in place. One thing to be sure and do is make sure the water line hose coming out of the back of the refrigerator inside is on top of the icemaker. It fits into a slot in the top of the icemaker - failing to do this will result in water pouring into the freezer compartment, not into the icemaker..
Reconnect the power cable to the new icemaker and tuck it up behind the icemaker assembly. Tighten the machine screws completely, but do not over-tighten.
Reconnect the water line on the back of the refrigerator at the wall, and plug in the refrigerator. You should hear the unit fill immediately.
In about an hour you should have ice filling the bin. Enjoy!
On top of the icemaker, two machine screws hold the icemaker to the side of the refrigerator. You will have to feel around to find the machine screws, but once you do, it is simple to slip the appropriate size socket over the hex heads. I found it helpful to have an extension on the socket wrench. Disconnect the power cable inside the refrigerator (there are little pressure clips on the side that help release the cable) and move it out of the way for the time-being.
Back out both machine screws several turns, but do not remove them completely. The icemaker slips over the screws, so leaving them in the side of the refrigerator makes that process a lot easier. Hand tighten the machine screws once you have positioned the new icemaker in place. One thing to be sure and do is make sure the water line hose coming out of the back of the refrigerator inside is on top of the icemaker. It fits into a slot in the top of the icemaker - failing to do this will result in water pouring into the freezer compartment, not into the icemaker..
Reconnect the power cable to the new icemaker and tuck it up behind the icemaker assembly. Tighten the machine screws completely, but do not over-tighten.
Reconnect the water line on the back of the refrigerator at the wall, and plug in the refrigerator. You should hear the unit fill immediately.
In about an hour you should have ice filling the bin. Enjoy!
Parts Used:
-
Richard Allen from PHOENIX, AZ
-
Difficulty Level:Really Easy
-
Total Repair Time:30 - 60 mins
-
Tools:Socket set
10 of 10 people
found this instruction helpful.
Was this instruction helpful to you?
Thank you for voting!
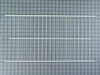
No shelf in Freezer compartment though obvious slots provided.
Used model # of frigidaire on your web site... reviewed parts available... noticed shelves abailable... zoomed in to measure using crosshatch background... measured my freezer compartment... seemed doable... ordered shelf... receivednext day... attempted to slip in slots... had to grind off 3/16th inch on two legs... slipped in... Perfect!
Parts Used:
-
Joe from Dallas, TX
-
Difficulty Level:Easy
-
Total Repair Time:15 - 30 mins
10 of 11 people
found this instruction helpful.
Was this instruction helpful to you?
Thank you for voting!
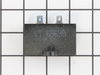
Coming from the refrigerator, there was an intermittent "clicking noise", occurring about every 30 seconds. The frig. eventually failed .
I removed the back cover and removed the clip holding the compressor- run capacitor and start relay. I replaced these 2 components and clean the dust from the frig., and from the bottom of the floor. I replaced the back cover ; Loss about $300 worth of meat when when the frig. failed. Then I thought that, during these turbulent times, there are many which don't have a refrigerator or any meat to place in it, The refrigerator is "running" normal again.
Parts Used:
-
winifred from LOUISVILLE, KY
-
Difficulty Level:Easy
-
Total Repair Time:30 - 60 mins
-
Tools:Nutdriver, Pliers
11 of 16 people
found this instruction helpful.
Was this instruction helpful to you?
Thank you for voting!
Crisper Pan
Just removed the broken pan and installed the new one within 2 minutes. Really simple
Parts Used:
-
Deepankar from Novi, MI
-
Difficulty Level:Really Easy
-
Total Repair Time:Less than 15 mins
13 of 22 people
found this instruction helpful.
Was this instruction helpful to you?
Thank you for voting!