




















25370603413 Kenmore Refrigerator - Instructions
Keep searches simple. Use keywords, e.g. "leaking", "pump", "broken" or "fit".
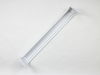
Bin had broken.
Replacement was a snap! Literally! OK there were two snaps. One on each side.
Parts Used:
-
Ralph from Shelby Twp, MI
-
Difficulty Level:Really Easy
-
Total Repair Time:Less than 15 mins
3 of 3 people
found this instruction helpful.
Was this instruction helpful to you?
Thank you for voting!
Shelf Held Together with Rubber Bands
Old shelf was removed and the new shelf clicked right into place, an exact match, perfect fit.
Parts Used:
-
Leon from Upper Marlboro, MD
-
Difficulty Level:Really Easy
-
Total Repair Time:Less than 15 mins
3 of 3 people
found this instruction helpful.
Was this instruction helpful to you?
Thank you for voting!
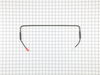
Fridge was cooling down enough the heating defrost was bad
I take 2 crew on front of the fridge take the cover and fan out replaced the part and put everything back it’s a easy job thanks guys for the parts from Orlando fl
Parts Used:
-
José from ORLANDO, FL
-
Difficulty Level:Really Easy
-
Total Repair Time:15 - 30 mins
-
Tools:Pliers, Screw drivers
3 of 3 people
found this instruction helpful.
Was this instruction helpful to you?
Thank you for voting!
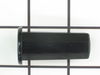
Refrigerator door was not sealing correctly.
Remove screws from lower hinge and carefully remove the door. In my case it was the lower bearing, flip door upside down being careful to remove anything which might fall off first. I removed the door stop and then pulled the broken bearing out with pliers. Then I pushed the new one in and reassembled it.
Parts Used:
-
Edward from Andover, CT
-
Difficulty Level:Easy
-
Total Repair Time:15 - 30 mins
-
Tools:Nutdriver, Pliers
3 of 3 people
found this instruction helpful.
Was this instruction helpful to you?
Thank you for voting!
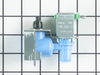
The fan had stopped spinning. According to the internet it should spin freely if I use my hand, but it wouldn't.
After pulling the fridge away from the wall and opening the paper backing on the bottom, I could see the motor. It's affixed to 3 metal ribs by 3 small screw/nuts. There is also a 12" wiring harness that led to a simple disconnect. Removing the disconnect and the 3 nuts was easy. However, there was no room to remove the motor with the fan attached. Between frame parts, the drip pan below, the ribs, and small, delicate copper tubing that can't get bent, it wouldn't fit thru any openings. So we rotated the motor inside the framework until the blade faced out, then reached in with a pair of needle nose pliers to remove the washer. Removing the washer is easy, it's just difficult to reach. With the washer off the fan was out of the way and very carefully (it was tight) the motor came out. Reverse was the same issue. Motor tight going in, not a lot of room to maneuver fan onto motor, and needed needle nose to tighten washer again. Make sure you tighten the washer before you install the motor on the prongs. Otherwise you need to remove it from the ribs, twist it to face you, then reinstall it on the prongs. Also, I felt I was stripping the nuts into the new motor. Turns out the holes in the motor aren't tapped. i realized the nuts are self tapping once I looked at them. I'm a big time DIYer and this wasn't bad at all. If your motor/fan assembly comes out whole, it's even easier.
Parts Used:
-
Patrick from RICHWOOD, TX
-
Difficulty Level:A Bit Difficult
-
Total Repair Time:15 - 30 mins
-
Tools:Nutdriver, Pliers
3 of 3 people
found this instruction helpful.
Was this instruction helpful to you?
Thank you for voting!
Ice maker stopped making ice.
The repair was fast and easy .I removed the ice tray , disconnected the wiring connector and lossend two screws. I removed ice maker assy.and repeated in reverse order to install. I also installed a new water filter. I had ice in about 20 minutes.
Parts Used:
-
Thomas from WESTAMPTON, NJ
-
Difficulty Level:Really Easy
-
Total Repair Time:30 - 60 mins
-
Tools:Nutdriver
4 of 6 people
found this instruction helpful.
Was this instruction helpful to you?
Thank you for voting!
Broken tab on shelf
-
Wiliam from BINGHAMTON, NY
-
Difficulty Level:Very Easy
-
Total Repair Time:Less than 15 mins
3 of 3 people
found this instruction helpful.
Was this instruction helpful to you?
Thank you for voting!
Drive great stripped for ice eject. Heater bad
Loosened the 2 bolts 4 turns where it mounts inside the freezer. Lift maker off the bolts unplug 1 plug. Reverse to install.
Parts Used:
-
Danny from PUEBLO, CO
-
Difficulty Level:Really Easy
-
Total Repair Time:Less than 15 mins
-
Tools:Nutdriver
4 of 6 people
found this instruction helpful.
Was this instruction helpful to you?
Thank you for voting!
Shelf was broken
Slid the old shelf out. Attached meat drawer to new shelf and slid it in.
Parts Used:
-
RALPH from PARIS, KY
-
Difficulty Level:Very Easy
-
Total Repair Time:Less than 15 mins
3 of 3 people
found this instruction helpful.
Was this instruction helpful to you?
Thank you for voting!
Accidentally broke the glass insert.

-
DAVID from SAN FRANCISCO, CA
-
Difficulty Level:Very Easy
-
Total Repair Time:Less than 15 mins
3 of 3 people
found this instruction helpful.
Was this instruction helpful to you?
Thank you for voting!
broken glass on top of crispers
Since the glass was broken and gone I just had to slide the new glass on top of the crispers. This was not really a repair, just an exchange of new for the old.
Parts Used:
-
Teresa from SOUTHFIELD, MI
-
Difficulty Level:Very Easy
-
Total Repair Time:Less than 15 mins
3 of 3 people
found this instruction helpful.
Was this instruction helpful to you?
Thank you for voting!
The refrigerator door did not come for the opening swing to be reversed
I ordered four bearing hinges and drill holes for the hinges on top and bottom of frezer and fridge doors insert the bearing hinges on the holes and all the other part on the door were able to reversed.
Parts Used:
-
Benjamin from Jersey City, NJ
-
Difficulty Level:Easy
-
Total Repair Time:1- 2 hours
-
Tools:Nutdriver, Screw drivers, Socket set
10 of 24 people
found this instruction helpful.
Was this instruction helpful to you?
Thank you for voting!
Ice maker stopped working. Part needed to repair it no longer available so had to replace the whole icemaker.
Loosened the two mounting screws (no need to remove them), lift off the icemaker and unplug it. Reverse the order and done.
Parts Used:
-
Edward from GROTON, CT
-
Difficulty Level:Very Easy
-
Total Repair Time:Less than 15 mins
-
Tools:Nutdriver
4 of 7 people
found this instruction helpful.
Was this instruction helpful to you?
Thank you for voting!
Just replaced the old broken one
-
Kimberly from POTTSTOWN, PA
-
Difficulty Level:Very Easy
-
Total Repair Time:Less than 15 mins
3 of 4 people
found this instruction helpful.
Was this instruction helpful to you?
Thank you for voting!
Ice maker would dump ice one time and then stop. Turning the ice maker off for a minute and back on would repeat the process.
I removed the two side mount screws with a screwdriver and disconnected the electrical plug to the ice maker to remove it. I reversed the process to install the new one.
It was the thermostat that was the problem, but I chose to replace the entire ice maker for only $25 more.
It was the thermostat that was the problem, but I chose to replace the entire ice maker for only $25 more.
Parts Used:
-
James from KNOXVILLE, TN
-
Difficulty Level:Very Easy
-
Total Repair Time:Less than 15 mins
-
Tools:Screw drivers
3 of 4 people
found this instruction helpful.
Was this instruction helpful to you?
Thank you for voting!