




















25331874102 Kenmore Refrigerator - Instructions
Keep searches simple. Use keywords, e.g. "leaking", "pump", "broken" or "fit".
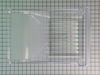
very nioce rental unit, people slammed door w/Crisprers open
No big deal. Placed the order, got the replacement. Put them in and that was that! The great thing is, I have a perfect refrigerator for new renters. It would have been a lost rent without these easy to get parts. Thank you.
Parts Used:
-
Robert from Edenton, NC
-
Difficulty Level:Really Easy
-
Total Repair Time:Less than 15 mins
7 of 11 people
found this instruction helpful.
Was this instruction helpful to you?
Thank you for voting!
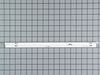
Job was really easy. Took less than 10 minutes
I easily removed the shelf, cleaned it, removed one screw, adjusted a tab that was bent, then installed new side rail with the screw that was removed and put back the shelf and storage bin. Everything worked perfectly. I must have saved $100 by doing it myself.
Parts Used:
-
Neil from Sayreville, NJ
-
Difficulty Level:Really Easy
-
Total Repair Time:Less than 15 mins
-
Tools:Screw drivers
5 of 5 people
found this instruction helpful.
Was this instruction helpful to you?
Thank you for voting!
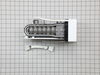
I replaced the icemaker
I removed the two screws and unplugged it. I then attached the pigtail to the appliance, then to the fridge. I had to push the excess wire harness into the hole in the back. It took a few minutes to move the rest of the harness out of the way by curving it upward and securing it with a nylon tie.I ordered the ice maker from Part Select on Sunday night and it arrived at 8:32 Tuesday morning, THANK YOU! I ordered very simple weed cutter parts from Sears a week ago and they haven't even shipped yet!
Parts Used:
-
Michele from Smithfield, UT
-
Difficulty Level:Easy
-
Total Repair Time:15 - 30 mins
-
Tools:Nutdriver
5 of 5 people
found this instruction helpful.
Was this instruction helpful to you?
Thank you for voting!
Broken drawer (original)
The repair was a simple replacement. The problem was that after waiting three weeks for the new drawer to arrive I had to call the company and ask what the delay was?? They said the first order was lost in the mail?? Second order arrived within a week. But we didn't enjoy having to wait this long.
Parts Used:
-
Jim from EUREKA, CA
-
Difficulty Level:Really Easy
-
Total Repair Time:Less than 15 mins
5 of 5 people
found this instruction helpful.
Was this instruction helpful to you?
Thank you for voting!
Ice maker stopped working (Very oxidized residue)
I removed the old ice maker and unplugged the cable. Screwed in the new one with a 1/4 nut driver at the 2 mounting screws, plugged cable in. Checked ice maker with a small level before final. All Ok and after night I had Ice and it has been working great since.
Parts Used:
-
Robert from Woodstock, IL
-
Difficulty Level:Really Easy
-
Total Repair Time:Less than 15 mins
-
Tools:Nutdriver
8 of 14 people
found this instruction helpful.
Was this instruction helpful to you?
Thank you for voting!
Fridge made a hellacious noise and wasn't cooling well
From discussions with friends, I determined the problem might be easy to fix. The fridge made a lot of noise, but the compressor DID come on, and inside the freezer was cold, but the main fridge was warming.
After unplugging the fridge, I removed the fan assembly in the freezer (there were about 4 nuts and a couple of plugs to uncouple.
I could see right away the fan blades has broken off, but the motor looked good. The new new fan pushed easily onto the shift and fit perfectly in the housing.
I reinstalled the fan assembly, plugged in the fridge, and right away heard the new fan come on - very quietly. What was a roar became a whisper and the fridge was down to 38 degrees with a few hours.
After unplugging the fridge, I removed the fan assembly in the freezer (there were about 4 nuts and a couple of plugs to uncouple.
I could see right away the fan blades has broken off, but the motor looked good. The new new fan pushed easily onto the shift and fit perfectly in the housing.
I reinstalled the fan assembly, plugged in the fridge, and right away heard the new fan come on - very quietly. What was a roar became a whisper and the fridge was down to 38 degrees with a few hours.
Parts Used:

-
Bruce from MARTINEZ, CA
-
Difficulty Level:Really Easy
-
Total Repair Time:Less than 15 mins
-
Tools:Nutdriver
5 of 5 people
found this instruction helpful.
Was this instruction helpful to you?
Thank you for voting!
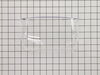
Refrigerator door missing parts
I ordered two of the long refrigerator shelf door bars and cut one of them to fit the freezer shelf door because that ready-made door bar was very expensive. The fit after cutting and notching to receive the end caps went very well.
Parts Used:

-
Catherine from Bismarck, ND
-
Difficulty Level:A Bit Difficult
-
Total Repair Time:30 - 60 mins
5 of 6 people
found this instruction helpful.
Was this instruction helpful to you?
Thank you for voting!
Icemaker stopped making ice and i knew it wasnt the mechanism since I could hear that working when I unplugged and plugged the unit back on.
I found a couple of videos online of a similar product fix to get a lay of the land. When I got the part, I unplugged the unit and turned off the water. It was easy to take off the back panel and remove the old water intake valve to swap it out for the new one. Once I attached everything again I could see that the valve was taking up water but it didnt seem to be going all the way to the icemaker. I gave it some time and by the next day, there was fresh ice!
Parts Used:
-
Jennifer from BUFFALO, NY
-
Difficulty Level:Really Easy
-
Total Repair Time:15 - 30 mins
-
Tools:Screw drivers
5 of 6 people
found this instruction helpful.
Was this instruction helpful to you?
Thank you for voting!
Left side rail support snapped off the lunchmeat drawer
Used a small screwdriver to disconnect the left side rail from and replaced with the new left side rail. Everything went smooth and from start to finish, replaced the piece in about 3 minutes. Works great now!
Parts Used:
-
Mary Lou from Scranton, PA
-
Difficulty Level:Really Easy
-
Total Repair Time:Less than 15 mins
-
Tools:Screw drivers
5 of 6 people
found this instruction helpful.
Was this instruction helpful to you?
Thank you for voting!
Too much weight in lunch meat drawer
Emptied the shelf. Took out the shelf. Screwed in the one screw for the support rail. Put shelf back in. Put drawer back in. Works like a charm.
Parts Used:
-
Tony from Toledo, OH
-
Difficulty Level:Really Easy
-
Total Repair Time:Less than 15 mins
-
Tools:Screw drivers
4 of 4 people
found this instruction helpful.
Was this instruction helpful to you?
Thank you for voting!
Left Support Rail broke
Most of my time was spent removing food items from the shelf that supported the rails. Once that was done, a quick removal of the screw, replace the left support rail and re-installing the screw. Done. I wish all of my repairs were so easy!
Parts Used:
-
Frank from Chicago, IL
-
Difficulty Level:Really Easy
-
Total Repair Time:Less than 15 mins
-
Tools:Screw drivers
4 of 4 people
found this instruction helpful.
Was this instruction helpful to you?
Thank you for voting!
Broken Crisper Glass
Very easy. Watched a video on your site prior to getting the glass replacement. Removed the crisper drawers. Placed the glass in the front and placed it down. Took just a few minutes. Love your site and will come back again when needed. Thank-you.
Parts Used:

-
Wendy from OCALA, FL
-
Difficulty Level:Very Easy
-
Total Repair Time:Less than 15 mins
4 of 4 people
found this instruction helpful.
Was this instruction helpful to you?
Thank you for voting!
Accidently dropped the crisper drawer and it broke on the left front corner.
We received the crisper drawer in magnificent time and unpacked it and washed it and dryed it, and just slid it into the refrigerator. Thank you for your very prompt service.!!!!!!!
Parts Used:
-
Carol from ROCKVILLE, IN
-
Difficulty Level:Very Easy
-
Total Repair Time:Less than 15 mins
5 of 7 people
found this instruction helpful.
Was this instruction helpful to you?
Thank you for voting!
Warter valvr cracked
It was real easy but I still have problem making ice cubs
Fell problem is in the ice maker went it dose make cubs they don,t dump
Fell problem is in the ice maker went it dose make cubs they don,t dump
Parts Used:
-
Louis from Damascus, PA
-
Difficulty Level:Really Easy
-
Total Repair Time:15 - 30 mins
-
Tools:Nutdriver
7 of 13 people
found this instruction helpful.
Was this instruction helpful to you?
Thank you for voting!
I had a broken fan blade due to ice build up from a leaking ice maker.
1. I took out one screw on the ice maker and loosened the other two screws and unplugged and removed the ice maker.
2. Next I took out 2 screws from the bottom of the auger drive box and unplugged the wiring harness and removed the box. The wiring harness was a little tricky. The lock on the plug pushes in to unlock even though it looks like it pulls out,.
3.next you must remove 2 screws from the left side bracket that holds the auger box and remove the bracket.
4.Now take out 8 screws that hold the back panel in place and remove the back panel.
5. now your looking at the evaporator fan blade and motor. The simple way to replace the fan blade is to unplug the motor and remove it from the freezer. It just sits in with nothing holding it. The fan requires a little pressure but should pull right off. Install new fan blade and put everything back in the same order it was removed.
2. Next I took out 2 screws from the bottom of the auger drive box and unplugged the wiring harness and removed the box. The wiring harness was a little tricky. The lock on the plug pushes in to unlock even though it looks like it pulls out,.
3.next you must remove 2 screws from the left side bracket that holds the auger box and remove the bracket.
4.Now take out 8 screws that hold the back panel in place and remove the back panel.
5. now your looking at the evaporator fan blade and motor. The simple way to replace the fan blade is to unplug the motor and remove it from the freezer. It just sits in with nothing holding it. The fan requires a little pressure but should pull right off. Install new fan blade and put everything back in the same order it was removed.
Parts Used:
-
gary from ARANSAS PASS, TX
-
Difficulty Level:Easy
-
Total Repair Time:30 - 60 mins
-
Tools:Nutdriver
5 of 7 people
found this instruction helpful.
Was this instruction helpful to you?
Thank you for voting!