




















25331874102 Kenmore Refrigerator - Instructions
Keep searches simple. Use keywords, e.g. "leaking", "pump", "broken" or "fit".
Oven light bulb went dark; it needed replacing

-
Lise from CEDAR GROVE, NJ
-
Difficulty Level:Very Easy
-
Total Repair Time:Less than 15 mins
10 of 17 people
found this instruction helpful.
Was this instruction helpful to you?
Thank you for voting!
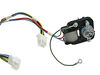
Lightning struct the house and fried the evap thermostat
Noticed the evap fan wasn't working, so trying to disconnect the wire broke the connection so had to order a new motor. Installed the motor but it still didn't work. Had a technician look at it and he said it was the control board. Ordered and installed control board and still didn't work. The only element left is the evap thermostat. Jumped the thermostat and it worked so ordered and installed a thermostat. It works now
Parts Used:
-
charles from parker, CO
-
Difficulty Level:A Bit Difficult
-
Total Repair Time:More than 2 hours
-
Tools:Nutdriver, Screw drivers, Socket set
8 of 11 people
found this instruction helpful.
Was this instruction helpful to you?
Thank you for voting!
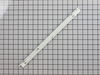
the drawer support rail broke
it was very simple, my husband did it. had to take the top shelf out and screw in the support rail and that was it. couldn't have been any easier. this was the easiest process from start to finish that we ever had. looked up on line, found your website, ordered the part and it arrived in a couple of days. So easy and your company was most efficient in having the part and in processing. Couldn't have been mored pleased.
Parts Used:
-
Tara from Winsted, CT
-
Difficulty Level:Really Easy
-
Total Repair Time:Less than 15 mins
-
Tools:Screw drivers
7 of 8 people
found this instruction helpful.
Was this instruction helpful to you?
Thank you for voting!
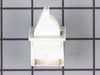
Switch would not allow door to close.
Removed screws holding unit and removed unit. Removed switch from connectors in unit. Replaced unit without switch. On day switch arrived (delivery was prompt) my wife replaced switch by attaching the two connectors and slipping into unit without having to remove entire unit. How easy was that!!!
Parts Used:
-
Charles from Front Royal, VA
-
Difficulty Level:Really Easy
-
Total Repair Time:Less than 15 mins
-
Tools:Nutdriver, Screw drivers
7 of 8 people
found this instruction helpful.
Was this instruction helpful to you?
Thank you for voting!
Rust on freezer shelf

-
Bob from Torrance, CA
-
Difficulty Level:Really Easy
-
Total Repair Time:Less than 15 mins
8 of 11 people
found this instruction helpful.
Was this instruction helpful to you?
Thank you for voting!
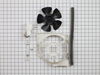
Freezer compartment warm / Ice cream soft
I worked for GM as a Frigidaire Tech, before starting my own business. I have retired now.
I took the three screws off the back of the bracket holding the motor. Disconected wire harness and pulled out the motor. Reverse to install. servantoftheking@hughes.net
I took the three screws off the back of the bracket holding the motor. Disconected wire harness and pulled out the motor. Reverse to install. servantoftheking@hughes.net
Parts Used:
-
George from McBee, SC
-
Difficulty Level:Really Easy
-
Total Repair Time:15 - 30 mins
-
Tools:Nutdriver, Socket set
9 of 15 people
found this instruction helpful.
Was this instruction helpful to you?
Thank you for voting!
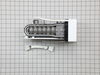
Original Ice Maker quit working.
Loosened the 2 screws a little so that it would slide up and off then unplugged the wire harness.
Installed the new one in reverse order and works like a champ.
Installed the new one in reverse order and works like a champ.
Parts Used:
-
Gary from Azle, TX
-
Difficulty Level:Really Easy
-
Total Repair Time:30 - 60 mins
-
Tools:Nutdriver
6 of 6 people
found this instruction helpful.
Was this instruction helpful to you?
Thank you for voting!
Plastic support rail broke
removed the top shelve. Unscrewed the broken support rail and replaced it with the new one.Put the shelve back and I was done
Parts Used:
-
Joanne from BOURG, LA
-
Difficulty Level:Very Easy
-
Total Repair Time:Less than 15 mins
-
Tools:Screw drivers
6 of 6 people
found this instruction helpful.
Was this instruction helpful to you?
Thank you for voting!
my old ice maker leaked at the bottom
it was really easy changing the ice maker. the only trouble i had was the wiring. it was very stiff and hard to route. it did not work at first but that was my fault did not have the connector plugged in all the way.since then it works great.
Parts Used:
-
harry from terre haute, IN
-
Difficulty Level:Really Easy
-
Total Repair Time:Less than 15 mins
-
Tools:Nutdriver
7 of 9 people
found this instruction helpful.
Was this instruction helpful to you?
Thank you for voting!
Evaporator fan motor quit and would not circulate cold air from coils.
Remove shelves and rear panels to get to motor. Motor is held in place on shroud by simple strap. Remove fan blade, then un hook strap, remove and save rubber spacers on old motor to reuse to remount new motor. New motor Mew motor has wiring harness that is universal. Cut out the three wires that go to the new motor leaving long as possible, cut wires from old motor as long as possible, strip ends of all wires 1/2 inch, connect wires by color,slip into provided wire connectors and crimp. Pull on wires to insure connection. Tie wires together so they don't touch the coils. Plug in and check operation. If all is working unplug and replace all covers and shelves. Plug back in and it will take few hours to reach operating temperature. Video of side by side repair shows easy removal of panels and motor.
Parts Used:
-
Denver from BLAIRSVILLE, GA
-
Difficulty Level:Really Easy
-
Total Repair Time:30 - 60 mins
-
Tools:Nutdriver
6 of 7 people
found this instruction helpful.
Was this instruction helpful to you?
Thank you for voting!
Refrigerator Light bulb went out
I replaced the bulb using my hands to twist the bulb in the socket located at the top of the refrigerator.
Parts Used:
-
ANGELA from MEBANE, NC
-
Difficulty Level:Very Easy
-
Total Repair Time:Less than 15 mins
7 of 10 people
found this instruction helpful.
Was this instruction helpful to you?
Thank you for voting!
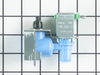
Water Valve was leaking water and not making ice
I unplugged the fridge and unscrewed the back cover,unscrewwd the two screws holding the water valve in place and the water line to the ice maker and the electrical connection and install the new water valve,then buttoned everything back up and plugged the fridge back in and it is working great,making ice as normal.
Parts Used:
-
timothy from georgetown, TN
-
Difficulty Level:Really Easy
-
Total Repair Time:15 - 30 mins
-
Tools:Pliers
13 of 28 people
found this instruction helpful.
Was this instruction helpful to you?
Thank you for voting!
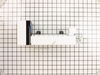
Replace ice maker which was splashing water
Turn off ice maker
Slide wire harness shield off connector
Disconnected harness
Loosened 2 wall screws
Remove old ice maker
Installed new one reversing process
Slide wire harness shield off connector
Disconnected harness
Loosened 2 wall screws
Remove old ice maker
Installed new one reversing process
Parts Used:
-
John from PHOENIX, AZ
-
Difficulty Level:Really Easy
-
Total Repair Time:15 - 30 mins
-
Tools:Screw drivers, Wrench set
5 of 5 people
found this instruction helpful.
Was this instruction helpful to you?
Thank you for voting!
gasket tearing
grab gasket on a corner and pull...new gasket push raised rib into grove....your Done!!!
Parts Used:

-
Paul from AGAWAM, MA
-
Difficulty Level:Very Easy
-
Total Repair Time:Less than 15 mins
5 of 5 people
found this instruction helpful.
Was this instruction helpful to you?
Thank you for voting!
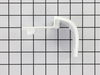
Door retainer bar end broke
The plastic ends are held to the retainer bar by small metal tabs in the retainer bar. Pry up the tabs to remove the broken part. Insert the new part and crimp the tabs back down with a pliers. Couldn't be easier.
Parts Used:
-
James from Austin, TX
-
Difficulty Level:Really Easy
-
Total Repair Time:Less than 15 mins
-
Tools:Pliers
5 of 5 people
found this instruction helpful.
Was this instruction helpful to you?
Thank you for voting!