




















25331874102 Kenmore Refrigerator - Instructions
Keep searches simple. Use keywords, e.g. "leaking", "pump", "broken" or "fit".
refrigerator door would not fully close
Took old gasket off and put new gasket into place. Part came in the mail in 2 days. Hardest part was finding the model number of the refrigerator.
Parts Used:

-
Elizabeth from Chicago, IL
-
Difficulty Level:Really Easy
-
Total Repair Time:15 - 30 mins
-
Tools:Screw drivers
10 of 12 people
found this instruction helpful.
Was this instruction helpful to you?
Thank you for voting!
Gaskets needed replacing
I watched u-tube and did the same thing. It was simple.
Parts Used:
-
Claire Ellyn from Inverness, FL
-
Difficulty Level:Very Easy
-
Total Repair Time:15 - 30 mins
10 of 12 people
found this instruction helpful.
Was this instruction helpful to you?
Thank you for voting!
The Gasket was not holding tight and I replaced with a new one.
-
Kebreab from NASHVILLE, TN
-
Difficulty Level:Very Easy
-
Total Repair Time:15 - 30 mins
9 of 10 people
found this instruction helpful.
Was this instruction helpful to you?
Thank you for voting!
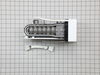
Ice maker was not making ice
I replaced the solenoid first because the ice maker was not getting water. After replacing the solenoid valve, I waited about 1/2 an hour, still no water. So, I ordered a replacement ice maker. I then installed the replacement ice maker, waited a 1/2 an hour, still no water. Then, I waited overnight. Yeah, ice! WORD OF ADVICE. WAIT OVERNIGHT TO SEE IF THE ICE MAKER CREATES ICE. Not sure how long a cycle takes, but it's longer than you would think. Hope your installation is a success!
Parts Used:
-
Jeffrey from Indianapolis, IN
-
Difficulty Level:Easy
-
Total Repair Time:Less than 15 mins
-
Tools:Nutdriver
9 of 10 people
found this instruction helpful.
Was this instruction helpful to you?
Thank you for voting!
Crisper Pan
Just removed the broken pan and installed the new one within 2 minutes. Really simple
Parts Used:
-
Deepankar from Novi, MI
-
Difficulty Level:Really Easy
-
Total Repair Time:Less than 15 mins
13 of 22 people
found this instruction helpful.
Was this instruction helpful to you?
Thank you for voting!
Broken meat drawer support
Took out the broken piece, replaced it with the new support using only a screwdriver, and VOILA, it was finished. Thanks!
Parts Used:
-
Sue from Ocala, FL
-
Difficulty Level:Really Easy
-
Total Repair Time:Less than 15 mins
-
Tools:Screw drivers
8 of 8 people
found this instruction helpful.
Was this instruction helpful to you?
Thank you for voting!
Freezer and refrigerator stopped cooling
The site offers a video for this part which worked perfectly. In addition to replacing the part, since the cardboard panel was off, we also cleaned all the dust off of the coils which someone recommended to do annually.
Parts Used:
-
Amy from PITTSBURGH, PA
-
Difficulty Level:Easy
-
Total Repair Time:Less than 15 mins
-
Tools:Screw drivers
8 of 8 people
found this instruction helpful.
Was this instruction helpful to you?
Thank you for voting!
Broken drawer support and drawer'
Drawer support held in by one screw drawer slide in no problem
Parts Used:
-
Cameron from Bronx, NY
-
Difficulty Level:Really Easy
-
Total Repair Time:Less than 15 mins
-
Tools:Screw drivers
9 of 11 people
found this instruction helpful.
Was this instruction helpful to you?
Thank you for voting!
Ice maker failed
Watched YouTube video. Very easy. Used my cell phone camera in ‘selfie’ mode propped up in the upper right hand corner of freezer to see the 2 hidden screws.
Parts Used:
-
Mary from SOUTH LYON, MI
-
Difficulty Level:Easy
-
Total Repair Time:Less than 15 mins
-
Tools:Nutdriver, Screw drivers
9 of 11 people
found this instruction helpful.
Was this instruction helpful to you?
Thank you for voting!
Replacing Icemaker
Pull refrigerator from wall and disconnect the water line and unplug the power.
On top of the icemaker, two machine screws hold the icemaker to the side of the refrigerator. You will have to feel around to find the machine screws, but once you do, it is simple to slip the appropriate size socket over the hex heads. I found it helpful to have an extension on the socket wrench. Disconnect the power cable inside the refrigerator (there are little pressure clips on the side that help release the cable) and move it out of the way for the time-being.
Back out both machine screws several turns, but do not remove them completely. The icemaker slips over the screws, so leaving them in the side of the refrigerator makes that process a lot easier. Hand tighten the machine screws once you have positioned the new icemaker in place. One thing to be sure and do is make sure the water line hose coming out of the back of the refrigerator inside is on top of the icemaker. It fits into a slot in the top of the icemaker - failing to do this will result in water pouring into the freezer compartment, not into the icemaker..
Reconnect the power cable to the new icemaker and tuck it up behind the icemaker assembly. Tighten the machine screws completely, but do not over-tighten.
Reconnect the water line on the back of the refrigerator at the wall, and plug in the refrigerator. You should hear the unit fill immediately.
In about an hour you should have ice filling the bin. Enjoy!
On top of the icemaker, two machine screws hold the icemaker to the side of the refrigerator. You will have to feel around to find the machine screws, but once you do, it is simple to slip the appropriate size socket over the hex heads. I found it helpful to have an extension on the socket wrench. Disconnect the power cable inside the refrigerator (there are little pressure clips on the side that help release the cable) and move it out of the way for the time-being.
Back out both machine screws several turns, but do not remove them completely. The icemaker slips over the screws, so leaving them in the side of the refrigerator makes that process a lot easier. Hand tighten the machine screws once you have positioned the new icemaker in place. One thing to be sure and do is make sure the water line hose coming out of the back of the refrigerator inside is on top of the icemaker. It fits into a slot in the top of the icemaker - failing to do this will result in water pouring into the freezer compartment, not into the icemaker..
Reconnect the power cable to the new icemaker and tuck it up behind the icemaker assembly. Tighten the machine screws completely, but do not over-tighten.
Reconnect the water line on the back of the refrigerator at the wall, and plug in the refrigerator. You should hear the unit fill immediately.
In about an hour you should have ice filling the bin. Enjoy!
Parts Used:
-
Richard Allen from PHOENIX, AZ
-
Difficulty Level:Really Easy
-
Total Repair Time:30 - 60 mins
-
Tools:Socket set
8 of 8 people
found this instruction helpful.
Was this instruction helpful to you?
Thank you for voting!
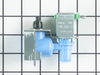
Ice maker stopped working
-
Fred from Las Vegas, NV
-
Difficulty Level:Really Easy
-
Total Repair Time:Less than 15 mins
-
Tools:Nutdriver
11 of 18 people
found this instruction helpful.
Was this instruction helpful to you?
Thank you for voting!
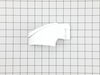
Door shelf bar broke
This was a really simple repair. The hardest part was getting the broken piece of the plastic end cap out of the metal retainer bar. I had to use a small screwdriver to gently pry it out of the two notches in the retainer bar. Then I just slipped on the new part, and snapped the whole retainer bar into the fridge door and that was it.
If the end cap doesn't lock into place when you slide it into the metal retainer bar, you may need to bend the bar (gently) to get the notches around the plastic clips. You don't need a lot of force to do this since all you want is to lock the end cap in place.
If the end cap doesn't lock into place when you slide it into the metal retainer bar, you may need to bend the bar (gently) to get the notches around the plastic clips. You don't need a lot of force to do this since all you want is to lock the end cap in place.
Parts Used:
-
George from Worcester, MA
-
Difficulty Level:Really Easy
-
Total Repair Time:Less than 15 mins
-
Tools:Screw drivers
8 of 9 people
found this instruction helpful.
Was this instruction helpful to you?
Thank you for voting!
Cracked drawer
I slid out the old drawer and slid in the new drawer. Easy as that! I would recommend this website to anyone.
Parts Used:
-
Jaime from Harrisburg, PA
-
Difficulty Level:Really Easy
-
Total Repair Time:Less than 15 mins
8 of 10 people
found this instruction helpful.
Was this instruction helpful to you?
Thank you for voting!
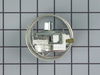
Not running
After waiting over 2wks for my part to arrive, I purchased the part locally and made the repair the same day as I am still waiting for the part to arrive from you guys. Your customer service really needs improving. I paid for 2 day shipping, what a joke. I will be returning the part as soon as I receive it thanks.
Parts Used:
-
Kenneth from SAVANNAH, GA
-
Difficulty Level:Really Easy
-
Total Repair Time:Less than 15 mins
-
Tools:Nutdriver
8 of 10 people
found this instruction helpful.
Was this instruction helpful to you?
Thank you for voting!
ice maker quit making ice
I basically followed the instructions offered when i searched for the ice maker. It was relatively easy to do, I undid the 2 screws holding the ice maker to the side of the freezer, the was the tricky part, holding a mirror so i could see the slots of the screws. loosened them, disconnected the electrical connection and reversed the process for the install. It took about 25 minutes and i was back making ice.
Parts Used:
-
Barry from Middletown, DE
-
Difficulty Level:Easy
-
Total Repair Time:15 - 30 mins
-
Tools:Screw drivers
8 of 10 people
found this instruction helpful.
Was this instruction helpful to you?
Thank you for voting!